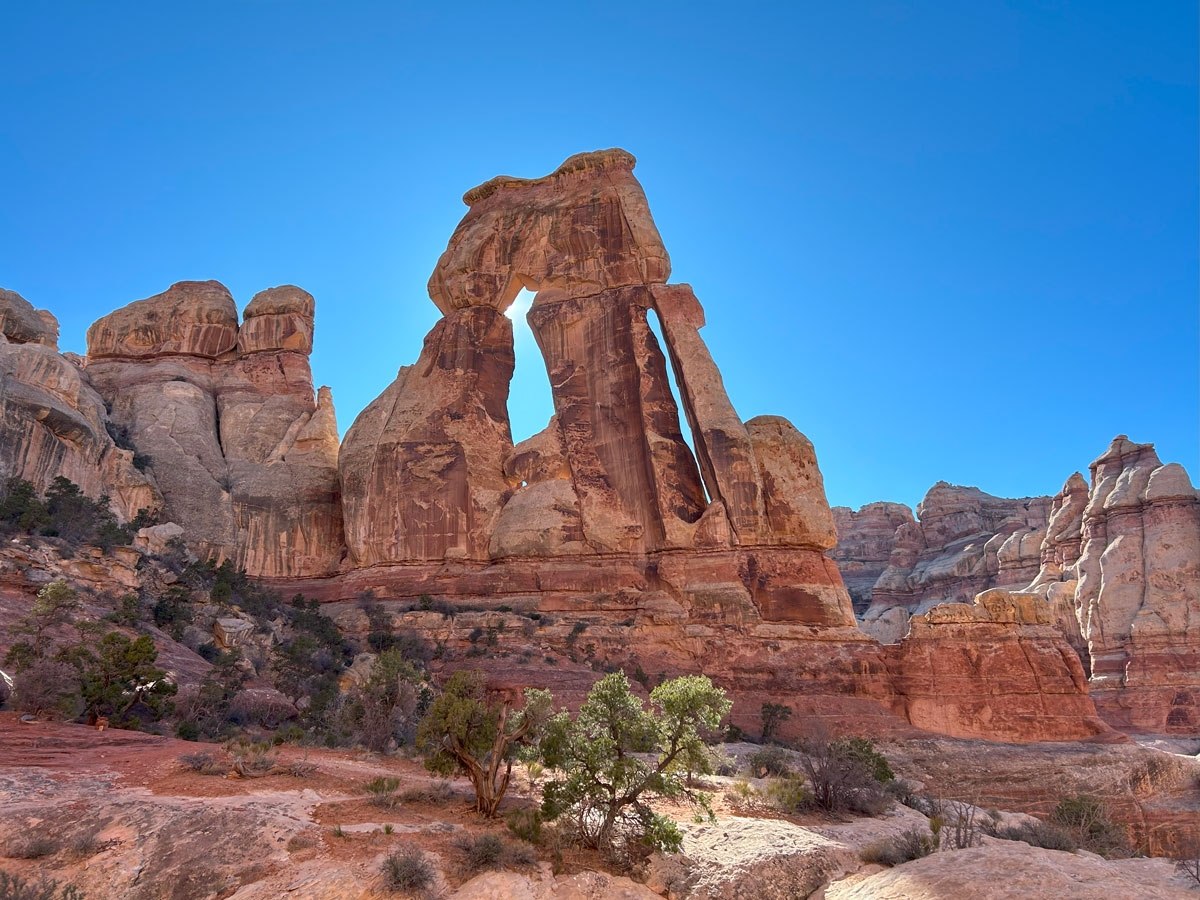
Druid Arch with Chesler Park
TRAIL STATS
If a massive arch, mindboggling rock formations, and a maze of narrow rock fissures is on your wish list, a hike to Druid Arch with a side trip into Chesler Park might be just the hike for you. Although this hike is almost 15 miles, the elevation gain is spread out, so it has the feel of a moderate hike most of the way. Viewpoints along the trail offer panoramic views of the many geologic wonders of the area.
Trail Description
Thanks to its more remote location, the Needles District of Canyonlands National Park sees less traffic than the Island in the Sky District, and that’s a good thing. We did our trip in late February, which is a less popular time of year anyway, and we saw only 3 other people the entire way, and one was a brand new park ranger. It was glorious.
If you’re not up for hiking the entire route in one day, you have options:
- Druid Arch only This option is 9.9 miles with 1371 feet of elevation gain. You’ll miss the rock formations and narrow rock fissures in Chesler Park. Only do this if you’re coming back to hike Chesler Park later.
- Chesler Park only This option is 11.1 miles with 1913 feet of elevation gain. You’ll skip hiking the sandy wash up to Druid Arch, but you’ll also miss the magnificent arch. No bueno.
- Backpack it You could obtain a permit and camp at a Chesler Park backcountry campsite. Getting these permits is extremely competitive during peak seasons, so plan ahead. See the Recreation.gov website for details.
- Shortcut Chesler Park This option is 11.4 miles and 1804 feet elevation gain. Staying on the Chesler Park Trail instead of extending the loop skips the best parts, so boo on this plan.
Druid Arch or Chesler Park?
If you only have time for one, you’re in an unenviable position. Both are so unique and worthwhile that it would be impossible for me to recommend one over the other. If your priority is seeing something really grand, go for the arch. If you’d rather play and scramble over rock formations and wander narrow corridors, Chesler Park is for you.
Highway 211
Once you leave the main highway just north of Monticello, Highway 211 takes you through Bears Ears National Monument, a wide valley with sheer cliff walls on either side of you that are a rock climber’s paradise. Along the way, you can make a quick stop at Newspaper Rock to see some outstanding petroglyphs. There are a lot of deer and cattle along this route, so stay alert for animals in the road. We saw two dead cows on the side of the road and can’t imagine that was a pleasant encounter.
Elephant Hill Trailhead
Once inside Canyonlands National Park, proceed to Elephant Hill Road and follow that all the way to the trailhead. It becomes dirt, but the road was good enough for the minivan we were in, so it’s good enough for you.
At the trailhead, you’ll find vault toilets with signs prohibiting doing your business on the floor. We know it’s there to help out the foreign visitors, but we still had a bit of a chuckle with that one.
Chesler Park Trail
On the south end of the parking lot, you’ll start up Chesler Park Trail and find it’s dishearteningly steep. Despite the initial grade, it’s hard not to get excited as you pass through one of the many narrow passageways you’ll encounter on this hike. Before you know it, the trail levels out and you’re on your way to Chesler Park.
The trail passes over a lot of solid rock areas where it’s easy to lose the trail, but there were plenty of cairns marking it when we went. Just in case, it’s smart to have GPS to help keep you on track.
There are also many other trails out there, including the one at your first junction called “Lost Hiker Trail.” We can only imagine how that one got its name. Each junction is well-marked, and as long as you know where you’re headed, you’re likely to stay on the correct trail.
Chesler Park/Druid Arch Junction
At the second junction is where you decide if you’re going to Chesler Park or Druid Arch first. We opted to stay right on Chesler Park Trail and go counter-clockwise through Chesler Park first, so I’ll describe the trail in that direction for the rest of this guide. Alternatively, go left onto Elephant Canyon Trail to continue to Druid Arch.
After leaving the junction, the trail climbs steadily for about 400 feet through a rocky pass, but the bonus is that you’ll come to a sign pointing to a viewpoint. Make a hard left u-turn and head up onto the rock to reach it. (It’s a short detour – GO!)
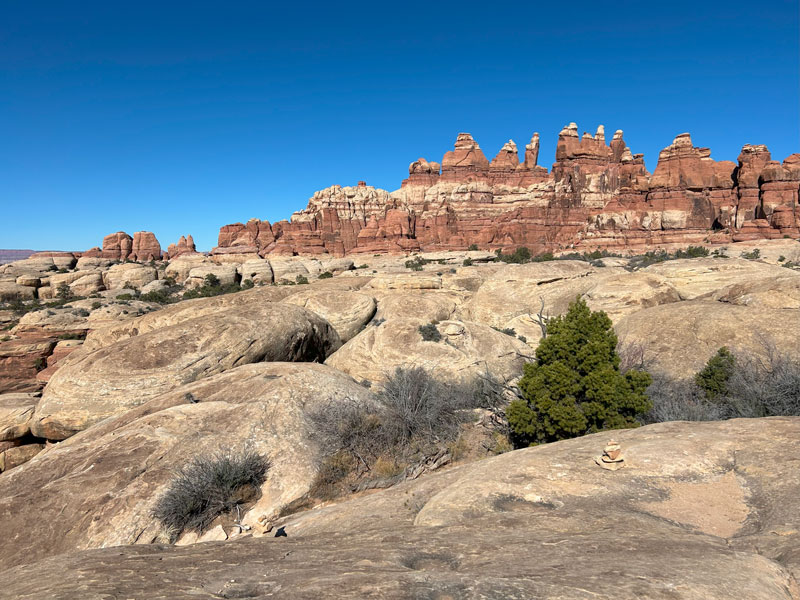
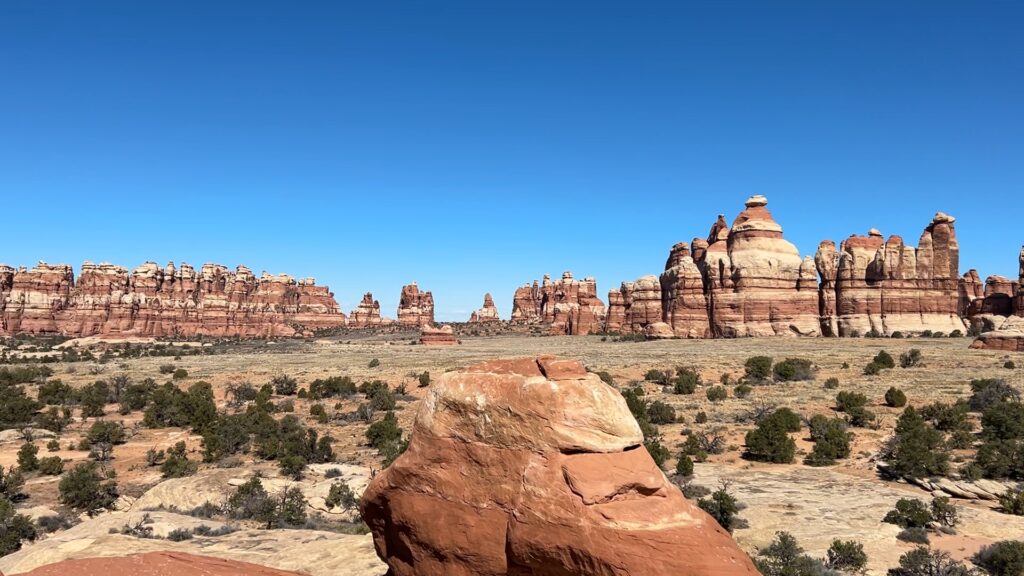
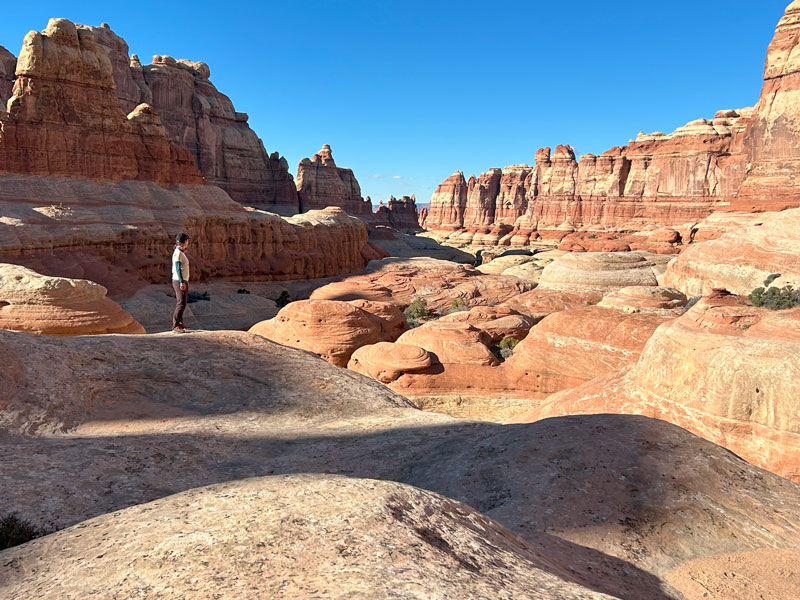
Once through this pass, the trail levels off and cruises among the many stunning rock formations in Chesler Park.
Devil’s Kitchen Trail
Next, there are two junctions with Devil’s Kitchen Trail (loop), and you’ll want to stay on Chesler Park Trail until the second junction with the southern part of the loop. Here, you’ll fork right onto the Devil’s Kitchen Trail and begin heading west. This was called Chesler Park Loop Trail on my GPS unit and Devil’s Kitchen Trail on the NPS map. How will you know you made the correct turn? GPS, of course. Unless you have mad old-school mapping skills.
Option Alternatively, you could cut the loop short and continue on Chesler Park Trail instead, but I promise you don’t want to do that. Some of the best parts of this hike are on the extended loop.
At the very next junction, fork left toward Joint Trailhead. Soon you’ll find yourself on a dirt road that leads you to Joint Trailhead. Yeah, walking on a dirt road ain’t no fun, but at least it’s short (and not very likely to actually have vehicles on it). Keep left at the fork in the road.
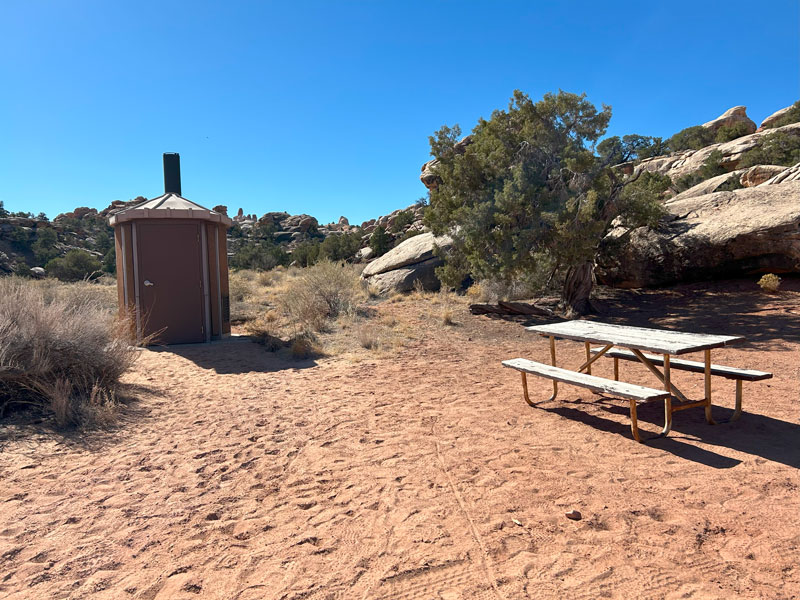
Joint Trailhead
If you gotta go, it’s a beautiful thing to find a bathroom mid-hike, and this one is exceptionally clean (and had hand sanitizer when we went!). There are also picnic tables if you’re so inclined.
Joint Trail
From here, continue on Joint Trail to one of the most spectacular areas on this hike: The Joint. Did you budget time for playing in this natural wonderland? If not, I hope you brought a headlamp because you’re about to get delayed.
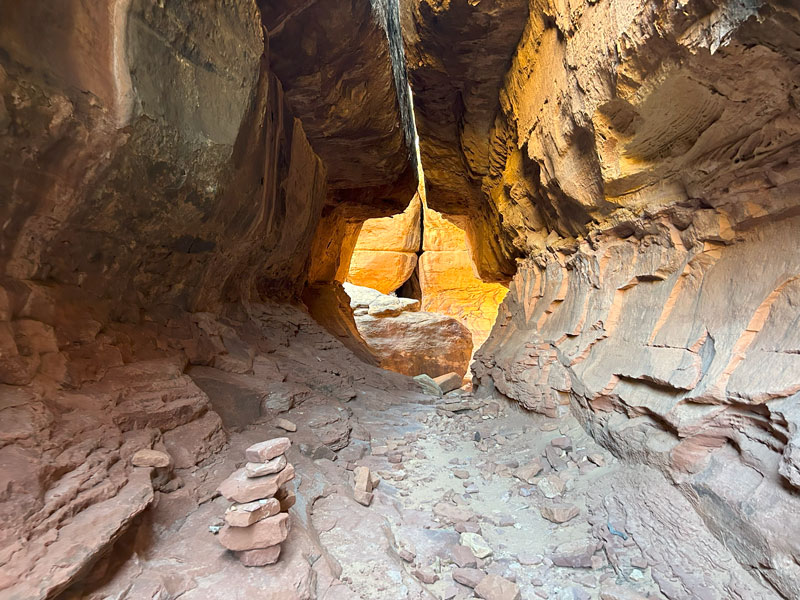
Once you go through this tunnel, it’s play time.
The Joint
The next part of the trail takes you into a labyrinth of narrow rock fissures. The route we followed didn’t track exactly with the official park map, but it was well enough marked to keep us from getting lost. The fun is in taking some of the offshoots and seeing just how narrow you’re willing to go.
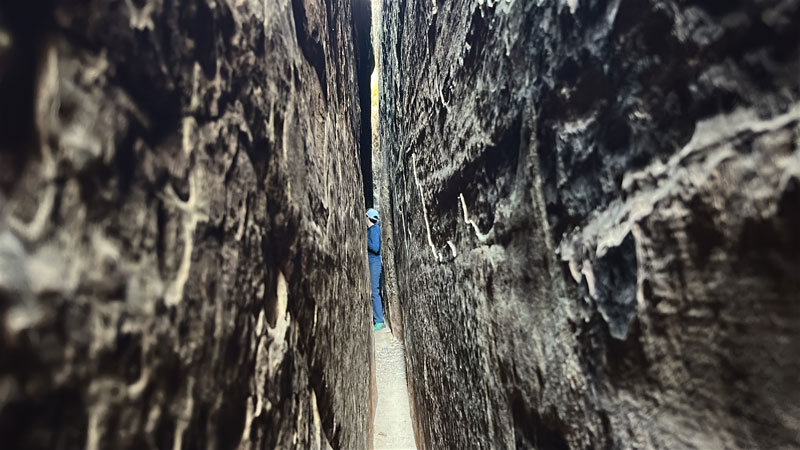
We found several offshoots that took us through a maze of fissures and eventually brought us out to the surface. It was loads of fun, but those with claustrophobia might think twice. One in our group started to panic a bit when the walls were touching her on the front and the back, but she eventually breathed through it.
Don’t worry, though, the main trail takes you through a section that is wide enough for you to walk through without touching on either side.
Chesler Park Overlook
Immediately after the trail goes back up to the surface, there’s an offshoot path that leads to Chesler Park Overlook. It’s a little hard to follow, but the main idea is to go up onto the rock ahead and left to the viewpoint.
For the next mile and a half or so, you’ll be trending down toward the junction for Druid Arch. Now it’s been a long day, your feet are tired, and you’re questioning whether you really want to add on the extra four miles to see the arch. Plus, you probably read in the reviews that it’s a “slog” and if you had to choose between Chesler Park and Druid Arch, you should choose Chesler Park. You might wondering, “Is it really worth it?”
Okay, I hurt my shin enough to cause me pain for the last five miles of the hike, but I can say unequivocally, “YES! IT’S WORTH IT!” If you have enough left in your tank, go to the arch. It’s huge, it’s majestic, and it’s particularly spectacular in the waning afternoon light.
Fork right onto Elephant Canyon Trail toward Druid Arch.
Elephant Canyon Trail
This trail generally follows a sandy wash and trends upward as it approaches the arch. Yes, the sand can be a pain, but the trail is often off to the side where the ground is more stable. Also, it’s not so steep of an upward climb that it feels like you’re climbing a sand dune. We didn’t find it that unpleasant at all.
When you get very close to the arch, you’ll see it from the side and wonder if that could be it. Yes, smartie pants, it is. Continue following the trail in an arc to the left as it goes up a bouldery ravine. This is the hardest, steepest part of the trail, but it’s also a very short section. Once at the top, veer right toward a large viewing area for the arch.
What did I tell you? It’s freakin’ magnificent.

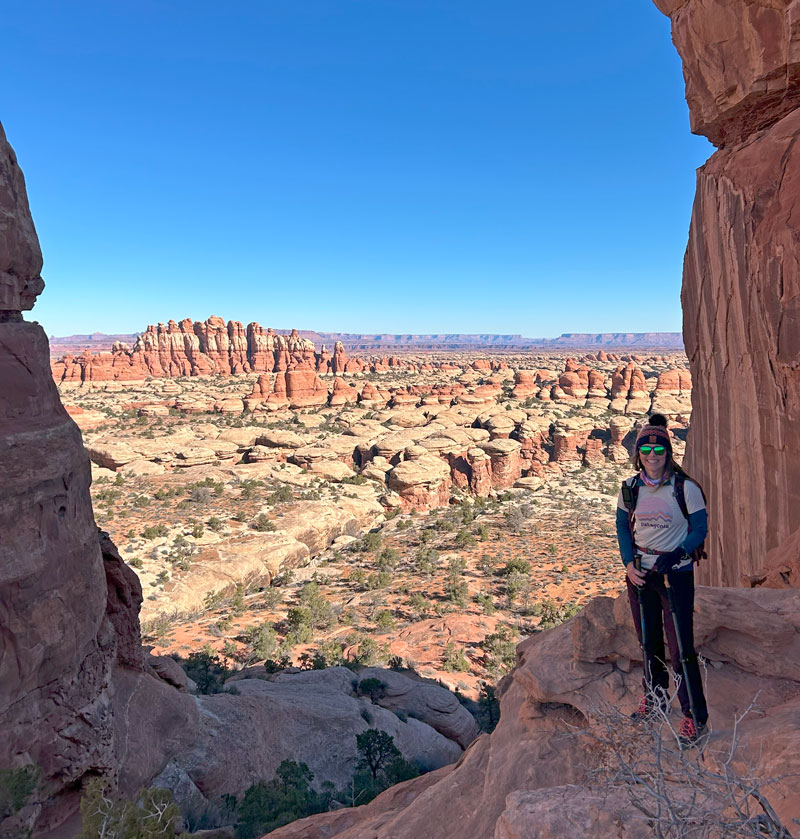
Not only that, but you’ll have a jaw-dropping view out into the canyon you just hiked up.
This viewing area is large and gives you excellent vantage points for everything worth seeing. My GPS unit showed a trail leading right up to the arch, so I decided to investigate. What followed was the most treacherous hike up loose rocks and boulders to a death-defying leap up onto a ledge directly below the arch. Only one fool in the group followed me, and all we got for our effort was a lame view up into the arch and a picture where we look like ants below it.
I do these things for you, my readers, so that you don’t have to. Spend your time gazing at the arch from the excellent viewpoint and call it good.
Some time after that point is when my shin started hurting, so I probably hurt it doing one of the stunts to get up there and didn’t feel it because of all the adrenaline flowing. That’s my theory, anyway, and it made the hike out a bit challenging.
Return Hike
For the return hike, you’ll follow Elephant Canyon Trail all the way back to the junction with Chesler Park Trail that you encountered this morning. The trail mostly follows a sandy wash, and there are times when it splits into two, only to rejoin itself later. We tried our best to stay out of the wash when there was an option, but we weren’t always successful.
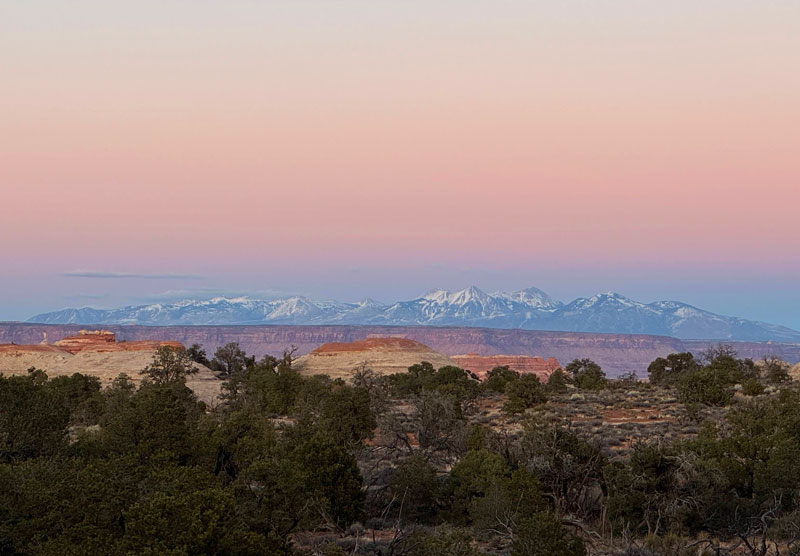
Once you fork right back onto the Chesler Park Trail, you’re retracing your steps from earlier that day. The views of the La Sal Mountains from here are breathtaking, especially if it’s right around sunset.
We ended our hike in the dark, but it was worth every minute, every mile, and even the pain from the injury. (Just don’t climb up to the arch, and you’ll be fine.)
Map & Directions
Location Canyonlands National Park, Needles District, Moab, Utah
Google Maps Elephant Hill Trailhead
Fees/Passes You need to pay an entrance fee to enter Canyonlands National Park or use your America the Beautiful pass.
Trailhead Facilities Vault toilets available
Preview this Hike
Recommendations for you
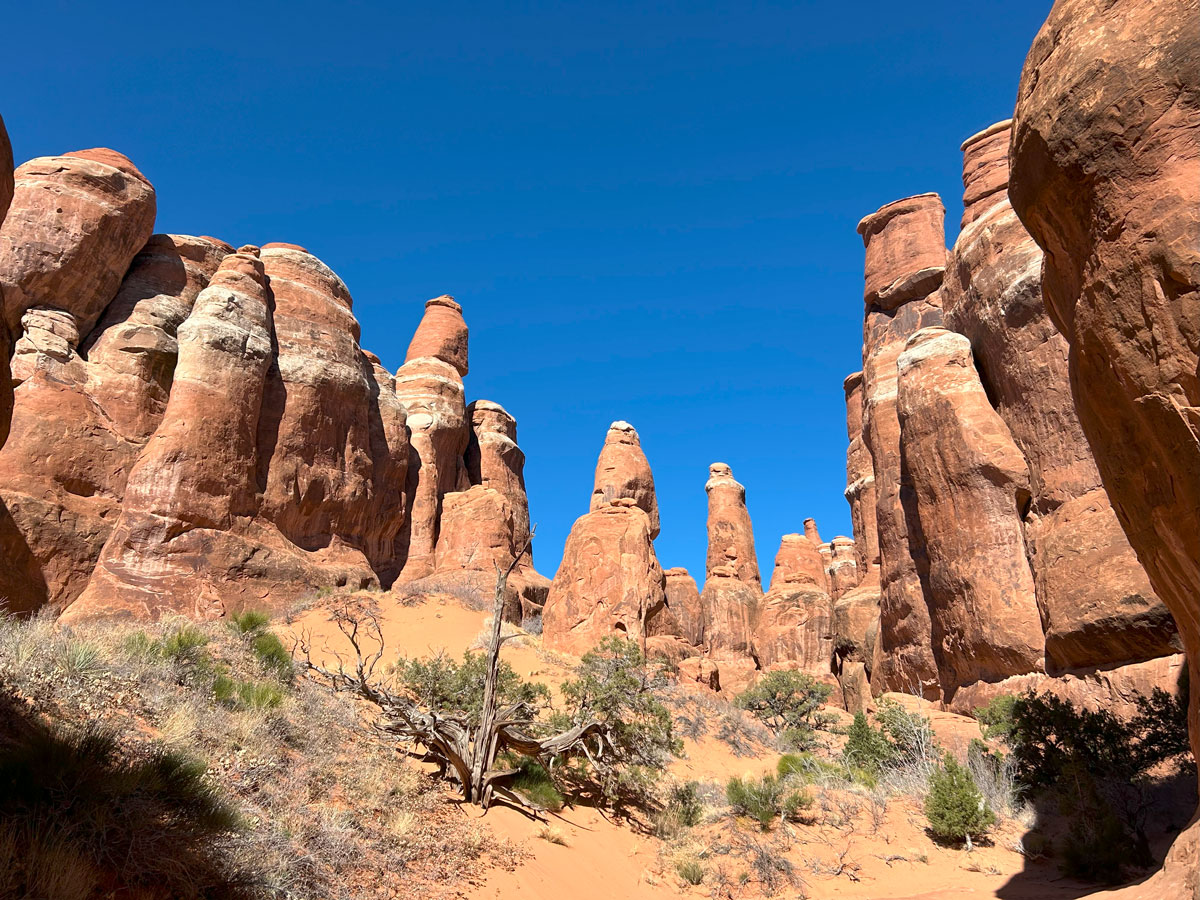
Fiery Furnace | Arches National Park
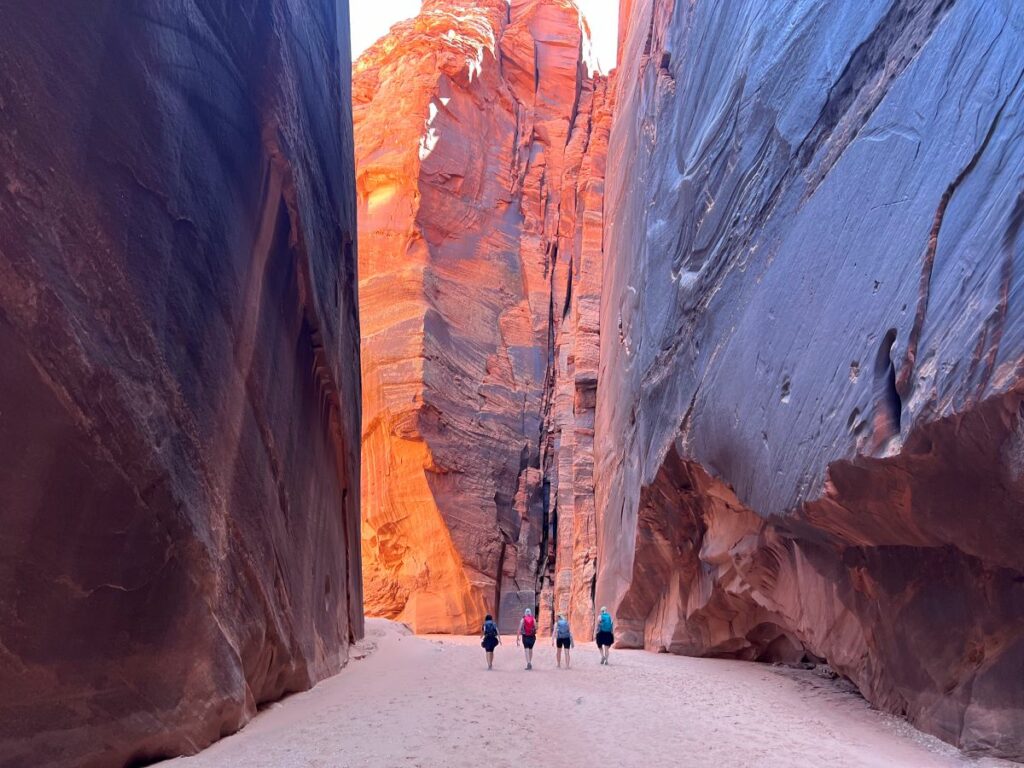
Buckskin Gulch | Vermilion Cliffs National Monument
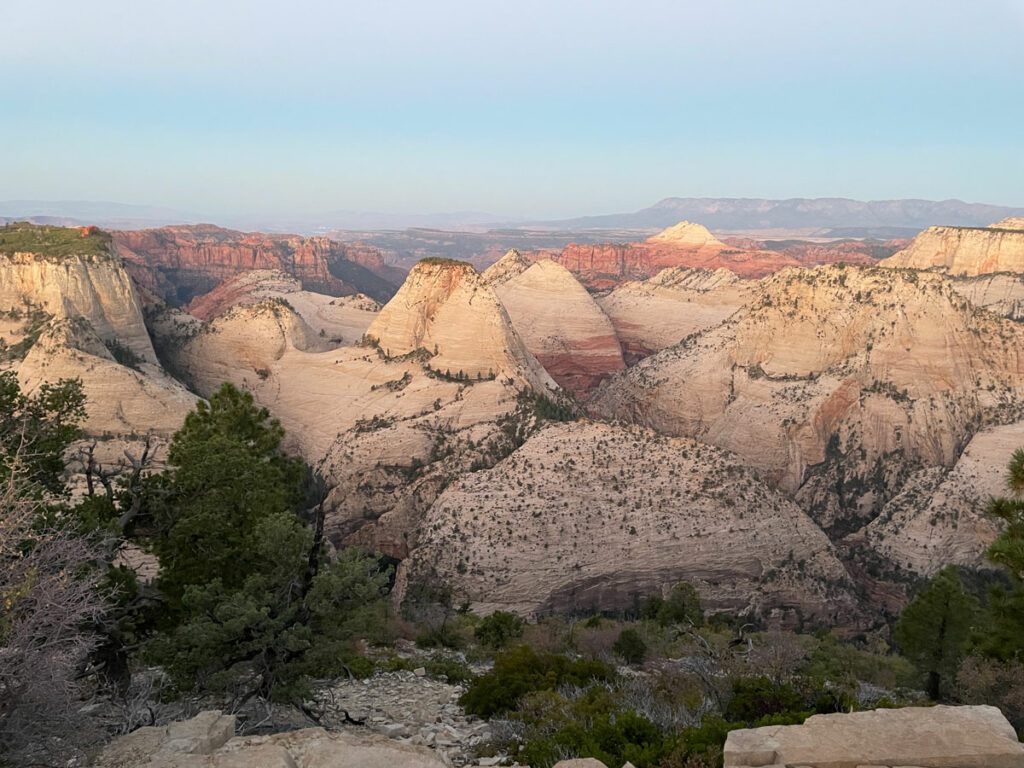
Zion Traverse – Zion National Park
Leave a Reply