
The Enchantments
TRAIL STATS
The Enchantments in Washington feature magical landscapes filled with placid alpine lakes, jagged snow-draped peaks, meadows of wildflowers, and an abundance of little cascades and waterfalls. The price of admission is a very competitive permit process (for overnight stays) and a strenuous hike to reach the core zone, but your efforts will be richly rewarded. It can also be done as a day hike using a self-issued permit at the trailhead.
Trail Description
If you’ve ever read a storybook and wished you could jump inside and visit that fantasy land, now is your chance! On a trip through Washington’s spectacular Enchantments, you’ll be able to take a refreshing dip in a glistening turquoise lake, watch a mountain goat peacefully munch on wildflowers, listen to the steady cadence of a waterfall, or just stare up at the puffy clouds in the sky. It may not be heaven, but it’s about as close as you’ll get.
This guide will cover the most popular route through The Enchantments, starting from the Stuart Lake Trailhead, over Aasgard Pass, through the Core Enchantment Zone, and down to the Snow Lakes Trailhead. Plus, it will cover side trips to the summit of Little Annapurna and Crystal Lake. Other itineraries and side trips are possible.
Due to the popularity of this special place, you will need a permit for both day and overnight hikes (more on permits, zones, and planning at the end).
Stuart Lake Trailhead
To get to the Stuart Lake Trailhead, you’ll have to drive on a dirt road that has quite a few potholes toward the end, but if you take it nice and slow, most any car should be able to make it. There is plenty of parking available, and those with overnight permits also have their very own designated spaces. If all the spaces in the lot are full, you can park along the road on the RIGHT SIDE ONLY (as you’re driving in). We saw a truck parked on the left side, and it made it very hard for all the other cars to squeeze through. Be cool, and stay right.
From here, you’ll go to the end of the parking lot to start on the Stuart Lake Trail #1599. This trail gradually ascends through a nice wooded area that runs along Mountaineer Creek.
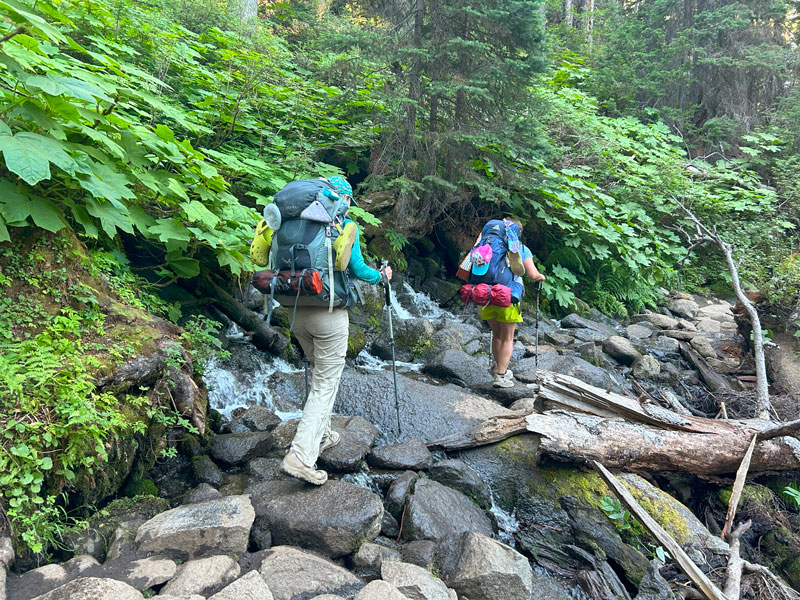
At 2.2 miles, there’s a well-signed trail junction where you’ll fork left onto Colchuck Lake Trail #1599A to continue your ascent up to Colchuck Lake.
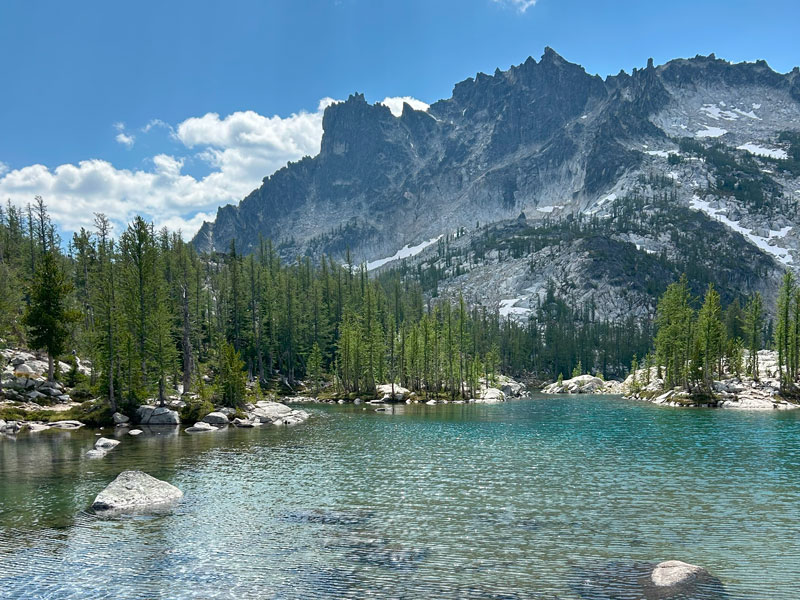
Colchuck Lake
It’s one of the most photographed areas of the Enchantments for good reason. A crystal blue lake set against a backdrop of rugged peaks and the infamous Aasgard Pass looming in the distance.
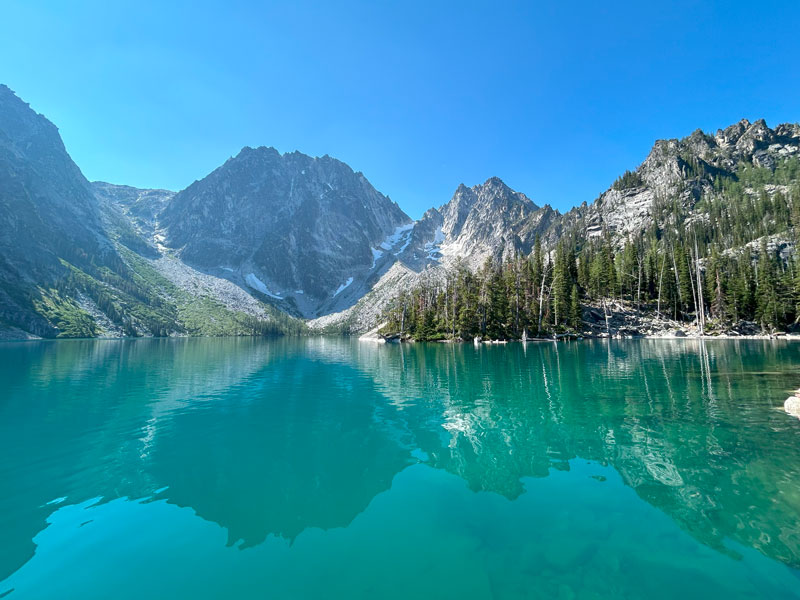
If it’s a warm day, this jewel of a lake will be beckoning you to jump in! This is a popular day hike, so you’ll probably be sharing it with others, although you might be able to find more solitude as you continue around the lake.
The water here will definitely be warmer than the lakes in the Core Enchantment Zone, so if you’re a wimp when it comes to cold water, now’s your chance. To my surprise, my friends busted out some legit inflatables. What?!
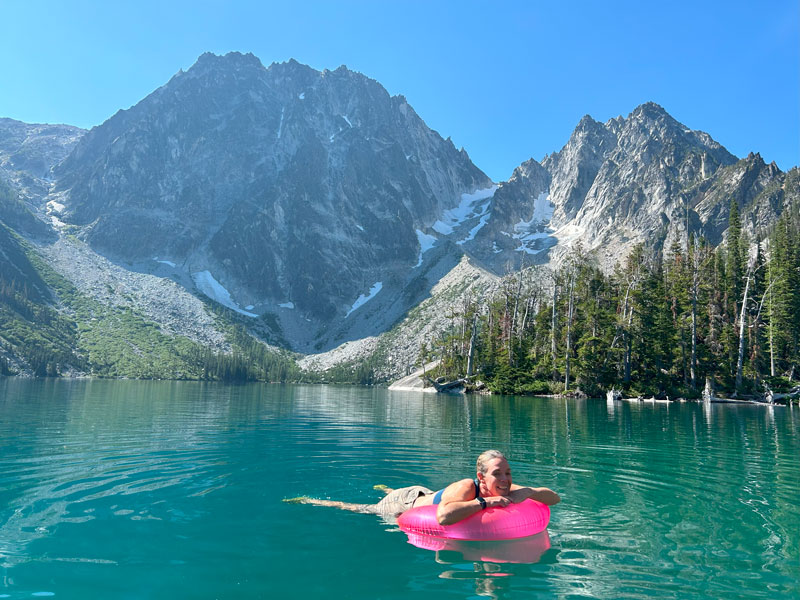
There’s no official rule, but the rules of YOLO say, “Get in the water!” Plus, you know Aasgard is coming, so kick off your shoes and stay a while.
I filtered water directly from this lake, and I can say it was clear and tasted delicious. However, if you’re a water snob like my hiking pals (okay, I’m teasing), then you can find a couple small streams flowing into the lake as you go around to Aasgard Pass.
Aasgard Pass
Here it is, the gatekeeper to the Core Enchantment Zone and maybe the most famous section of the trek: Aasgard Pass. Just the very mention can strike fear in the heart of a backpacker with a fully loaded pack.
As you make your way around Colchuck Lake, you’ll first have to cross a boulder field, and the gaps between these huge boulders can make deep chasms that swallow your loose equipment whole. I should know. As I hopped from one boulder to the next, my water bottle made a break for it and slid down into a hole at least 10 feet deep. “That’s a goner,” I heard my companion say. Knowing my only other water reservoir was a bladder (oh how I hate the taste of that), and not willing to let Aasgard score a point on me yet, I was determined to find a way down there. After some investigation, I finally found an opening about a foot wide, and I slid through to find myself in a treasure trove of lost items. Thanks for the tripod and sunglasses, y’all!
Me: 1, Aasgard: 0.
Shortly after the boulder field, it’s time to go up. And up. And up. Then up some more. No, you’re not there yet, stop asking! Over the years, hikers have blazed quite a few trails on the pass. The cairns are few, so your best bet is to loosely follow your GPS route and look for the path of least resistance. Which, in this case, still has a lot of resistance. It’s mostly quite steep with areas of loose rock where you’ll want to be careful not to start a landslide onto your friends below. And if you do, remember this very important word: “ROCK!”
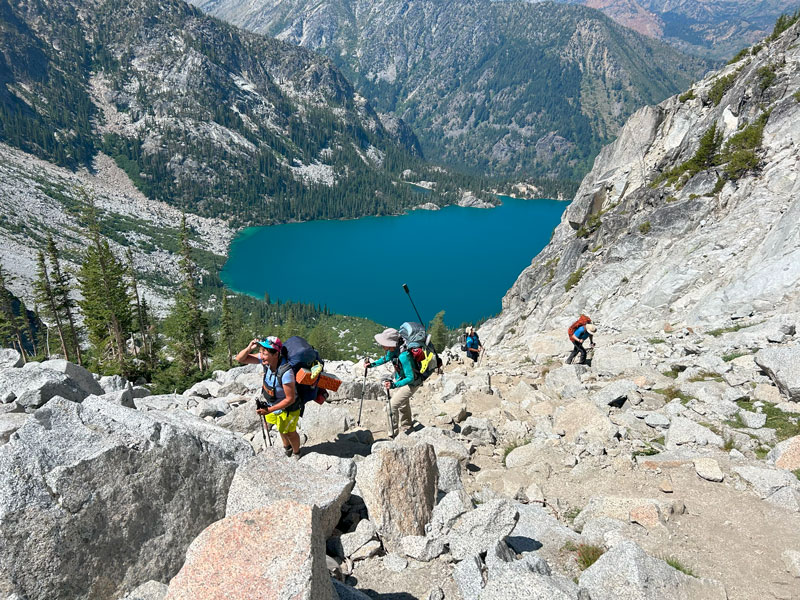
There are never really any “scary” spots, and If you’re an experienced hiker, you’ll do fine. However, this is probably not suitable for those without good physical fitness or much hiking experience. So get your booty out on the trails to prepare for this. If there’s snow on the pass, make sure you are prepared with adequate knowledge and equipment.
As you get closer to the top, you’ll traverse to the right a little bit before continuing the climb. This is the part where you think you’re pretty much done, but I’m just gonna put it out there for you right now. You’re not. Then just when you are resigned to the idea that this climb will NEVER end. . . something magical happens. The saddle!
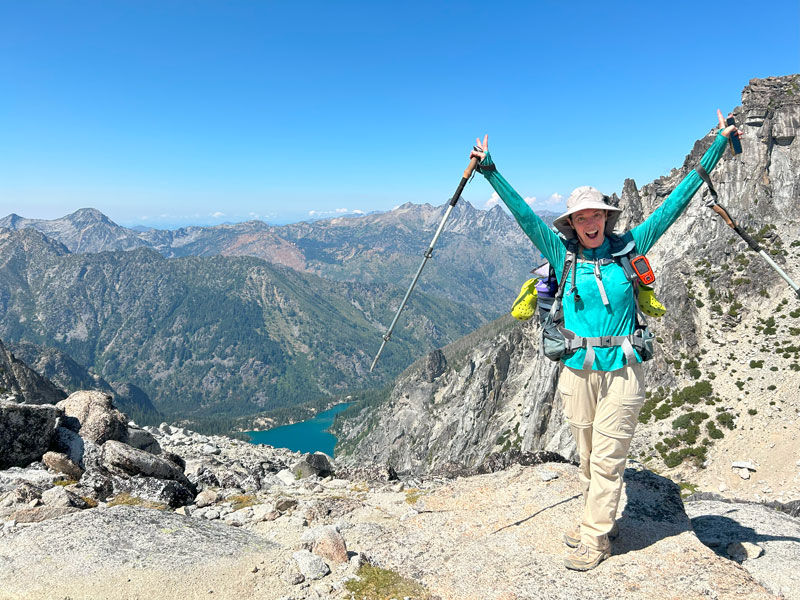
Be careful who you ask to take your photo here. You worked hard for this spot, and you’re not going to waste it on an ill-composed garbage photo with a finger on the lens. Yeah, that happened, but we had retakes.
Core Enchantment Zone
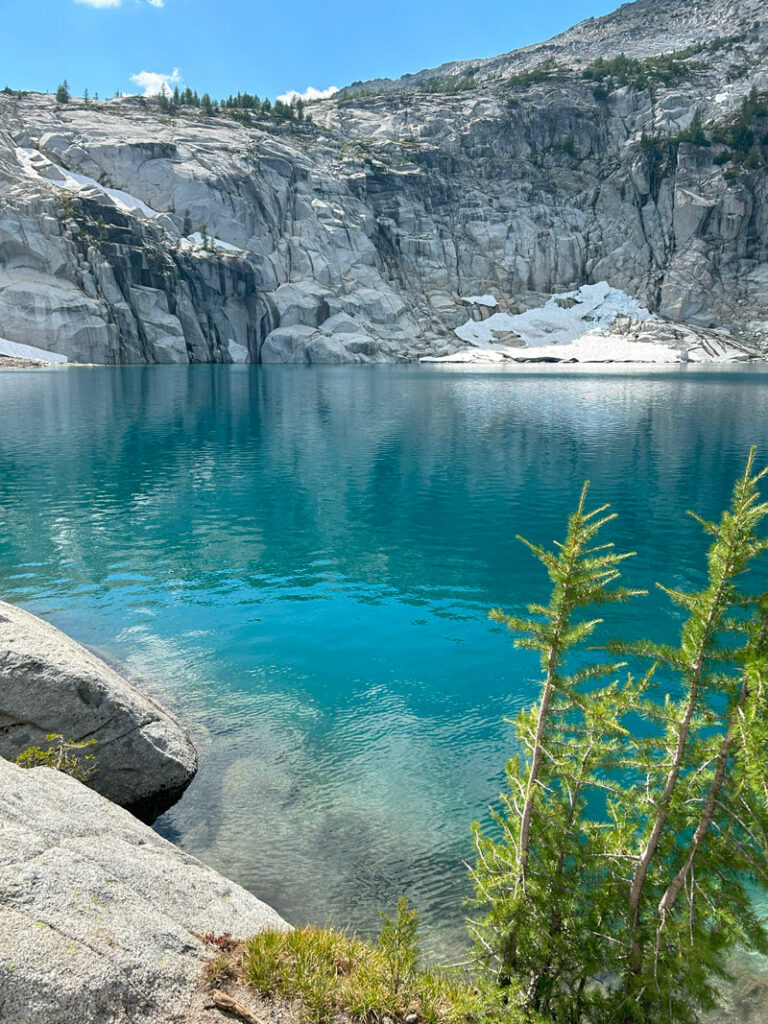
Shortly after you leave the saddle, you’ll come to your first lakes in the Core Enchantment Zone, Isolation Lake and Tranquil Lake. They’re also at the highest elevation of all the lakes and in an alpine environment with little vegetation.
I was a little bit disappointed upon seeing them. I mean, that blue water and the snow laced peaks are pretty, but it was also a lot of gray rocks. Meh. With the struggle to get up Aasgard, and all the hype surrounding the Enchantments, I was expecting more.
Just hang on, people. It gets better.
For one thing, now that you’re in the Core Zone, the trail flattens out significantly. From this point, you’ll be trending downward, and you’ll occasionally have some rugged terrain to climb up or down, but generally it’s not as strenuous.
Oh, and even in August, you might have some snow. Butt sliding was NOT the best form of transportation here, but the rules of YOLO said we should at least try it (it sucked).
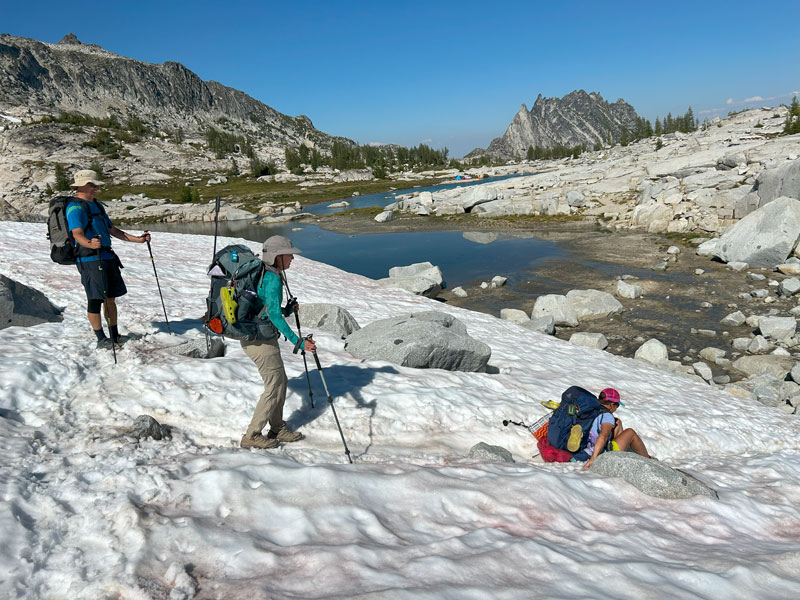
Luckily, that was our only snow field of the trip.
As you hike, look for large cairns that hopefully still have a giant white stick sticking out from the top. These help guide you across areas of solid rock where the trail is not obvious.
Soon the trees will begin to appear, and you’ll come to the most beautiful lakes.
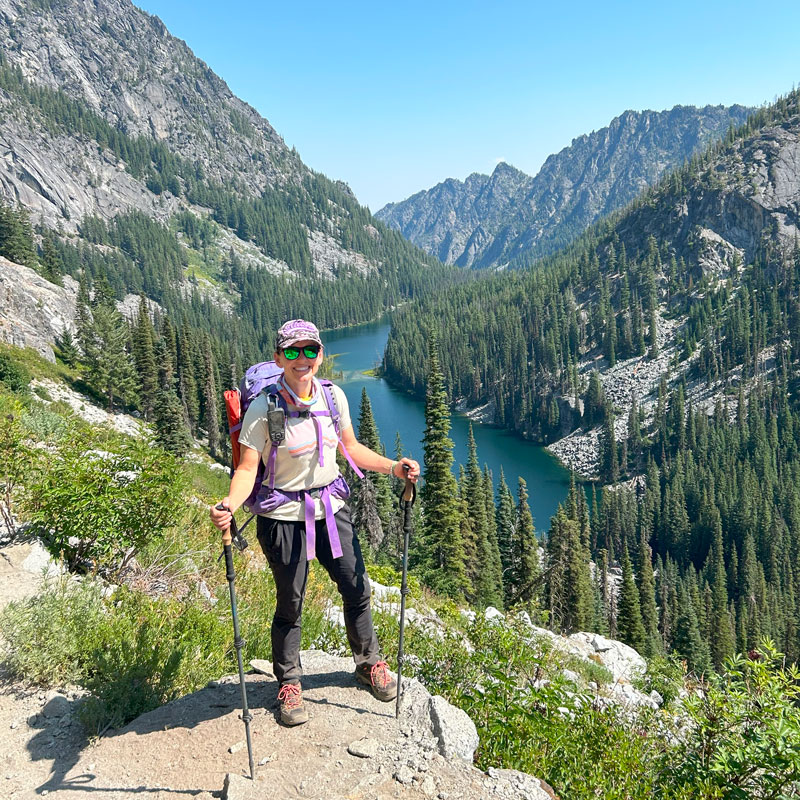
Little Annapurna Summit (optional)
Additional mileage 1.7
Additional elevation gain 561
Additional time about 2 hours
If you have even the slightest interest in peak bagging, a trip up to the summit of Little Annapurna will blow your mind. Before descending down to Inspiration Lake, look for a side trail on your right that heads up toward Little Annapurna.
The route first passes a couple campsites along a trail that can be hard to see in places. Once you get up on the rocky slope, there are a decent number of cairns to keep you on the route. Don’t expect a well-defined trail, though, and don’t expect the GPS route to match exactly (I mean, I tried my best).
You’ll come up over a false summit first, and then the remaining trail up the last part becomes more gravelly and easier to follow. Once it mostly flattens out, it’s a matter of walking all the way to the end and climbing up on the tallest rocky outcropping.
OH BABY!
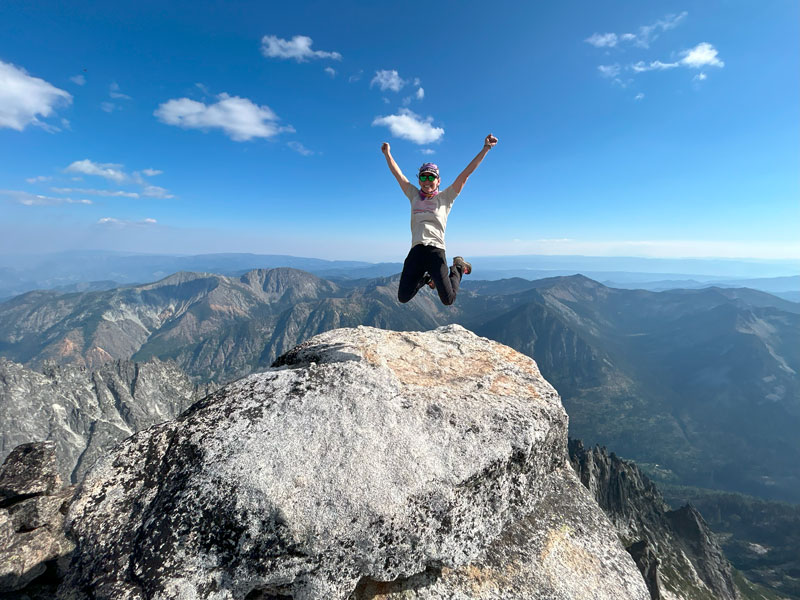
You’ll have massive views of the valley below, 11 layers of mountains in the distance, and a birdseye view of the Core Enchantment Zone. You’ll even be able to see Snow Lakes!
Once back on the main trail, you’ll descend the most rugged part of the trail in the Core Zone. Keep an eye out for cairns to help you navigate the loose, rocky chute.
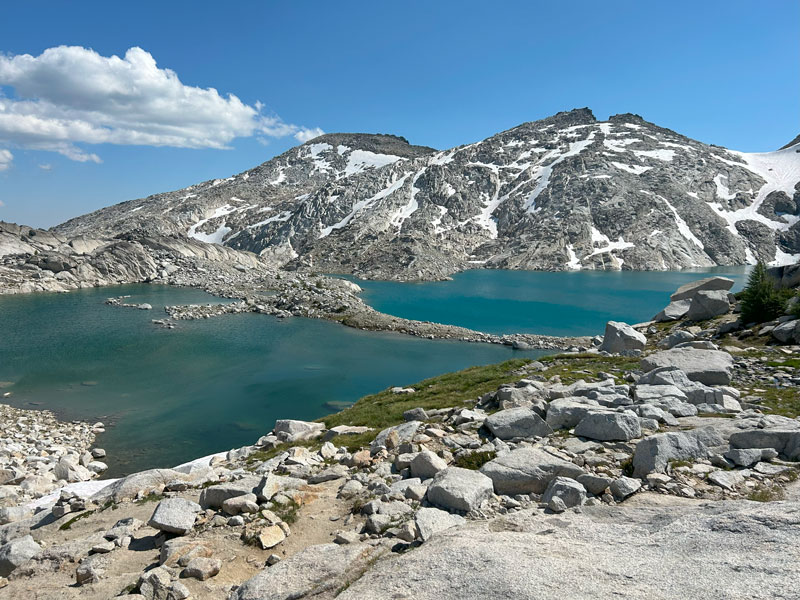
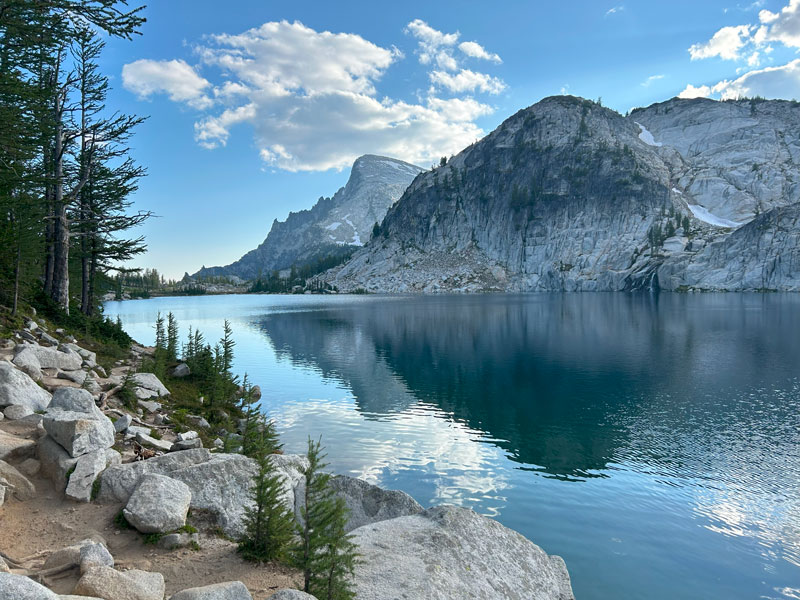
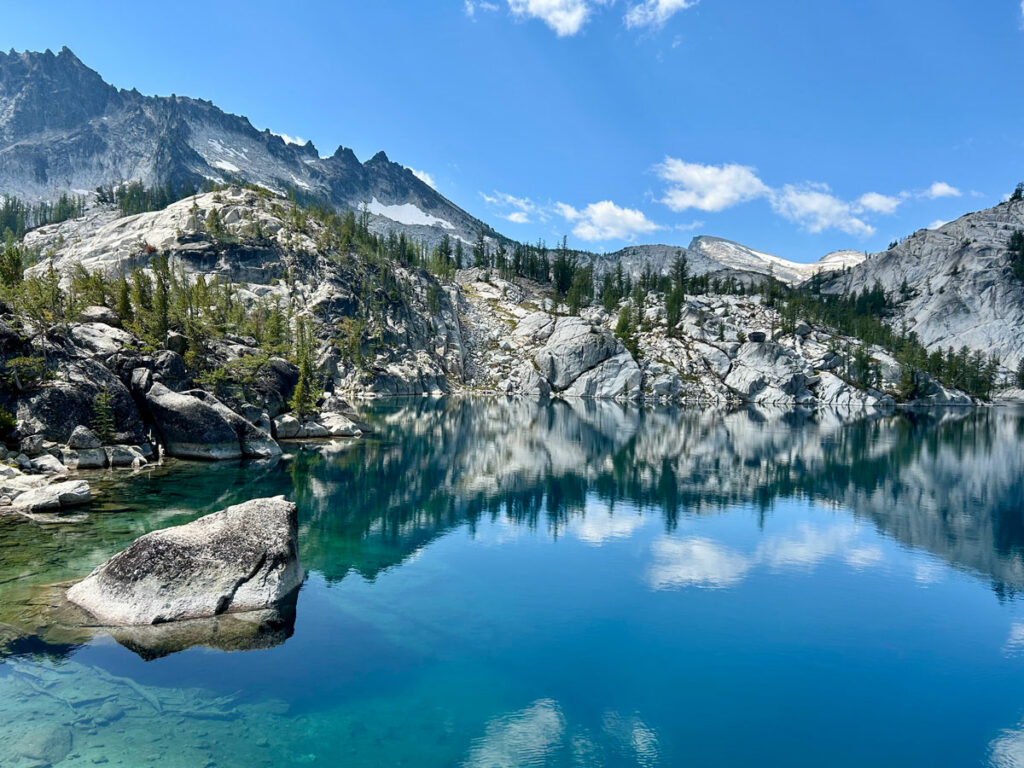
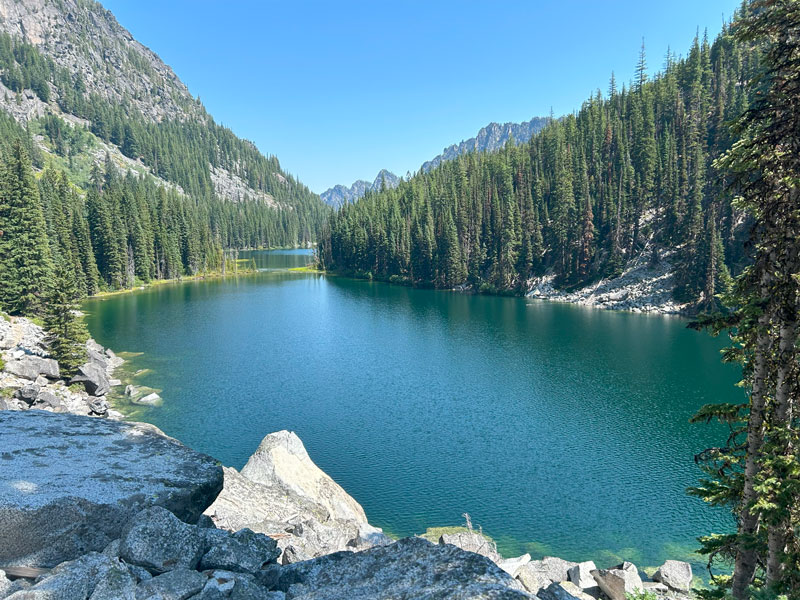
Inspiration Lake
Inspiration Lake was one of our favorites, and it’s the first one worthy of an extended stop, in our opinion. It really had an Alaskan feel to it.
You’ll follow the shoreline for a while and then pass through a small meadow with Prusik Peak visible in the background.
Perfection Lake
Uh huh. Appropriately named. I’m not making this up.
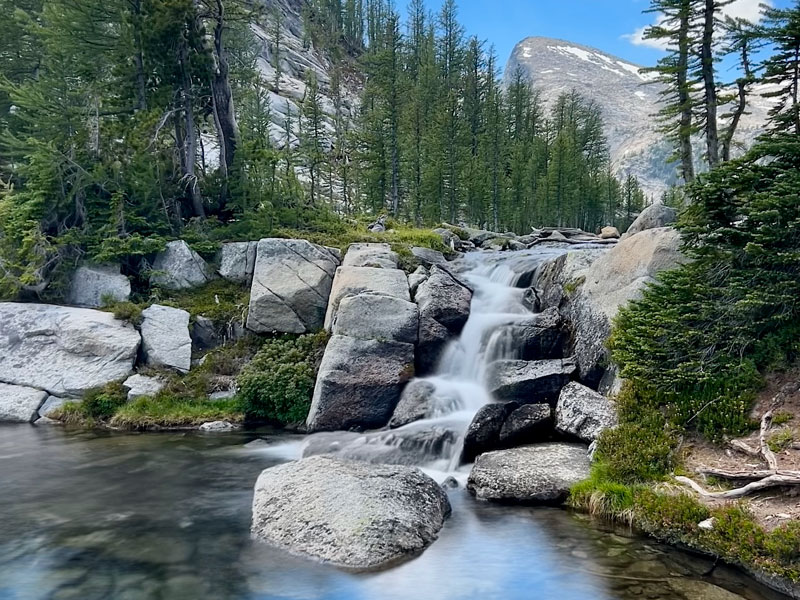
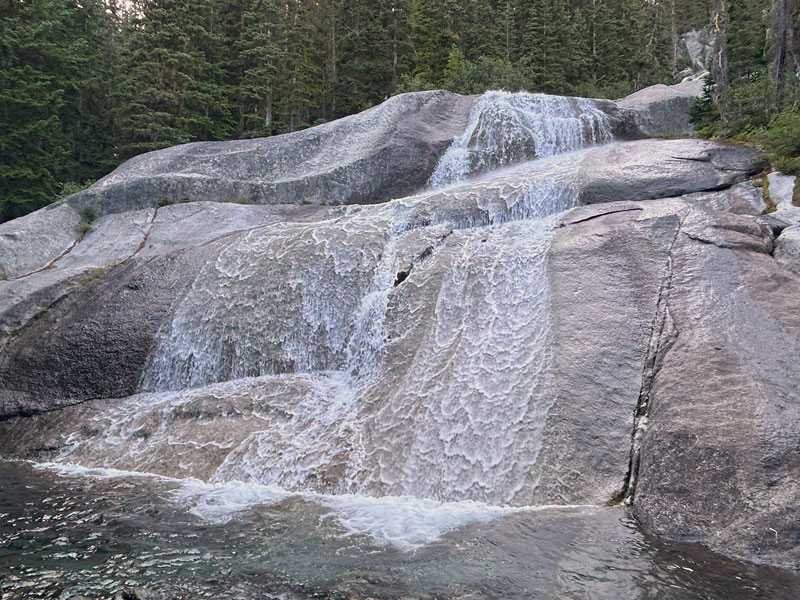
And then, if that wasn’t pretty enough, Perfection Lake drops into Sprite Lake via the most perfect little waterfall. Shall we call it Perfection Falls?
Aren’t the names just so cute? There’s also a Gnome Tarn nearby, and if I didn’t know better, I would have expected to see a mythical creature pop out.
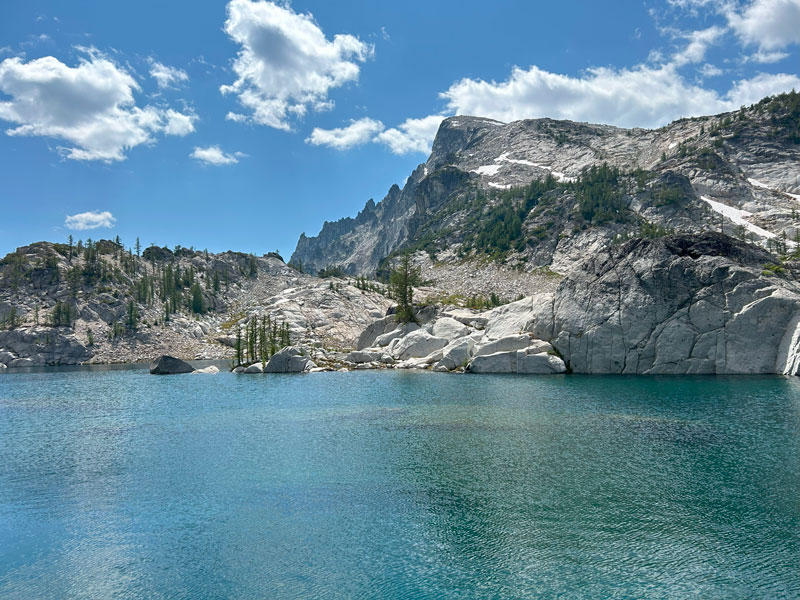
Crystal Lake (optional)
Additional mileage 0.9 mi
Additional elevation gain 92 feet
Additional time 1 hour (or more, if you’re swimming)
If you want to get off the beaten path a little bit and have a greater chance of having a lake all to yourself, make the short side trip to Crystal Lake. Right where Perfection Lake and Sprite Lake meet, at the top of the waterfall pictured above, find a trail that goes between them and heads south and then southwest.
The trail to Crystal Lake is fairly easy to follow, and it travels through a pretty meadow. When you see a sad little green pond on your right, don’t worry. That’s not it. Keep going until the trail takes you right to the shore.
There aren’t a lot of great places on the shore to sit, but you can find some large boulders off to your right that make a decent spot to hang out. The trail also continues to a small saddle where it looks like you can peer into the valley below the lake, but we didn’t check it out.
Leprechaun Lake
After Sprite Lake, you’ll travel along a creek cascading down the hill before arriving at Leprechaun Lake. Yep, magical.
Ahhhh, beauty overload! But are we done yet? Nope.
After passing Leprechaun Lake, you’ll get to a small ledge where you can look down over Lake Viviane and see just how far down you have to hike if you’re going all the way to Snow Lake. If you started at Stuart Lake Trailhead this morning, you’ll probably cry.
Before all that, you still have Lake Viviane coming up to cheer you up. To get there requires a couple tricky maneuvers. Cross the log jam bridge, traverse a ledge, and then make your way down a slope and down a chute. It’s not too bad, really, and the pictures look pretty cool! Except I forgot to snap one of us going down it, so here we are going up the next day.
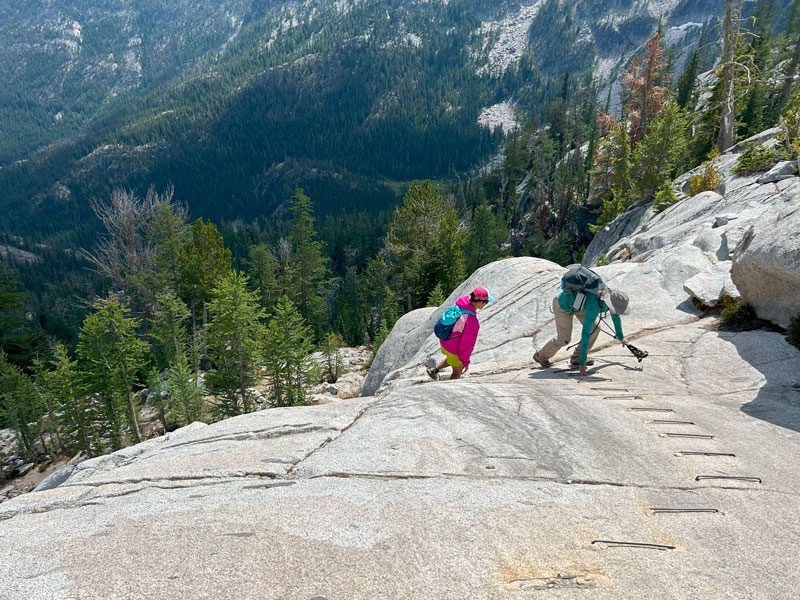
Those metal bars were not needed, and we could only imagine they are there to assist when there’s ice or snow on the route.
Lake Viviane
Also one of the best lakes in the Enchantment Zone, the beauty of Lake Viviane will make you forget your troubles. Namely, those tired feet.
Slipping your shoes off and soaking your feet in that cool, crystal water might be just the thing you need.
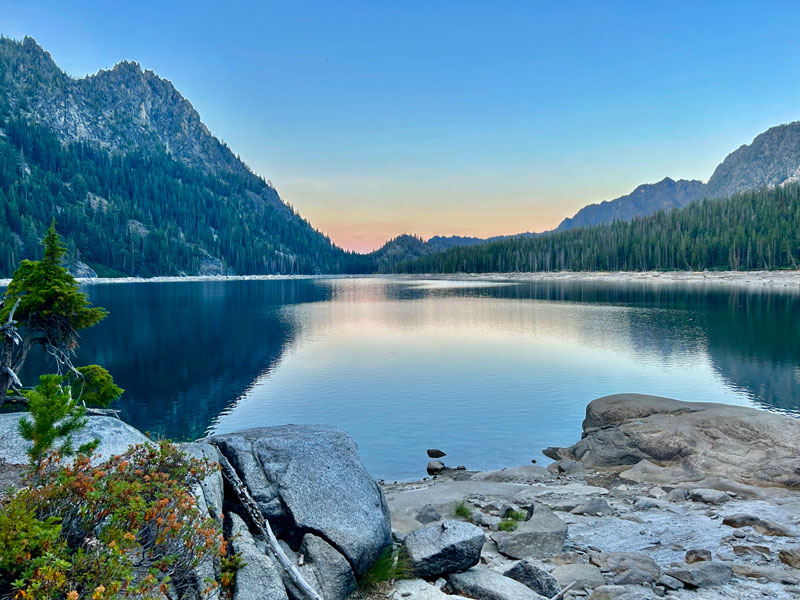
Snow Lakes Trail
From here, you’ll start descending rapidly toward Snow Lake. The upper part of this section has quite a few rocky slabs where you may need to put down your poles and use your hands to help you down. The farther down you get, the more flat dirt spots and the fewer steep rocky spots, but it can seem to drag on quite a while. At one point, you’ll get glimpses of a waterfall behind the trees, which is well worth a stop if you have enough energy left.
When it starts to flatten out, you’re almost there! It’s likely that you’ll find a lot of tents set up at the upper tip of the lake, but there are plenty of places to camp, so if you’re staying the night, just keep going until you find a pretty spot.
Then reminisce about the day while watching darkness fall over the lake.
As you sit at camp with your feet throbbing, you may be thinking there’s no way you’re going back up into the Core Zone tomorrow. Banish that thought immediately. We were not looking forward to hiking back up, but it actually went pretty quickly, and we enjoyed the Core Zone even more on day two. There’s more time to relax, take pictures, swim, or whatever else you feel like, and you already know where your favorite spots are. Do it.
When ready to head out to the trailhead, you’ll continue down lake for a long time, and you’ll probably be wondering where all the elevation loss will be happening. Don’t you worry—it’s coming.
Once you get past the Snow Lakes, you’ll come out onto an exposed mountainside where you’ll get epic views of the canyon and Nada Lake below. Plus, there’s water shooting powerfully out of a penstock from the upper lake into Nada Lake. Pretty rad.
This is where the thimbleberries begin to appear along the trail, so keep an eye out for those. They look similar to a raspberry, but they are very delicate. Tasty!
Nada Lake
Nada Lake is the very last lake along the Enchantments Traverse, and it makes a great place for lunch or to fill water. There will be a few other water opportunities later along the trail, too.
There are also camping opportunities for those who might want to move at a slower pace.
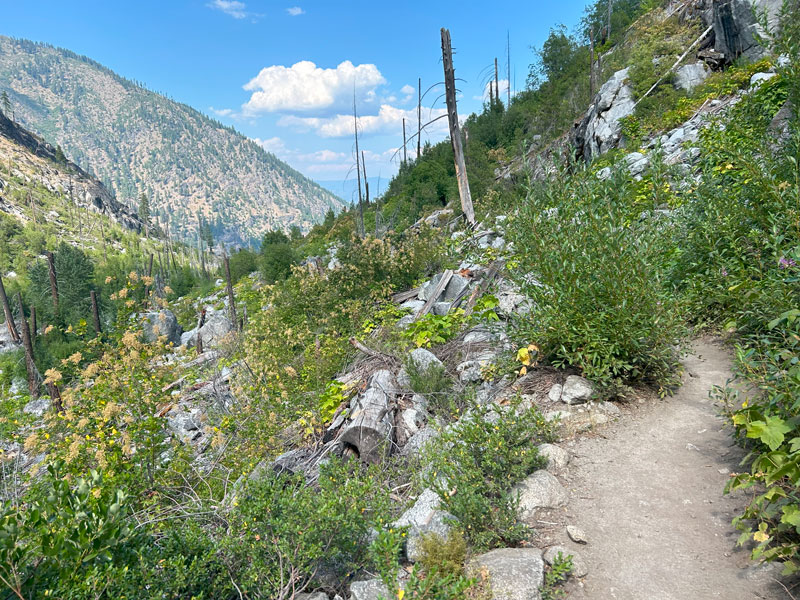
After the lake, the trail starts descending in earnest, and there are long sections of switchbacks. The good news is that if the berries are in season, you can pick and eat them the entire way down. Plus, if you’re extra lucky, you might find huckleberries and blueberries, too. Yum!
You’ll know you are getting close when you enter into a burned area with less shade, and you start to feel the temperature warm up considerably.
The final insult will be the ravine that runs between you and the parking lot. That’s right, the very last section of this trail is uphill. What?!
Getting a Permit
The unique and spectacular scenery of this place makes it pretty popular, especially in the prime months of July and August. Between May 15 and October 31, you will need a permit for both day and overnight use. Outside of this time frame, no permit is needed, but it’s covered in snow and only suitable for those with extensive winter backcountry experience and avalanche safety knowledge.
Day Hikes
If you’re planning to day hike it, all you have to do is grab a free, self-issued permit from the trailhead, and you’re on your way.
Overnight Hikes
For overnight stays, you will need to obtain a permit before your trip. There are a few ways to do this.
Enter the preseason lottery From February 15 until the end of February, you can enter the advanced lottery on Recreation.gov. Permits are drawn randomly on March 7, and winners are notified March 14 and have until the end of the month to claim their permit.
Snatch an unclaimed permit On April 1 at 7AM Pacific, any unclaimed permits are released back onto Recreation.gov. Now listen very carefully, folks! In my experience, there are quite a few that go unclaimed, but these permits go LIGHTNING fast. What I did to get mine was go in ahead of time and rehearse where I needed to click so that I could do it quick and robotically when the permits were released. I would recommend using a desktop and trying for either Colchuck or Snow because if you go for Core Zone, and you don’t manage to get it in your cart, the other permits will probably already be gone by the time you try again. The only other thing you can do if this fails is keep checking to see if anyone cancels.
Daily lottery If you are in the area, you can also enter a daily lottery. You’ll need to be within the designated geofence and have the Recreation.gov app downloaded. Then between 7AM and 10AM the day before you want to start, you can enter the daily lottery. You’ll be notified of the results at 11AM. If you win this permit, you’ll have until 2PM the same day to accept and pay. You must then pick up your permit in person between 12PM and 4PM on that same day. No lottery is run Saturdays or Sundays.
Zones
The Enchantments area is divided into five zones, but if you want to visit the Core Enchantment Zone during your trip, it’s best to obtain a permit for one of the following zones:
- Colchuck If you get a permit for this zone, you can start at the Stuart Lake Trailhead and camp at Colchuck Lake. The benefit of this trailhead is that it starts at a higher elevation than the Snow Trailhead, and it’s a shorter distance into the Core Zone. The drawback is that you’ll have to go over Aasgard Pass, which is famously steep and can be snowy early or late in the season. Because a permit for Colchuck Zone ONLY allows camping in that zone, you will have a long, strenuous hike to or from the Snow Zone if you want to do the whole traverse. A permit for this zone is valid for up to 8 people and 14 nights.
- Core Enchantment This is the HOLY GRAIL of Enchantment permits. Not only can you camp inside the Core Zone, but you can also spend other nights in ANY zone. This gives you the ultimate flexibility with your trip. The downside is that this is the hardest permit to obtain, and the quota is per person instead of per group, so you can’t add anyone to your permit later. This permit is valid for up to 14 nights.
- Snow If you get a permit for this zone, you can start at Snow Lakes Trailhead and camp at Nada Lake or one of the Snow Lakes. The benefit of this trail is that the ascent into the Core Zone is less steep than Aasgard Pass, but it’s also a longer distance and more elevation gain overall. Because a permit for Snow Zone ONLY allows camping in that zone, you will have a long, strenuous hike to or from Colchuck Zone if you want to do the whole traverse. A permit for this zone is valid for up to 8 people and 14 nights.
How to Choose
So let me get to my reasoning. I chose Snow Zone because I wanted to do the entire traverse, and camping at upper Snow Lake splits the 20 mile total distance into 12 miles one day and 8 miles another day. Additionally, I would start at Stuart Lake Trailhead, since it’s at a higher elevation and would reduce my total elevation gain, and I would go UP Aasgard Pass with my big pack. Looking back, I’m glad I didn’t have to go DOWN Aasgard Pass with my big pack. Since I also wanted to go back into the Core Zone on my second day, I didn’t have to go over Aasgard Pass again.
Let me also say that in talking to other people, the consensus is that most people who get Colchuck Zone or Snow Zone permits hike into their camp the first day, visit the Enchantment Zone with just a day pack on another day, and then hike back out the same way on the last day. This is probably very suitable for most folks, and eliminates the need for a shuttle, but some of us just have to see it all. Guilty as charged.
Day hikers almost always start at Stuart Lake Trailhead to reduce total elevation gain, go up over Aasgard Pass, and then exit Snow Lakes. This is because turning around after hiking through the entire Core Zone would be more miles than just hiking out Snow Lakes.
We did see one fellow who was doing the entire traverse one way and then back the other way IN THE SAME DAY. My hat’s off to you, man – you are in a league of your own.
Important Notes
Food storage Although bear canisters are not required, you will need to protect your food from critters. Plan to bring a canister, a critter proof sack, and/or hang your food.
Human waste This is a sensitive environment that we want to keep pristine, so please use one of the many toilets whenever possible. This also helps to keep the goats away that are attracted to the salts in human urine. When no toilet is available, urinate on a rock away from all campsites to keep goats from digging up the vegetation. For solid waste, dig a cathole at least six inches deep and 200 feet away from water sources.
Permits Always carry your permit with you, and don’t be tempted to camp outside the zone you have a permit for. The penalty for doing so can be a fine up to $5000, and/or 6 months in jail. It’s not worth it, and following the permit rules helps make the experience more enjoyable for everyone.
More Information The Forest Service website is the best place to get ALL the details about permits, rules, and regulations. It’s a worthwhile read.
Map & Directions
Location The Enchantments, Alpine Lakes Wilderness, Leavenworth, Washington
Fees/Passes For a day hike, you must display a Northwest Forest Pass or an America the Beautiful Pass. For overnight hikes, your permit comes with 2 parking passes.
Trailhead Facilities Pit toilets or portable toilets
Recommendations for you
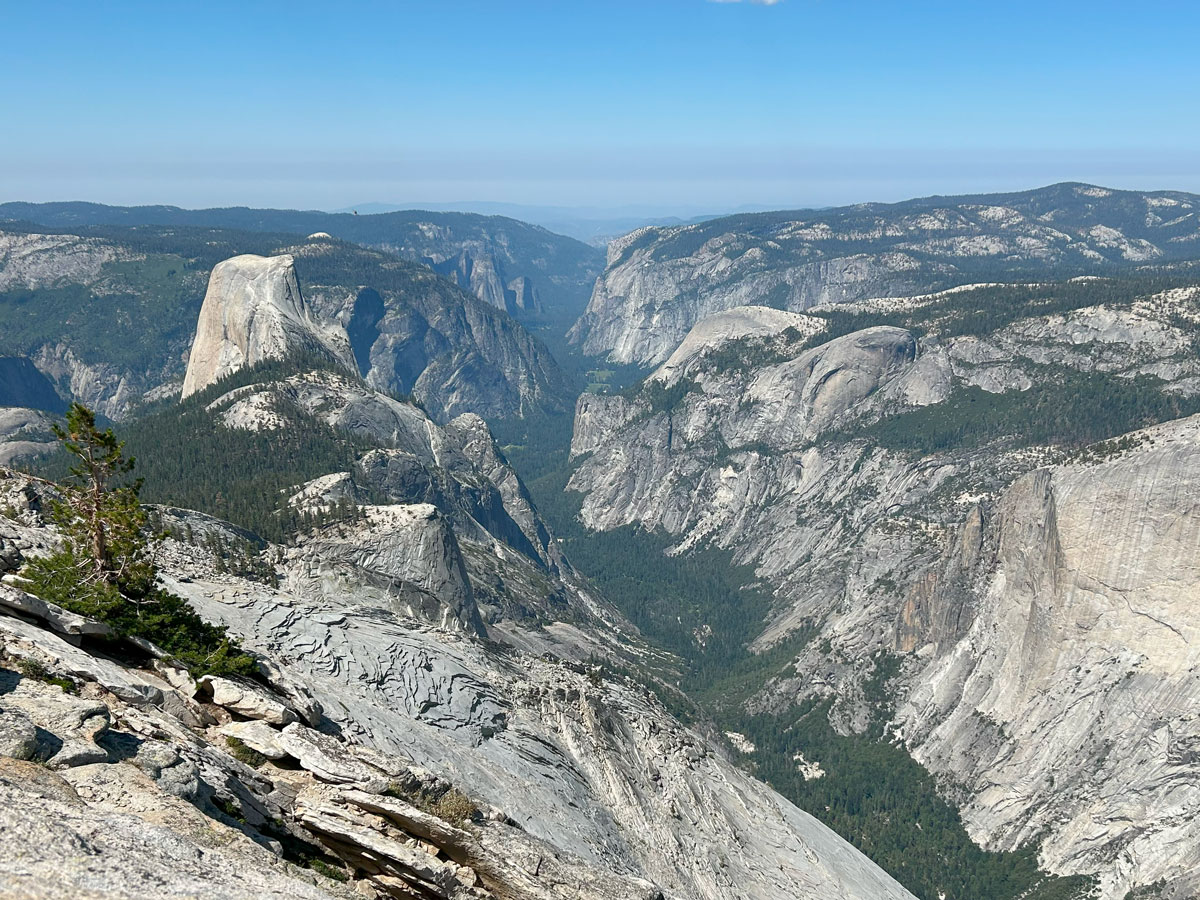
Clouds Rest and Half Dome Loop | Yosemite National Park
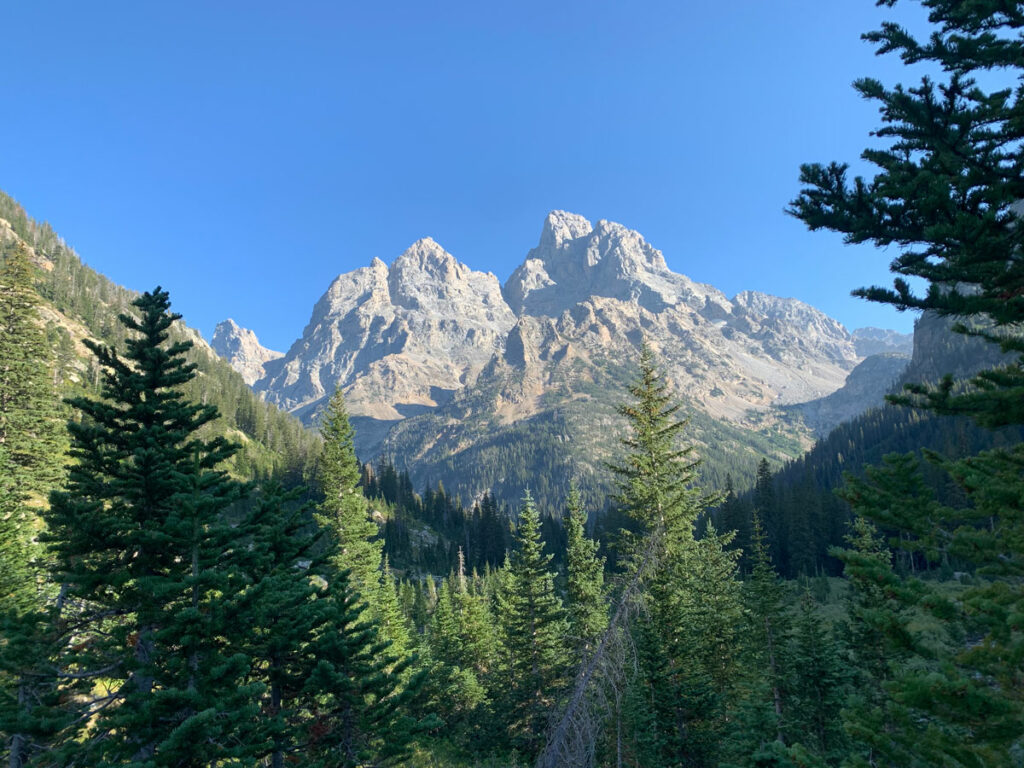
Teton Crest Trail | Grand Teton National Park

Rim to Rim | Grand Canyon National Park
Leave a Reply