Nankoweap
TRAIL STATS
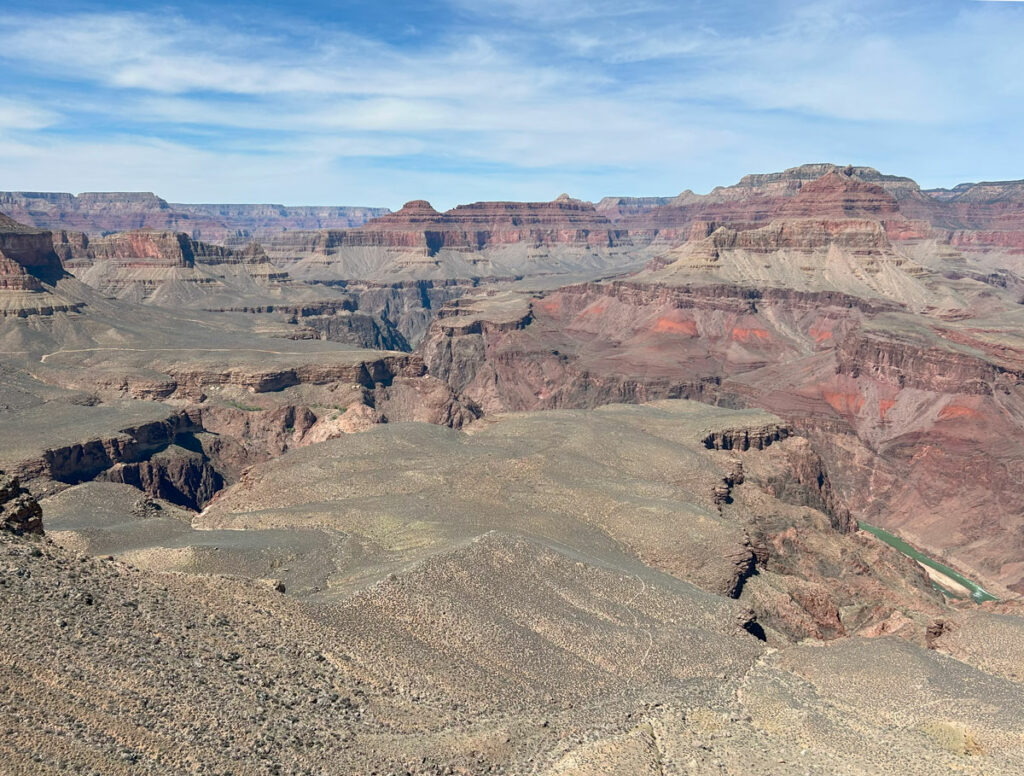
Nankoweap Trail is classified as “most difficult of the named trails in Grand Canyon” by the National Park Service. Narrow trails along exposed cliffs, steep descents through loose rocks, short downclimbs, limited shade, and 11 miles with no water sources make this adventure suitable for highly experienced hikers only. Those who tackle this rugged 14-mile route to the Colorado River will be rewarded with panoramic views, peaceful Nankoweap Creek, sandy beaches, riverside camping, and a visit to the famous Nankoweap granaries built by the Ancestral Pueblo people hundreds of years ago.
Trail Description
Oh, so you read past the summary. The narrow, exposed cliffs didn’t scare you away? I have to admit, reading the reviews of this trail before our trip literally made my hands sweat. The Park Service’s trail description didn’t help when it said, “The trail narrows to less than a foot wide and for 50’ one is intimately close to a 100’ drop.” Intimately close? Sounds a little crazy. I wondered if I had what it would take to keep a calm head and make it through, and I honestly wasn’t sure, but I was determined to try.
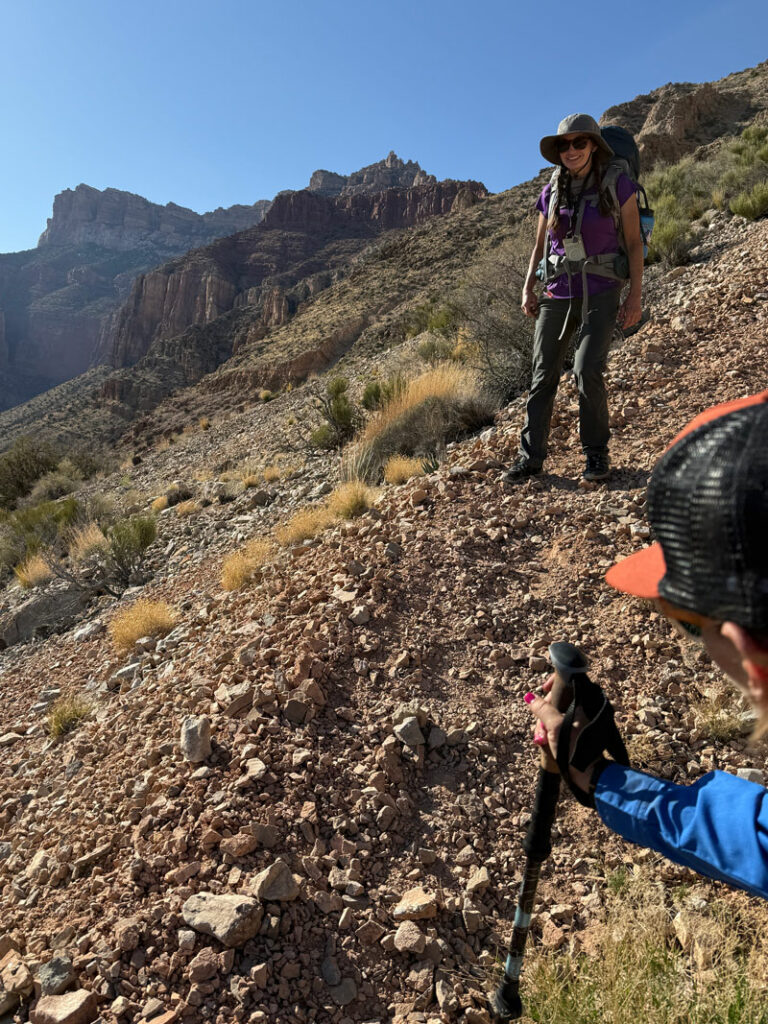
Before I dive into the details, I just want to reassure you that this is very doable. While the exposure is real, as long as you don’t have a severe fear of heights (healthy fear is okay), you are an experienced hiker, and you take your time, it won’t be a problem. Even where the trail is narrow, there is sloping ground to your left and right, so you’re never right on the edge. We have a few in our group who get very nervous near ledges, and none of us felt it was particularly terrifying. It helped to keep our focus on the trail ahead and not let ourselves look down at the drops next to us. Poles were crucial to give us an added measure of stability.
Saddle Mountain Trailhead
There are two trailheads to choose from for this hike, and they’re both called Saddle Mountain Trailhead. They are also both the trailhead for Forest Service Trail #57, just at opposite ends of it. All of the trails, including the one you’ll use to descend into the Grand Canyon are called Nankoweap. Confusing, right?
Saddle Mountain Trailhead (upper)
- Begins at a higher elevation (~8800 feet)
- More likely to have snow in winter and early spring
- Slightly shorter (3.0 miles to the junction)
- Starts with a 2000 foot descent
- Also known as the west trailhead
The 2000-foot descent to start turns into a 2000-foot climb after you get out of the canyon. We did not take this route, but reviews we read said, “Not fun.”
Directions Take Highway 67 south to Forest Service Road 611 and turn left. Fork right at the junction with Forest Service Road 610 and follow that to the trailhead.
Saddle Mountain Trailhead (lower)
- Begins at a lower elevation (~6400 feet)
- More reliable year round
- Slightly longer (3.5 miles to the junction)
- Starts with a 1500 foot uphill climb
- Also known as the north trailhead
A major benefit of this trailhead is that after you hike out of the canyon at the end of your trip, you’ll go mostly downhill to get to your car. Mostly. There is one short, steep ascent to get out of a ravine that feels particularly punishing after all you’ve been through. We took this route, and the road was in great condition. It is likely passable by any vehicle in dry conditions. As a bonus, we had cell phone service there.
Directions Take Highway 89A west from Marble Canyon or east from Jacob Lake and turn south on Forest Service Road 8910. Follow this to the trailhead.
Nankoweap Trail #57
Since we started at the lower trailhead, this section will describe that route. From the trailhead, head south on Nankoweap Trail #57 and begin begin hiking up a slight but steady incline. The trail is rocky and passes through a forest of dead trees. Once at the top of that hill, you’ll be able to see a wide gulley to your left. The trail makes a steep descent down into the gulley (which will later become that punishing final ascent on your way back).
At the bottom of the gulley is a creek bed that may or may not be dry (it was dry when we went), and the trail crisscrosses the creek bed as it continues. If it is dry, you can sometimes shortcut the trail by staying in the creek bed to avoid some of the brushier sections. If it’s wet, well, good luck.
Hope you enjoyed the flatness of the creek bed because you’re coming up on the first significant uphill push of the hike. Since you likely packed a lot of heavy water for this trip, it’s also your first reality check. Luckily, there are tall ponderosa pines here that give you ample shade and resting spots.
At the top of this climb, you’ll finally be on the rim. YAY!
Nankoweap Trail (Grand Canyon National Park)
Once on the rim, you’ll come to the junction with the Nankoweap Trail in Grand Canyon National Park. There’s a sign there with information and warnings. As you continue onto this trail, you’ll get your first view into the Grand Canyon.
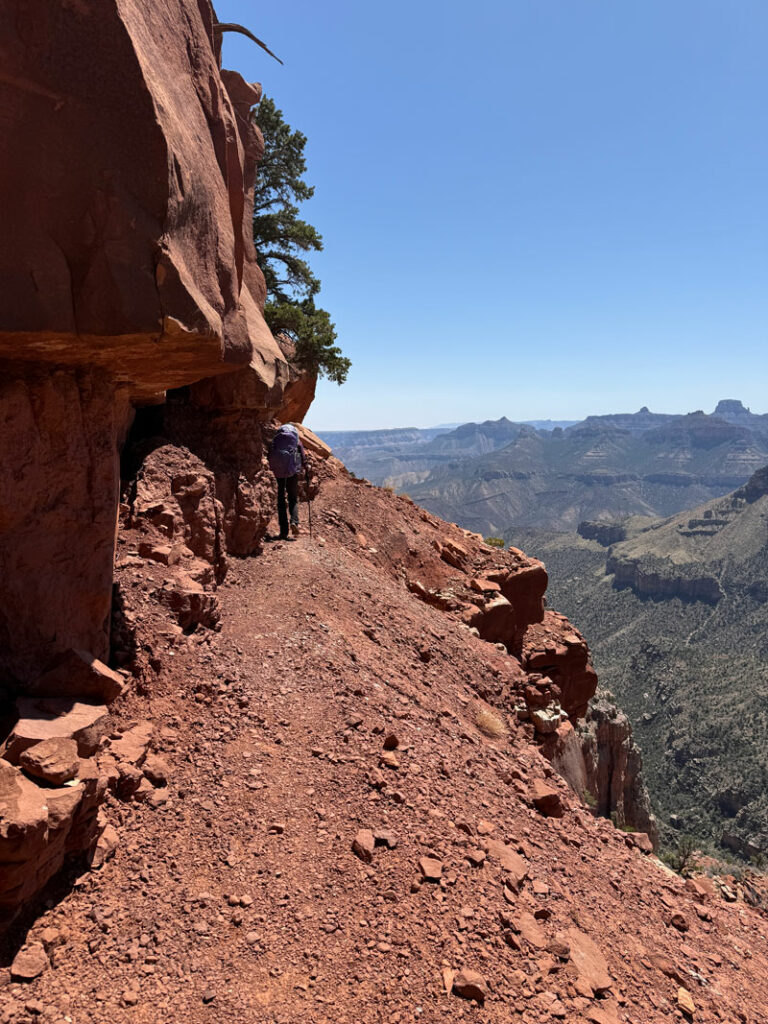
The first part of this trail descends steeply through the white sandstone layer, but it only lasts for less than half a mile. Soon, you’ll find yourself on a cliff in the red Supai group layer, and you’ll continue along this cliff as it contours around the canyon. You’ll have some ups and downs as the trail trends downward toward Marion Point.
You’ve probably heard stories about the exposure here, and there are honestly only a couple places before Marion Point where it feels kind of sketchy. We didn’t find it too scary, but you’ll definitely want to concentrate on your footing.
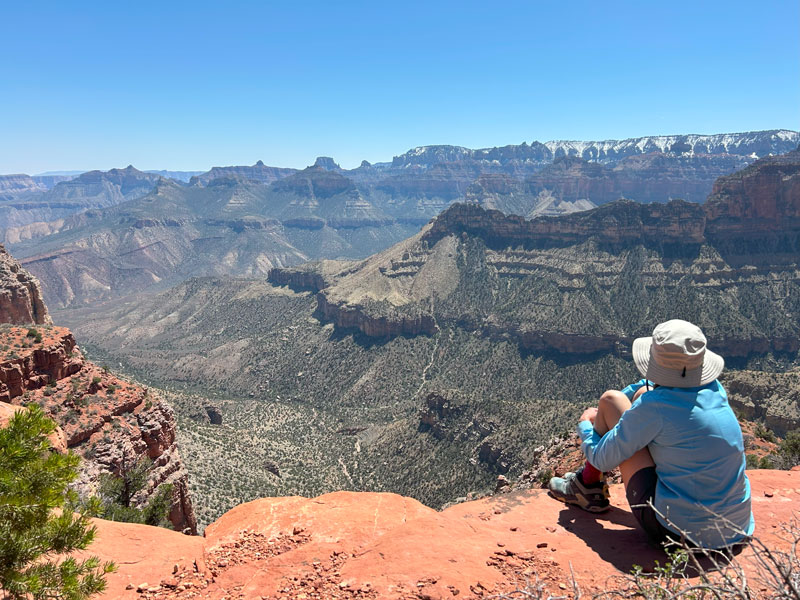
Marion Point
Two miles after you descend below the rim, you’ll arrive at Marion Point. The view here is nice, but it is limited in some directions, and you’ll have a much more expansive view at Tilted Mesa. Still, it makes a fine lunch spot. Just, please, don’t let curiosity get the best of you when you find a weathered bag there. Imagine Heather’s surprise when she was greeted by a baby rattler underneath it. She was so freaked out that she thought the rope inside the bag was a whole den of snakes, too. It still makes me laugh.
There is a small campsite at Marion Point with room for about two small tents. The Park Service encourages people not to camp there if possible due to its fragility and over use. We saved our main food and water cache for Tilted Mesa, but we did stash a 1/2 liter of water under the trees just in case. Two friends also dropped their lightweight camp chairs because they overestimated how willing they were to add weight for comfort. With all the extra water, your pack will be HEAVY, and you’ll definitely be feeling it. Plan accordingly.
Beyond Marion Point, the trail continues in a similar way, following along the same layer in the cliff as it contours around the canyon. We found the narrow spots along this section to be a little more sketchy at times. It’s not that you’re on the edge of a cliff, but that the trail is traversing a gravelly slope that eventually ends in a cliff. Slow, careful footing is key. There were also a few rock falls to cross, and we had to use our hands a few times to negotiate the boulders. One spot had a boulder sticking out into the trail, and we had to carefully step around it. That boulder broke our beloved luci light and sent her tumbling down into the canyon. RIP Luci.
Tilted Mesa
Three miles beyond Marion Point, you’ll begin dropping down the remaining layers of the Supai group. As you drop down each cliff to the next level, you will need to use your hands and may find it useful to remove your pack. The drops are short, and there are trees nearby to assist, so it shouldn’t be much of a problem. There are large, flat campsites on each level where you will see that folks have attempted to build shelters. You know why? Because it’s ridiculously WINDY there, as we found out the hard way on our last night.
But for now, we unsuspectingly hung our ratsacks in the tree with our last day’s food. By the way, there are definitely mice there, so if you’re leaving food behind, it is imperative to protect it from rodents. We also left about 2L of water each, and one person even left her last day’s clothing. It was basically a game to figure out just how much we could leave there. First day’s trash? Yep.
While the wind may be a major drawback at Tilted Mesa, one of the good things about the openness is that you can likely get a cell phone signal. Kind of weird and awesome to call a loved one from inside the Grand Canyon.
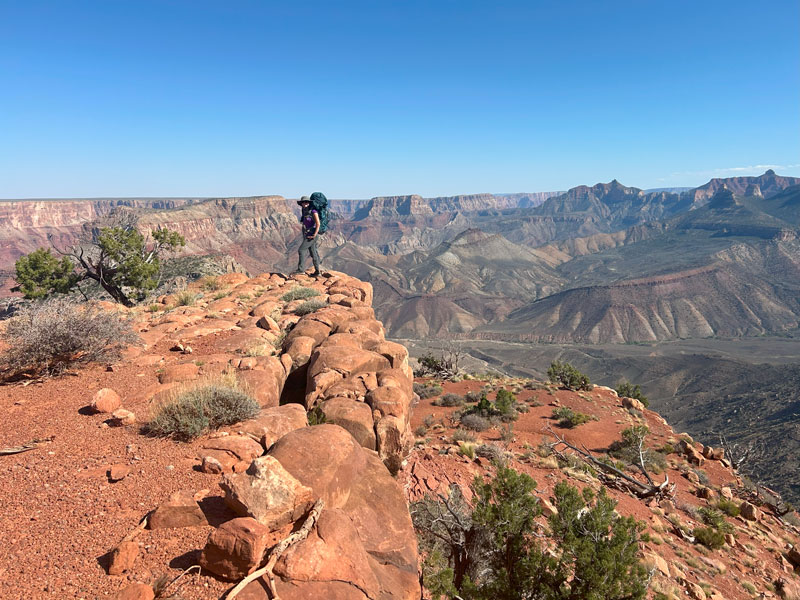
Continuing Past Tilted Mesa
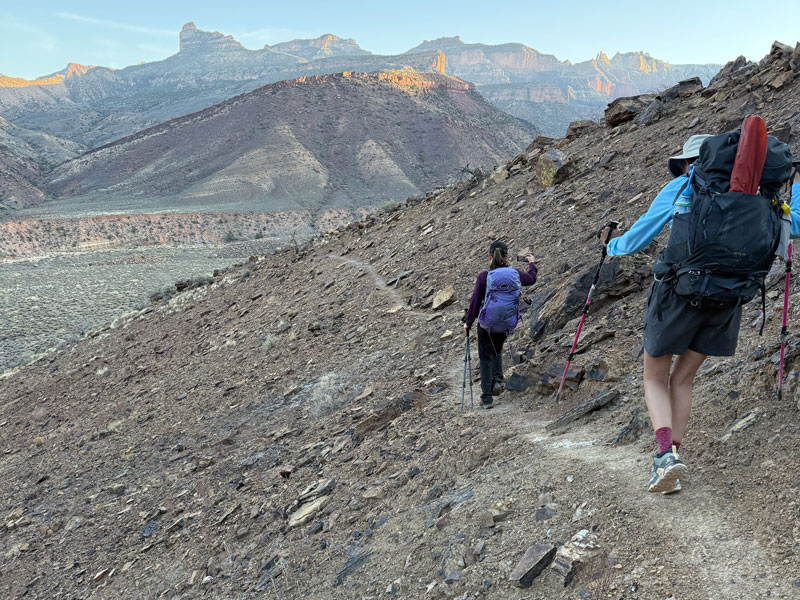
After the trail drops down the red cliffs, you’ll walk along a ridge between two canyons before the trail really starts to go down in earnest. Up until now, you may have been wondering where all the elevation loss was going to be. Well, here it is. The three miles from Tilted Mesa to Nankoweap Creek are the most difficult of the trip in both directions.
Once you drop below the ridge, you’ll be slip-sliding down switchbacks on very loose rocks. Weeee!
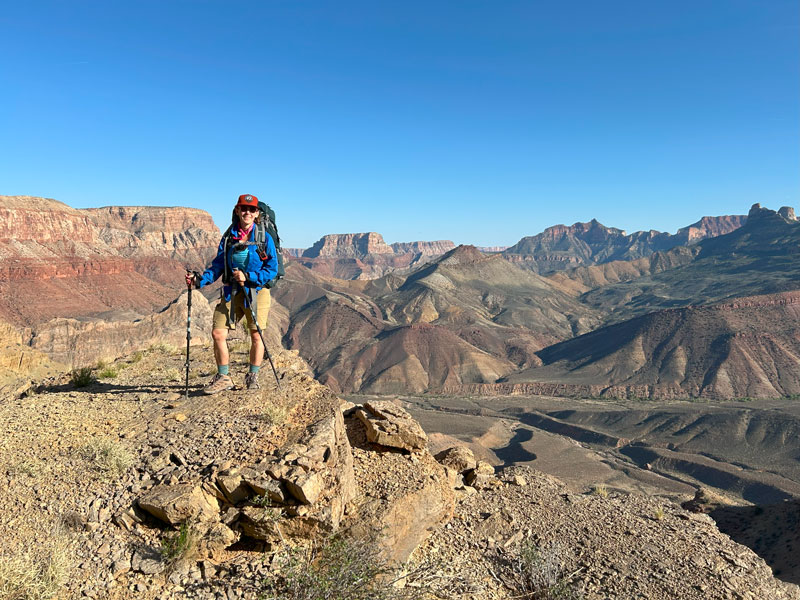
Next, you’ll be sliding down even finer gravel next to a cute heart-shaped pedestal rock. Luckily, that part is very short. A great viewpoint is just at the end of this section to reward you for your tribulations.
Beyond the viewpoint, you’ll traverse loose slopes that have some narrow spots where extra care should be taken. Then you’ll descend down a final small ridge to the gently sloping valley that leads to Nankoweap Creek. As a side note, we can confirm that large, healthy snakes live there, so watch your step.
By the time you reach the valley, your legs and feet will likely be exhausted from the descent, and this valley feels like a nice reprieve with stunning views before and behind you (don’t forget to look!). The huge cottonwood trees ahead mark Nankoweap Creek, a year round water source that has some nice campsites. With the lack of water over the first 11 miles of the trail, we did not have enough to dry camp, so it made the perfect destination for our first night.
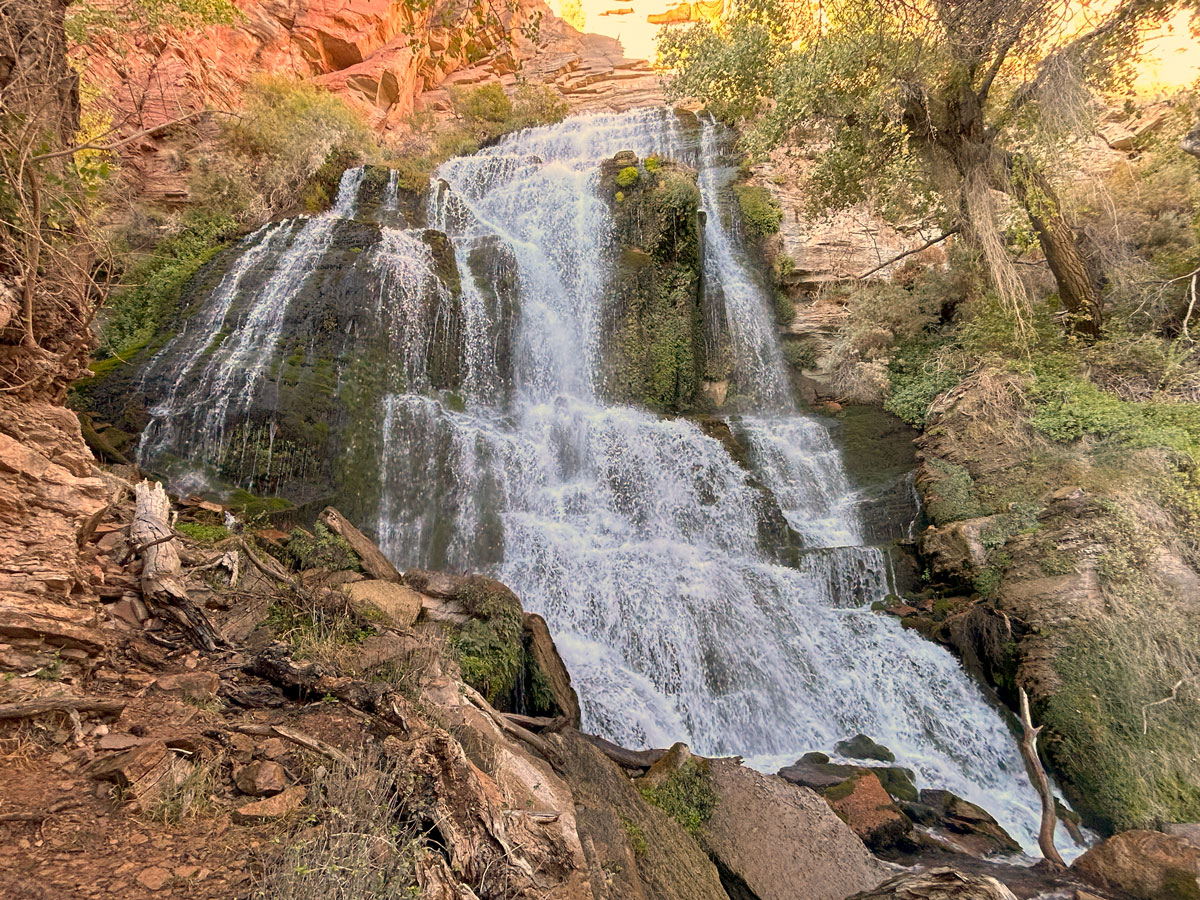
Nankoweap Creek
Having just hiked through a beautiful, but inhospitable desert, Nankoweap feels like an oasis. The water was cold and brought much needed relief to our tired feet. A big campsite can be found very close to where the trail intersects with the creek. We made a quick attempt to locate the upper spring, which the National Park Service said has “tastier drinking water,” but we soon gave up and were content to filter right from the creek. It was tasty enough for us.
Note that the campsite here is down in the creek bed and therefore susceptible to flash flooding. We did not find any campsites that were up above the creek bed, but we also did not go looking for them. We did notice some more sites beside the creek on our way down to the river, some of which I have marked on the map. There are almost certainly others.
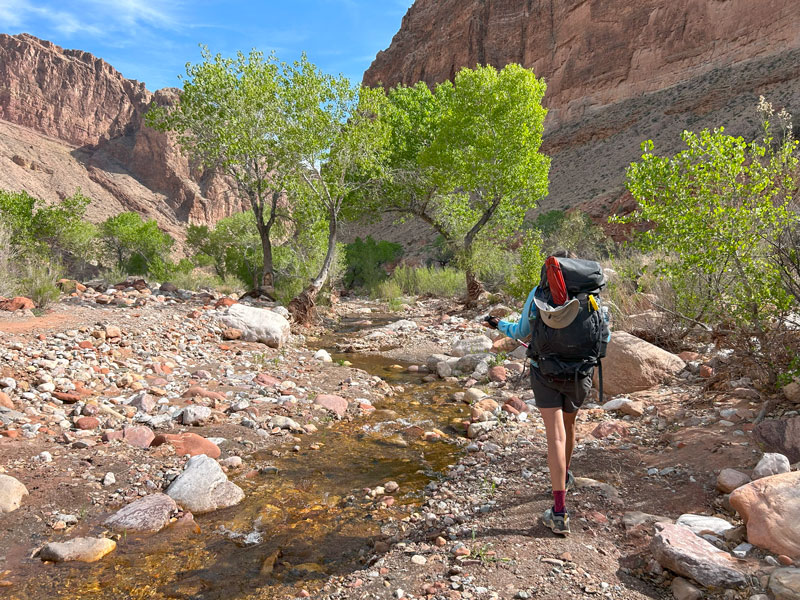
Once you’re at Nankoweap Creek, the trail all but disappears, and you’ll just want to follow the best path you can find as you make your way toward the Colorado River. We did have to cross the creek multiple times on our way, but there were always enough boulders and sand bars to keep our feet dry.
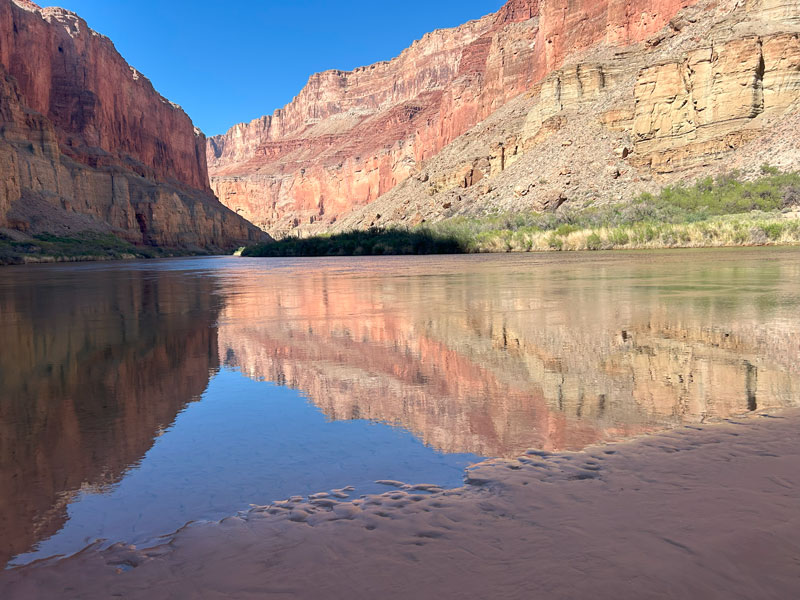
Colorado River
As you get closer to the river, you’ll see the imposing cliffs of the South Rim ahead, and before long, the master carver herself will come into view. Behold the mighty Colorado River! Just before you get to the river, a trail veers off to the right. We used this trail to get over to the upper Nankoweap camp. There are a lot of trails out there that lead to the various points of interest, and the Park Service asks you to stay on established trails to avoid erosion.
The beach at the upper Nankoweap camp was deserted and very inviting on this hot 90-degree day. In front of the beach is an area of calm, protected waters where it is safe to indulge in a wild swim, and I hope you do! The water was very cold (probably in the 50s), but who can resist an opportunity like this?
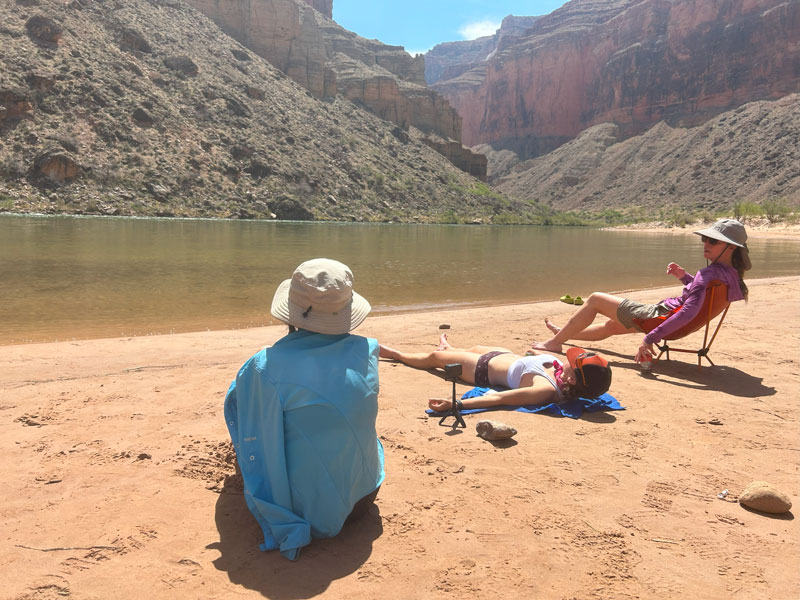
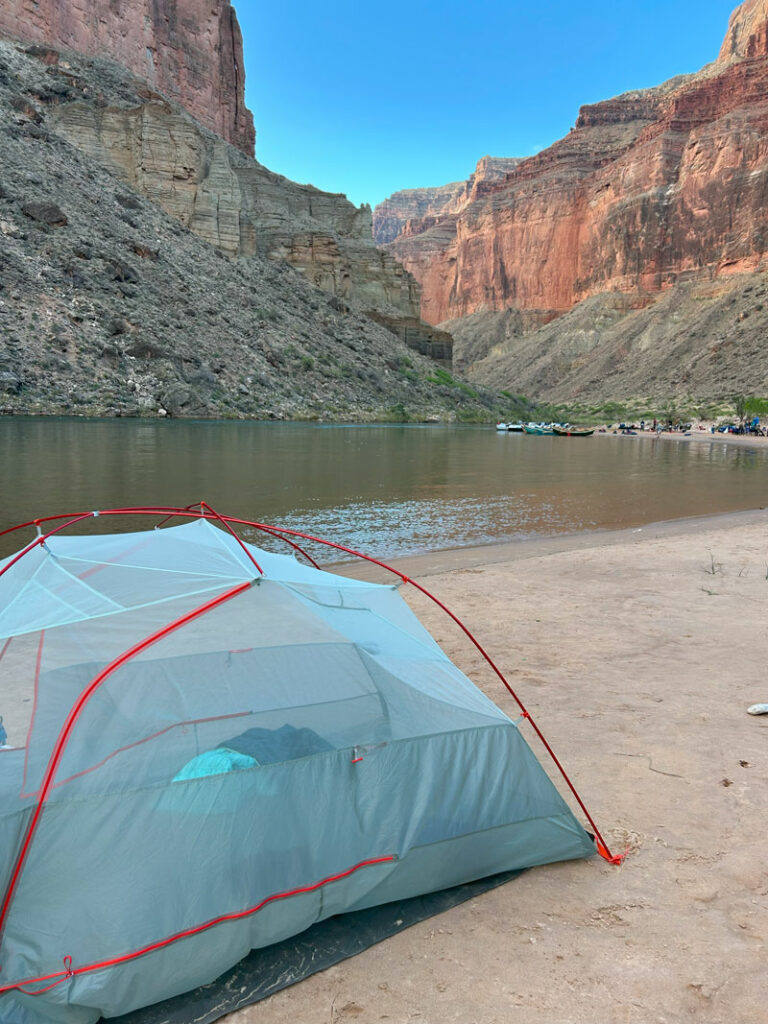
There are several camps to choose from along the river, and you will likely be sharing the larger beaches with at least one rafting expedition. That’s not necessarily a bad thing because they brought us delicious porkchops, spinach salad, and cornbread. Yummy! Definitely plan to camp on the beaches of the Colorado, though. It’s such a beautiful area down there, and you won’t want to leave. Promise.
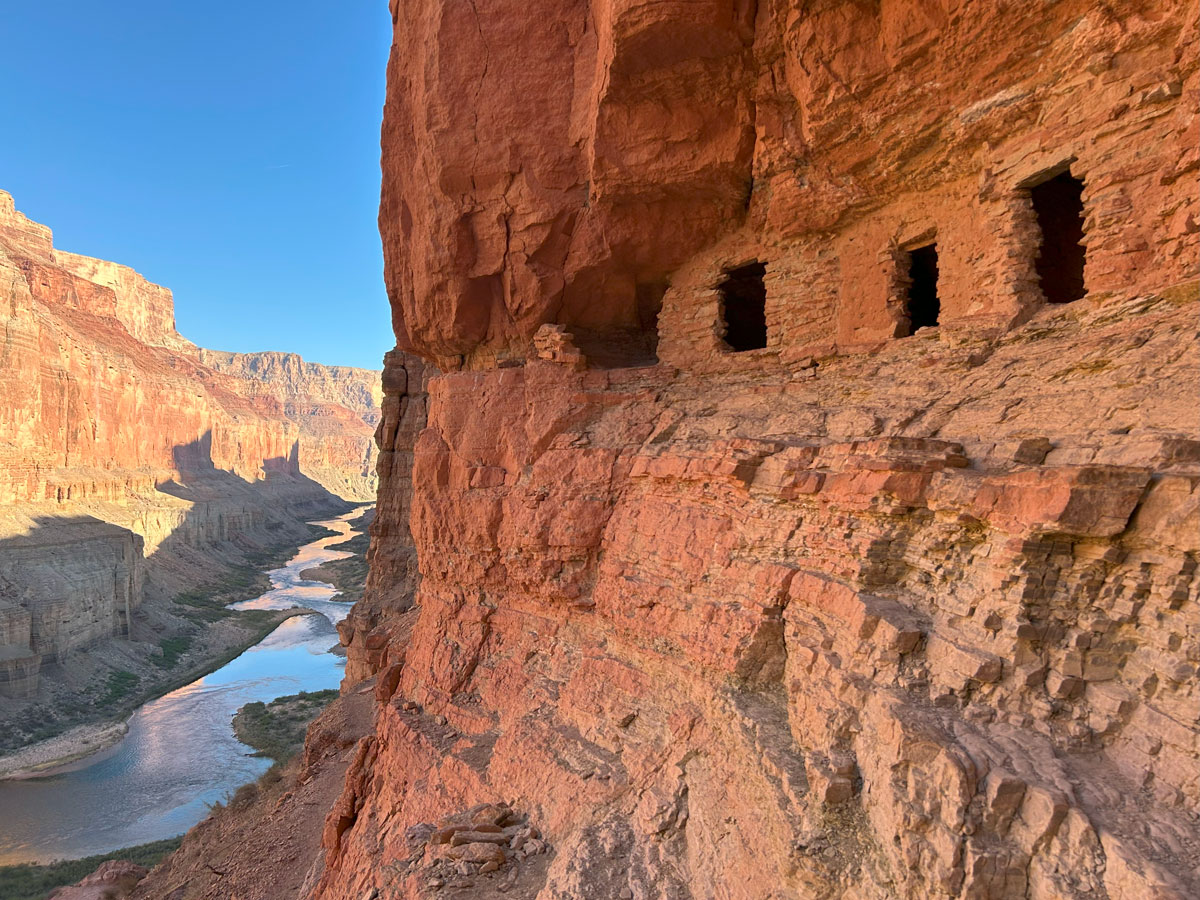
Nankoweap Granaries
One of the highlights of the Nankoweap Trail is the Nankoweap granaries that were built by the Ancestral Pueblo people hundreds of years ago.
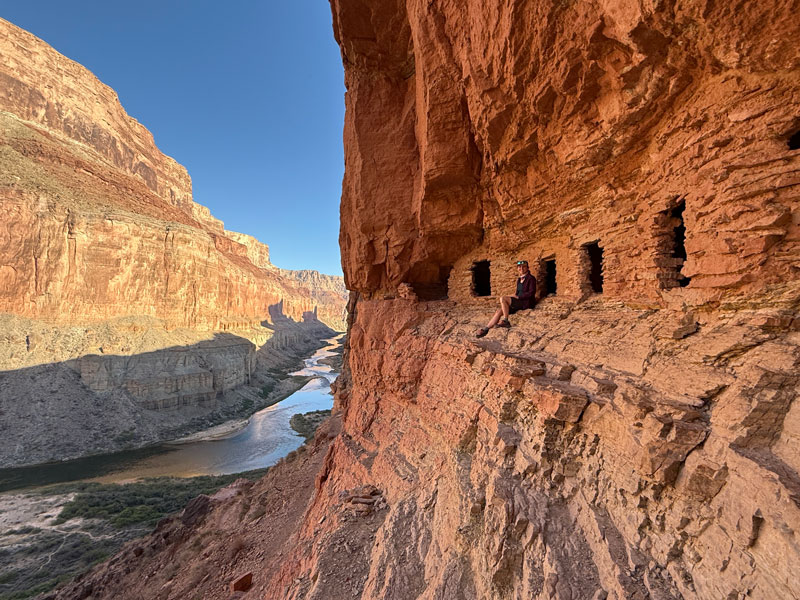
The hike up there is pretty steep, but it will be worth it when you are treated to one of the most sought after views in the Grand Canyon.
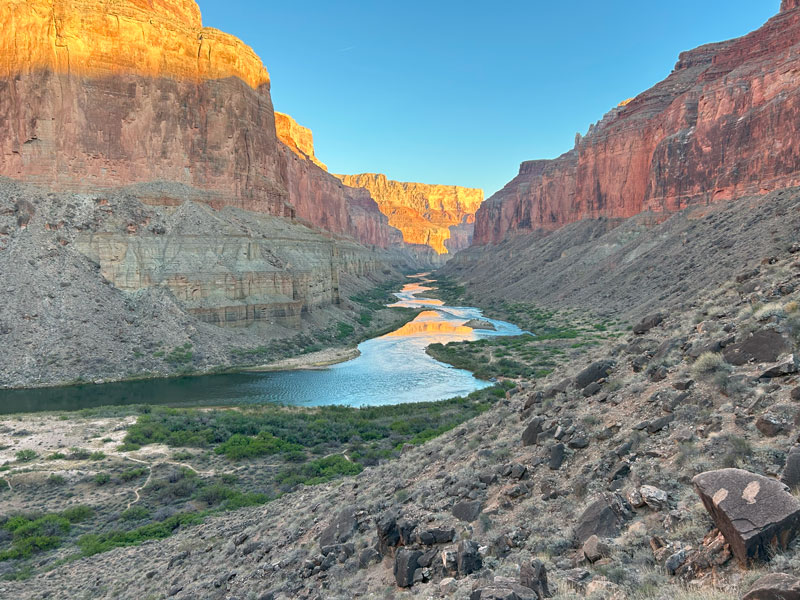
Lots of rafters also hike this trail, so you may have company, but it’s especially sublime if you can catch them at a time when you have them all to yourself. Sit there and take it all in, my friend.
Little Nankoweap Canyon
North of the main Nankoweap camp, you can get to Little Nankoweap Canyon. We had heard it was worth exploring the “narrows” there, but in reality it was not that narrow, and there was no water flowing while we were there. It was a lot of scrambling up and around boulder obstacles. Fun for those with a special kind of passion, but most of my friends tired of it quickly. The highlight of exploring Little Nankoweap Canyon is the small, beautiful beach at the mouth that may provide more solitude for you.
Interestingly, I noticed a trail marked on my topographical map called the “Little Nankoweap Route,” and I did come across a path and cairns as I explored the canyon. The map showed it going all the way to the rim, so I became curious about it. I found out later that a friend of mine had done it, and he said it was “an epic endeavor” with “lots of route finding and no water.” Just putting that out there for the extra adventurous among you.
Camping at Tilted Mesa
We spent just one blissful night on the beach, but I wouldn’t have minded more. The next day, we started early to try to avoid hiking in the heat of the day. We arrived back at Tilted Mesa in the afternoon and enjoyed the ever-changing shadows on the vast landscape before us.
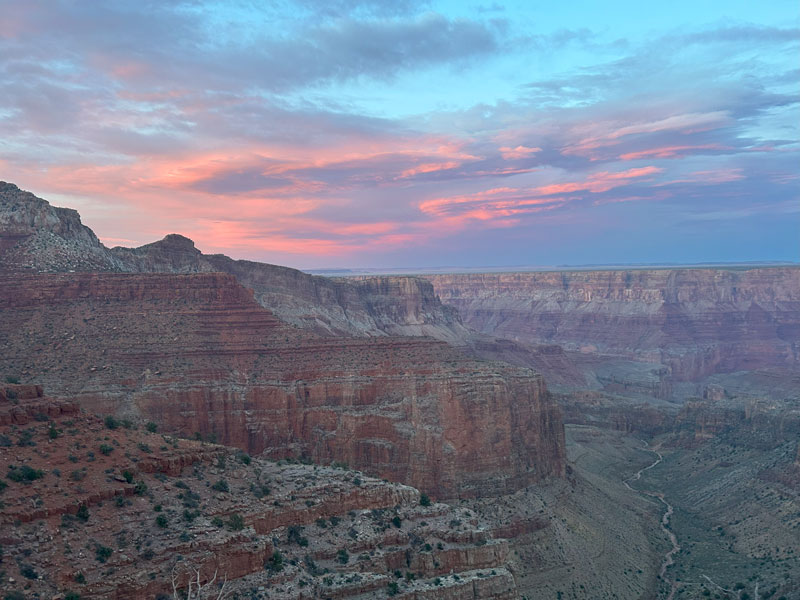
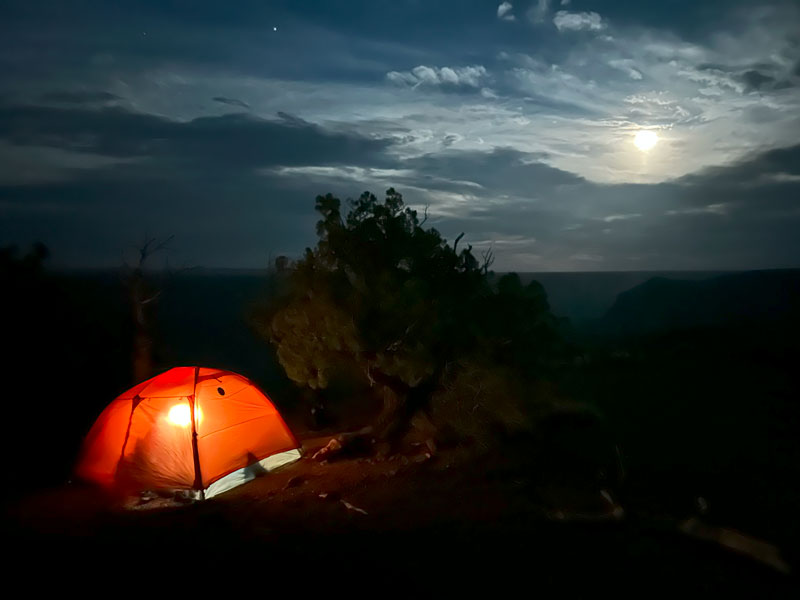
There were clouds building and lots of wind, and we hoped the wind would abate after the sun went down. It didn’t. At all. In fact, I think it got worse. The forecast had shown it would be more windy than our other days with gusts up to 30mph. Honestly, it felt like gusts up to 50mph.
Initially, we tried to set up tents at our site on Tilted Mesa, but after trying to hold the poles up to prevent them from snapping, we finally just gave up and removed the fly and poles completely. Our last night, we slept in flat tents with wind whipping all around us. I use the term “slept” very loosely. We might not have slept at all.
Despite the rough night, we loved our epic adventure at Nankoweap and 3 out of 5 said we would do it again. It might be too soon for the others. Give them time.
Map & Directions
Location Grand Canyon National Park, North Rim, Arizona
Google Maps Nankoweap Trailhead (lower trailhead), Saddle Mountain Overlook (upper trailhead)
Fees/Passes You must have a backcountry permit from Grand Canyon National Park to camp below the rim. You can join the lottery to get a time slot for early access to the permits. Otherwise, you’ll have to wait until the remaining permits are released. Visit Recreation.gov to get all the information about obtaining a permit. In addition, you will need to pay a fee for entrance into the park or use your America the Beautiful pass.
Trailhead Facilities None
Preview this Hike
Recommendations for you
Thunder River Deer Creek Loop | Grand Canyon
South Kaibab to Hermits Rest | Grand Canyon

Rim to Rim | Grand Canyon
Leave a Reply