La Barge Mountain
TRAIL STATS
Sure, La Barge Mountain is one of the tallest summits in the Superstition Wilderness, but there are so many more reasons to put this adventure on your list. You’ll find arches and caves along the way, as well as a cool rock ledge we dubbed “The Balcony” that makes a great place to eat lunch. Part of this route is off trail, but the route to the summit isn’t too difficult for an experienced adventurer. Once at the summit, most people will want to return the way they came. However, those who enjoy a grueling journey with downclimbs, loose rocks, and all kinds of sharp plants can make the somewhat treacherous journey to Triangle Arch.
Trail Description
The road out to the Woodbury Trailhead is in pretty good shape, and most vehicles with high clearance will not have a problem if it’s dry. From the parking area, you’ll follow an old road until you get to a windmill and water trough. That’s where you’ll pick up the JF Trail on your left.
JF Trail #106
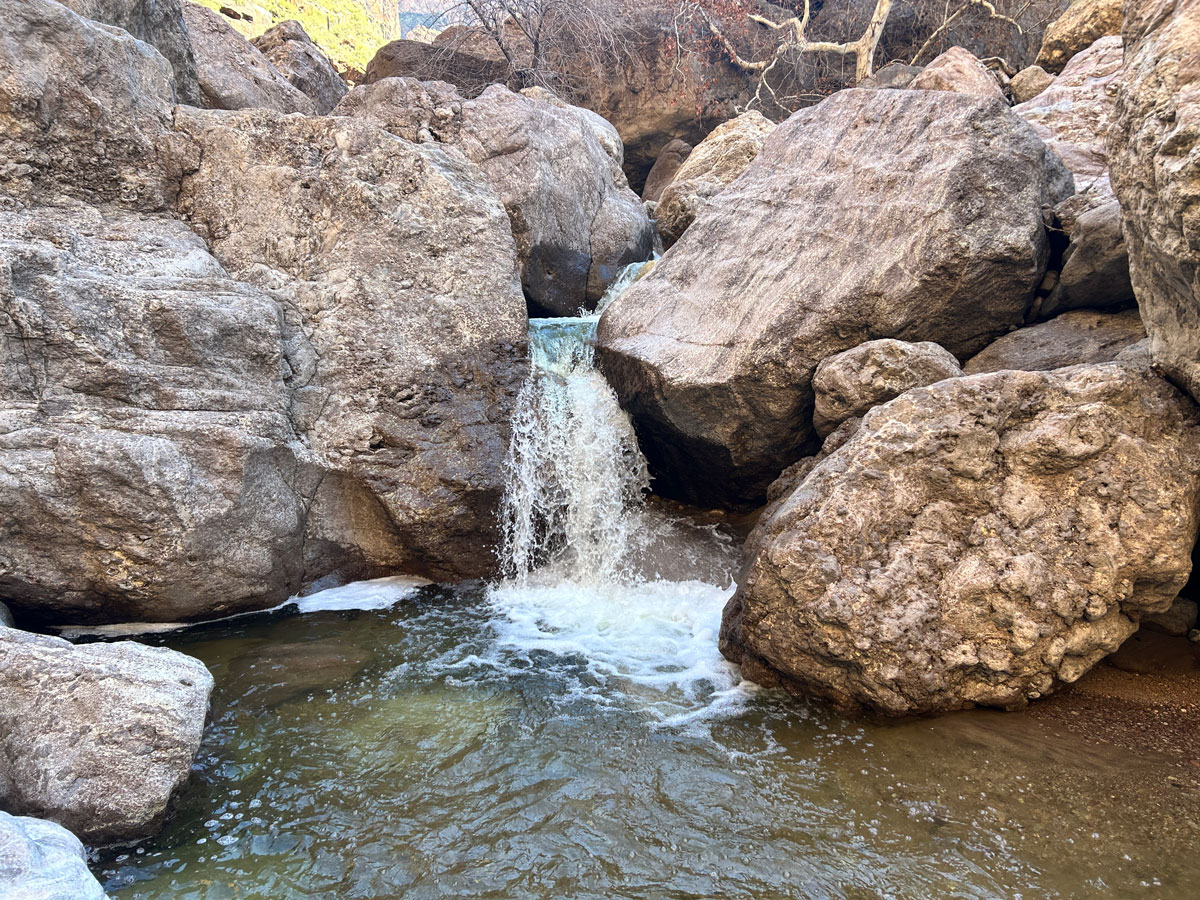
As you follow JF Trail, it’ll eventually cross a streambed that may or may not have water. You can pick up the trail on the other side, but we opted to walk in the streambed since our friend who had been there before said there was a lot of catclaw on the trail. The trail and the streambed will eventually cross again, and that’s where you’ll continue on the trail toward Tortilla Pass.
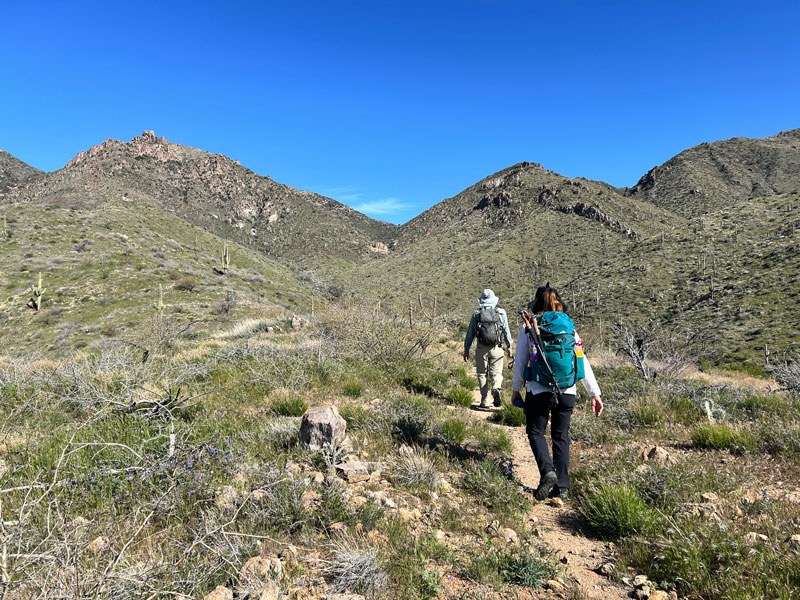
This part of the trail goes up a gently sloping ridge that looked so peaceful and beautiful covered in wildflowers fluttering in the breeze. It wasn’t fooling me, though. Last time we attempted this hike, we faced high winds that tried to knock us right off the edge of what we now call “Hurricane Ridge.”
Off Trail Section
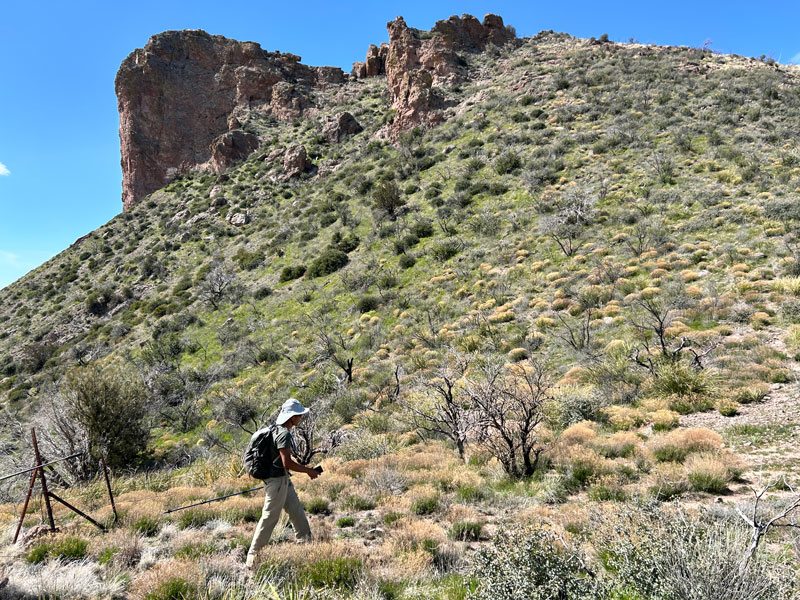
When you arrive at the sign that marks the junction with Rogers Canyon Trail, it’s time to leave the security of the trail. Adventure time, baby! Luckily, there’s a fence that you can follow to stay on the route.
You’ll start out going slightly uphill, and then you’ll go down again only to go back up. It’s best if you just get used to that idea now because the summit ahead ain’t it, either.
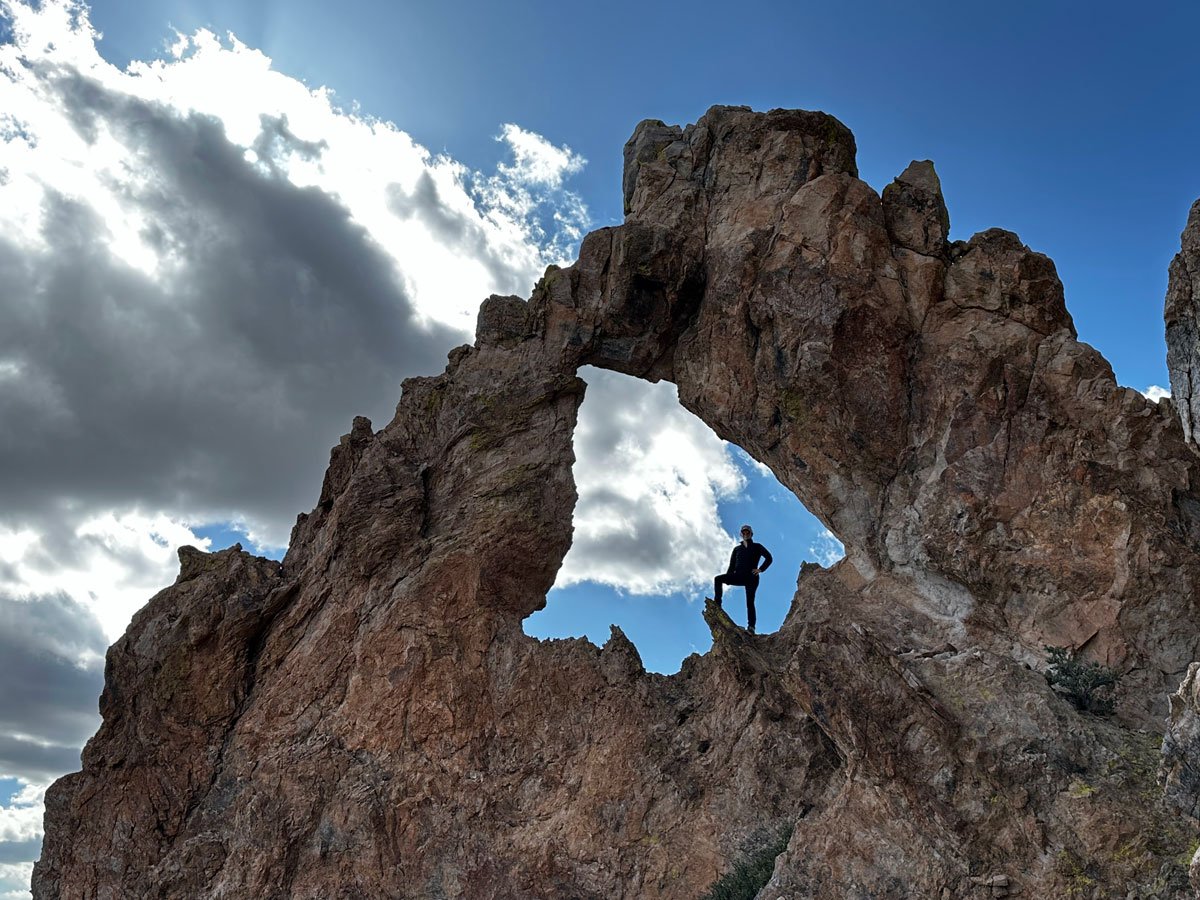
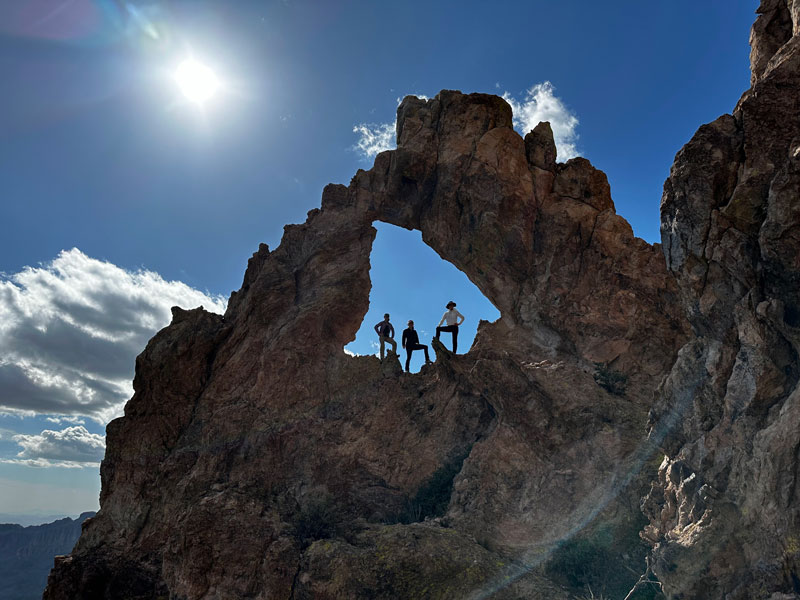
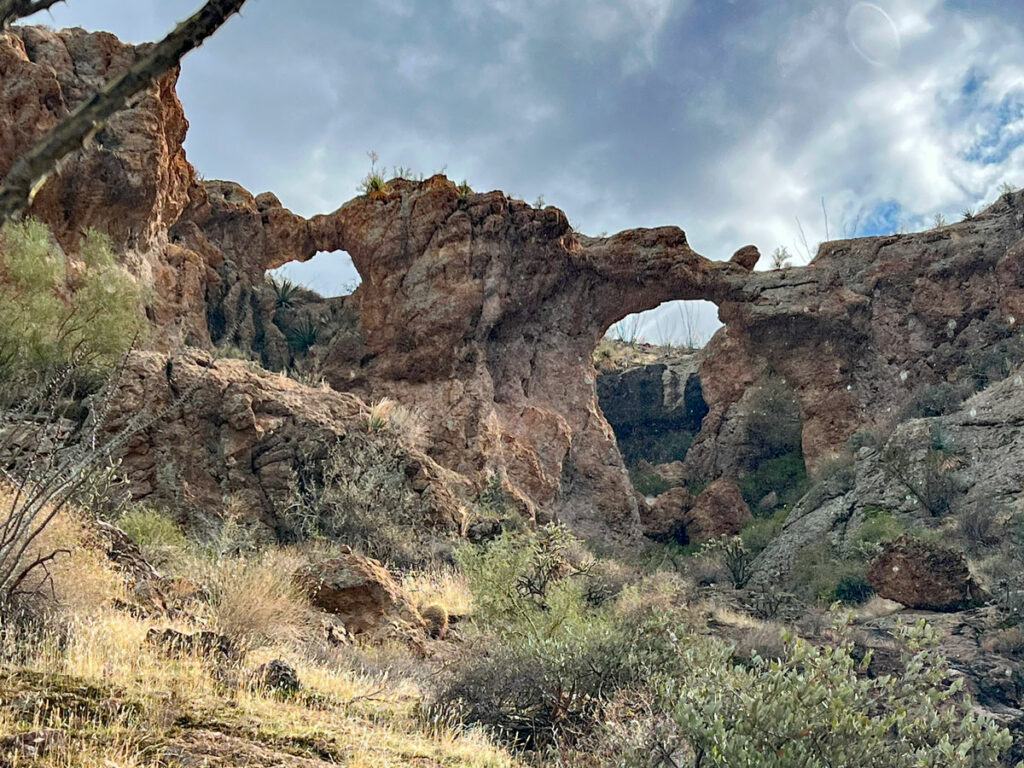
Sunrise Arch
Take heart, though. That rocky outcropping near the top is home to your first arch, which our friend, Justin, calls Sunrise Arch. He says if you got there in time for the sunrise, you’d be able to watch it through the arch.
We got there a little late for that.
The Balcony
Keep going to the other side of the summit to find the entrance to “The Balcony.” I did my best to mark the entrance on the map, but you may have to explore around a bit to find the tunnel that leads to this special place. Hint: look underneath the massive boulders.
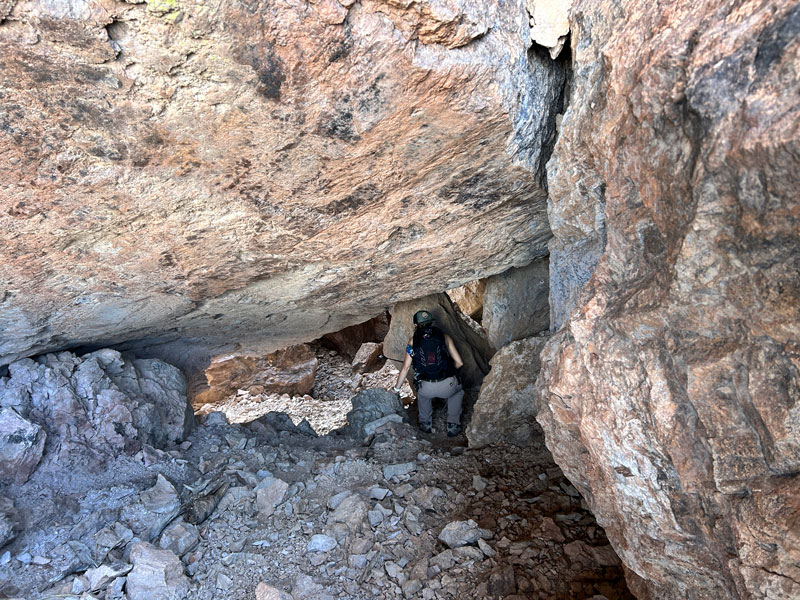
You’ll slip and slide your way down these loose rocks only to find yourself walking out onto the most unique, hidden rock ledge.
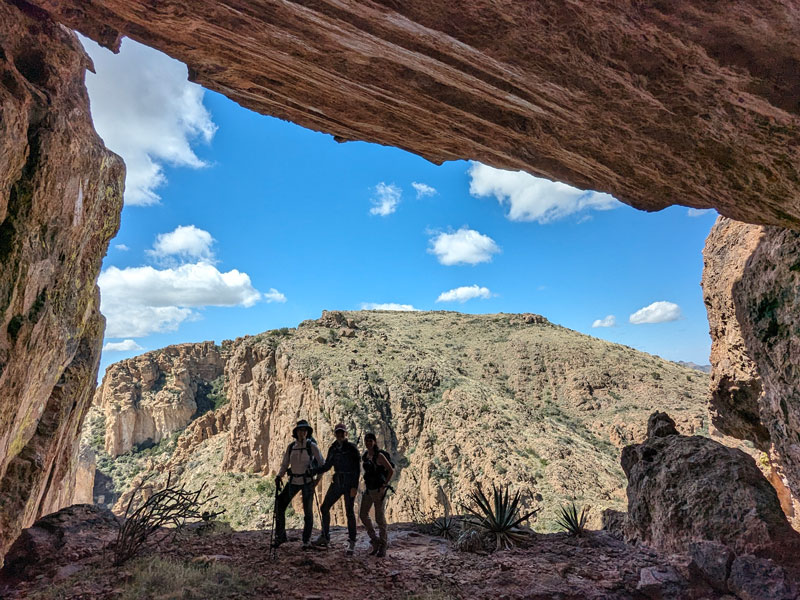
Go ahead, dangle your feet over the edge (at your own risk!), eat your lunch, and enjoy the view. That mountain up in front of you? La Barge Mountain summit.
Yep, you gotta go down and back up again.
Return to the route by climbing back up the slippery, slidey tunnel. What? My spellchecker is saying “slidey” is not a word. It’s never been to La Barge, obviously.
We found another arch along this next section that we called “Pig Arch,” and you can slither underneath its belly if you so choose. Watch your heads and your knees on this one, it’s gonna be a little bit rough.
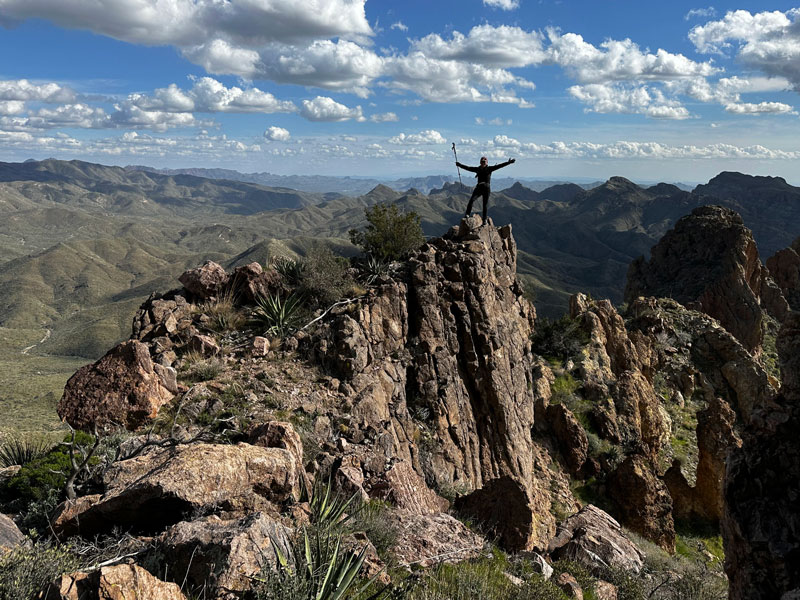
La Barge Mountain Summit
Once you go down and back up again, you’ll find yourself on the summit of La Barge Mountain. The top itself is nothing special, since it’s sort of flat and wide, but those views from the top are stellar!

When we were there, there was a sad little crumbling plastic container holding the summit register. It was falling apart while we were trying to open it, so if you have the chance to replace it, please do!
Most hikers will want to turn around here and go back the way they came.
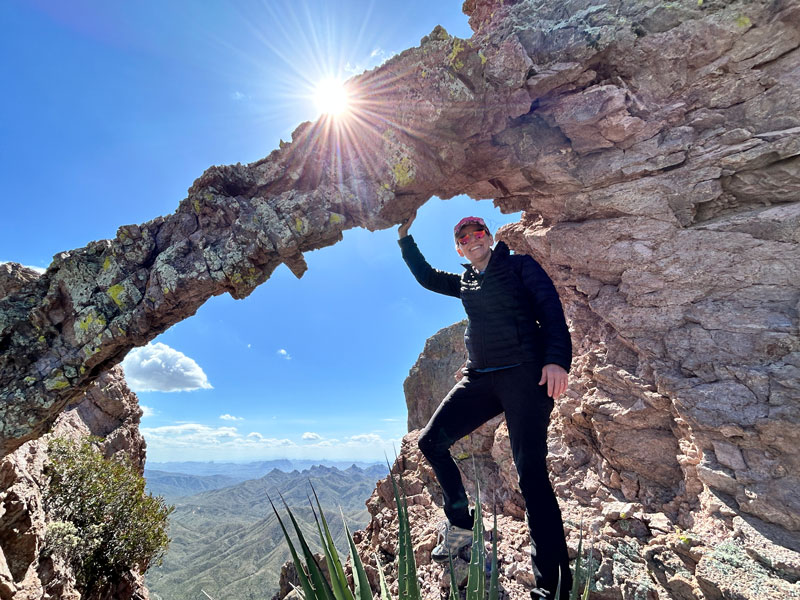
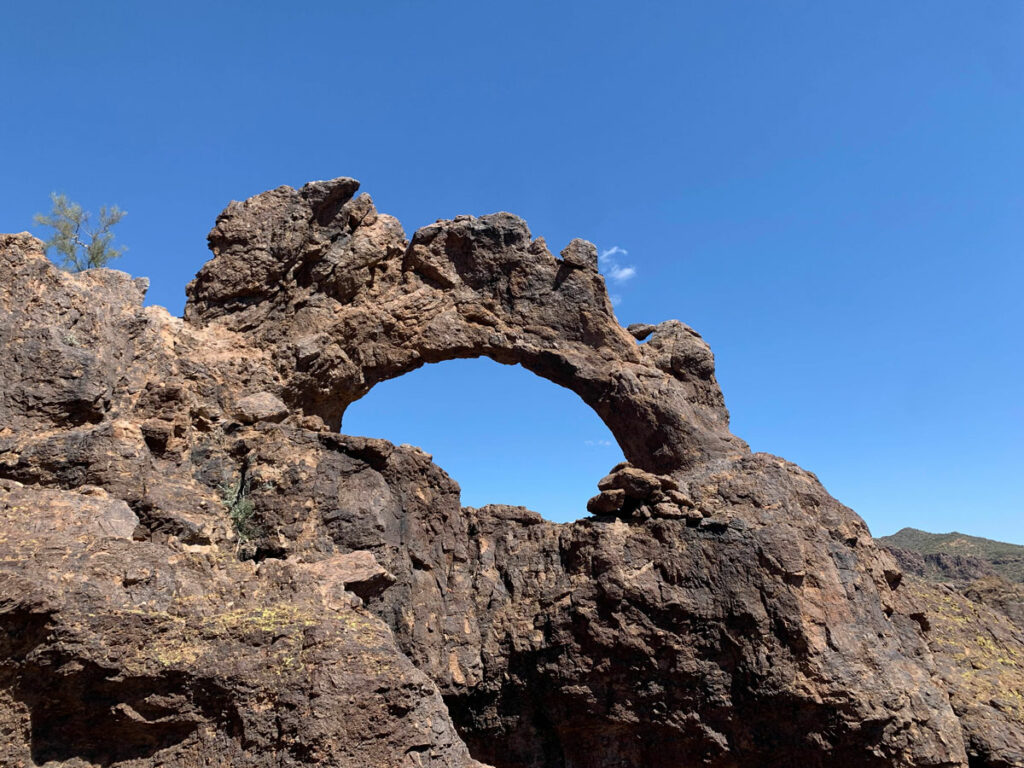
Optional Loop to Triangle Arch
Now this is where I have to get real with you. Our friend, Justin, told us that Triangle Arch would be the highlight of our hike, so he wanted to take us on a loop that would visit the arch on the way down. Don’t get me wrong. Triangle Arch, which sits perfectly perched atop the ridge, IS a very special place, but it’s not going to be easy to get there. You’ll face very challenging terrain that includes sketchy downclimbs, loose rocks, and so many pokey plants. If that sounds fun to you, go for it. Otherwise, turn back.
Additional mileage -0.6 (it’s actually shorter)
Additional elevation 30 feet
Don’t let the stats fool you. It most likely will take longer than going back the way you came. The GPS track I provided is just a general guide. It’s up to you to find a reasonable way down that’s within your ability level.
So, you’re still going for it? Okay, game on. From the summit, continue to the other side where you will see a canyon dropping in front of you if you look toward the southwest. You can see some interesting looking caves on the far side, but we didn’t visit them.
Triangle Arch lives on the rocky peninsula, if you will, that sticks out between this canyon and the one to the left of it (as you look down canyon). Your job is to find a way to get down some of these rocky outcroppings to access the arch. Justin told us it was going to be horrible, and that says a lot coming from him. The going is just really difficult and slow.
But, if you do make it down and around, you’ll find Triangle Arch there, perfectly perched upon a little ridge.
It’s a little bit of a scramble to get up inside, but worth it! Adjacent to the arch is a small cave to explore with lots of animal droppings inside.
And there are plenty of great photo ops if you look around.
Now, the bad news. You’re not done with the hard part. You’ll continue downclimbing, finding the path of least resistance until you get down below the rocky area onto a slope. Follow the slope down whatever path seems best back to the drainage. Once there, you can take a little sigh of relief because now it’s just an easy hike back to Woodbury Trailhead. You did it, you crazy animal!
Map & Directions
Location Superstition Wilderness, Apache Junction, Arizona
From Apache Junction, head east on US60 to Queen Valley Road and turn left. Then turn right on Forest Road 357 (aka Hewitt Station Road). This road is dirt, but not too bad. After 3 miles, you’ll turn left onto Forest Road 172 (aka Hewitt Canyon Road). After 10.7 more miles, bear right onto Forest Road 172B for a short distance to Woodbury Trailhead.
Fees/Passes None
Trailhead Facilities None
Preview this Hike
Recommendations for you
Fish Creek |Superstition Wilderness
Crucifix Canyon | Superstition Mountains
Triple Arches Loop | Goldfield Mountains
Leave a Reply