Illusions Canyon
TRAIL STATS
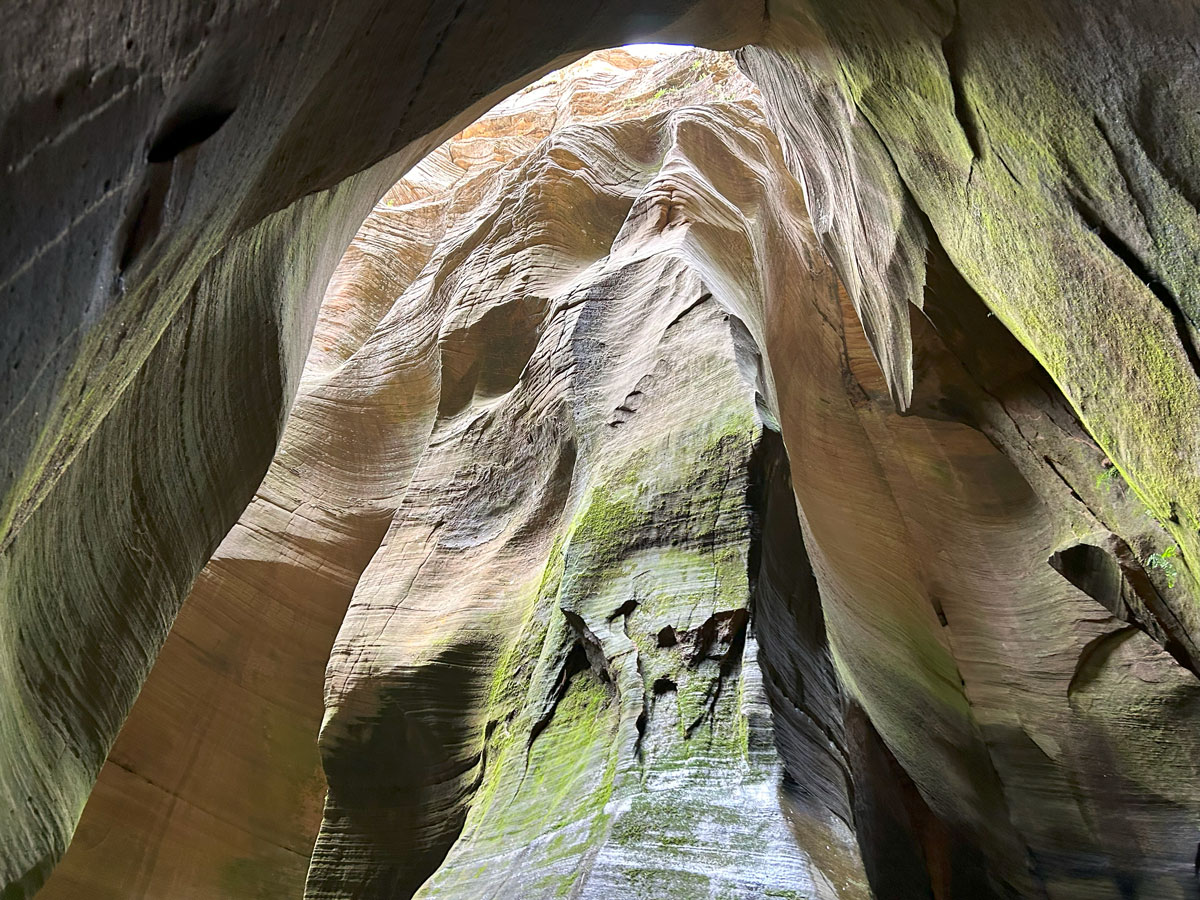
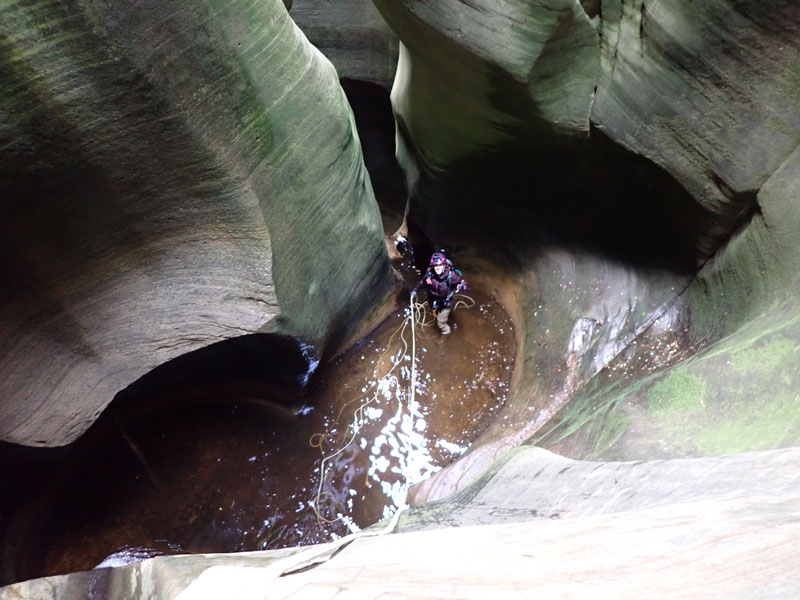
Illusions Canyon is one of the most stunning technical slot canyons in Arizona. With masterfully carved sandstone narrows, moss-covered walls, pools of water, and delicate beams of light highlighting the magnificent formations, you’ll be in awe from start to finish. This kind of beauty comes with a price in the form of physically demanding obstacles including rappels, slides, drops, downclimbs, and more. Because of constantly changing conditions, canyoneers entering this canyon should have plenty of experience, check the weather for rain, and be well prepared to face challenges both known and unknown.
🪢 This is a technical canyon with approximately 10-12 rappels up to 100 feet. You will need one 200-foot rope, plus all the required safety equipment for rappelling and knowledge how to use it. This guide is not intended to provide instruction on how to descend a technical canyon safely.
Trail Description
Illusions Canyon offers one of the most stunning slot canyon experiences anywhere in Arizona. This is definitely a canyon to put on any canyoneer’s bucket list, but the beauty of a water-sculpted canyon always carries with it some safety considerations that are important to keep in mind.
Safety considerations
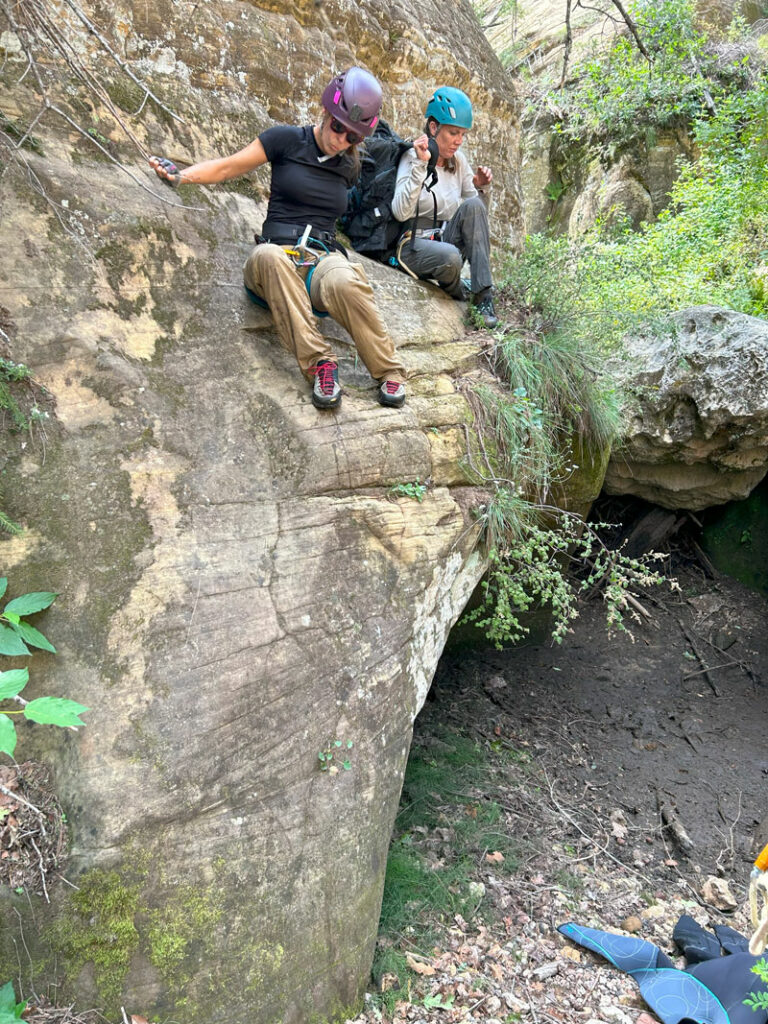
Illusions Canyon has numerous rappels, downclimbs, slides, swimmers, and other obstacles. Because of this, it’s very difficult to document every situation you will face. To successfully complete this canyon, you should be comfortable with the following:
- downclimbing, including chimneying to lower yourself
- using friction to control your speed on slides into shallow water
- dropping short distances into pools of water of various depths
- rappelling in slippery conditions
- getting off rope in deep water
- swimming in deep water with your gear
- climbing out of deep potholes onto ledges
- using partner assists for downclimbs
- escaping potholes (in low water conditions)
Low water
In low water conditions, this canyon is prone to developing keeper potholes, and this guide does not specify all the places where this is possible. If you are unsure of water levels, make sure your team has the skills and equipment necessary for pothole escapes. The last pothole can be particularly difficult because the ground on the other side is flat, and a potshot is unlikely to work. We have heard that a hook and etrier is a good choice. However, we have always descended this canyon when all the pools were full, and we recommend this option for safety and enjoyment. For best conditions, choose a warm day in summer when there has been recent rain but there is no chance of rain for that day.
Flash floods
Flash floods are possible in this canyon, so always check the weather. Because water regularly flows through the canyon (and is responsible for its beauty!), canyon conditions are constantly changing.
Changing conditions
Flash floods can wash away anchors or move rocks and log jams. We also found rappels where the webbing was removed, and you will need to build a new anchor, downclimb, or use a ghosting technique. As such, the rappel numbers should be used as an estimate because you may have more or fewer than the ones listed here. This list is just to give you an idea of the number and types of rappels so you can keep track of your progress down the canyon. Be prepared to face situations that may not be described in this guide.
Water temperature
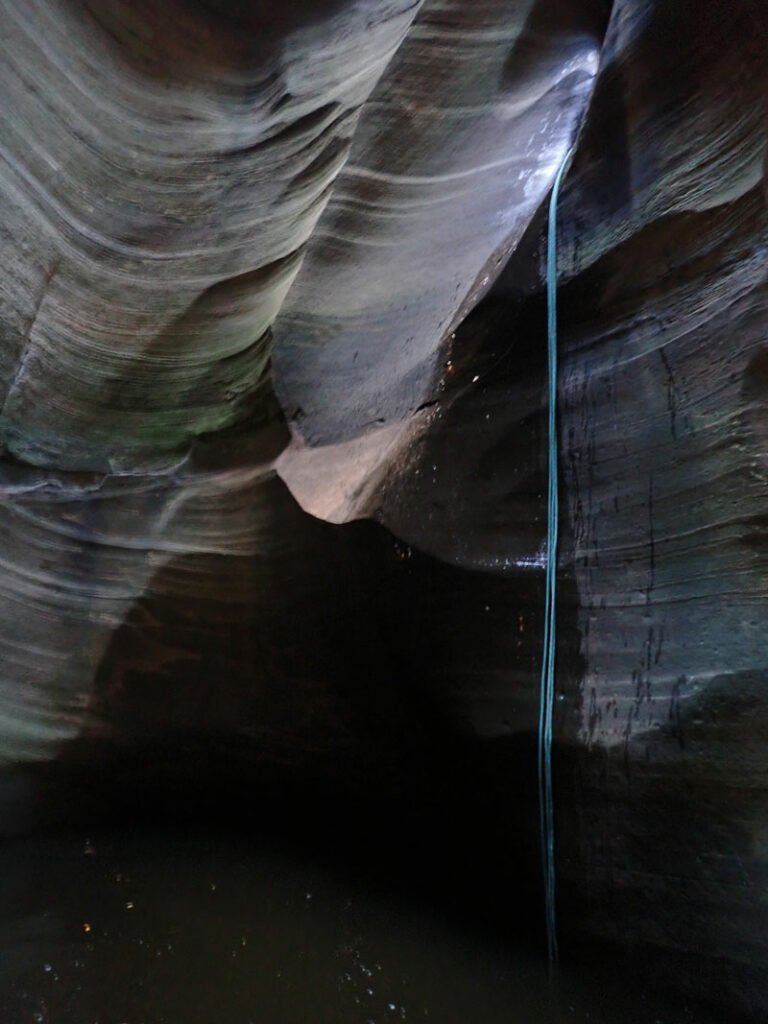
Most of this canyon is very narrow, so the water doesn’t receive much sunlight. The water is cold at all times of the year. We went in the summer, and recommend the following:
- full wetsuit, either a full 3-5mm or a 3mm with a 2mm shortie on top
- neoprene gloves
- neoprene socks
- neoprene beanie, although my head never went under
- rain jacket
- rain pants
We get cold easily, and we had minimal shivering with this gear. If you don’t get cold that easily, you could get away with less, but definitely a full wetsuit and neoprene socks at a minimum. In colder weather, a dry suit or thicker wetsuit may be appropriate.
I promise, I’m not trying to scare you. I just want to make sure you understand the types of challenges you may face here and that you are confident you have the skills and equipment to have a safe and enjoyable descent. This is one of the best canyons I’ve been to in Arizona, and those who are ready for it will have an incredible experience to remember for a lifetime. Now, let’s get to it. Rope!!
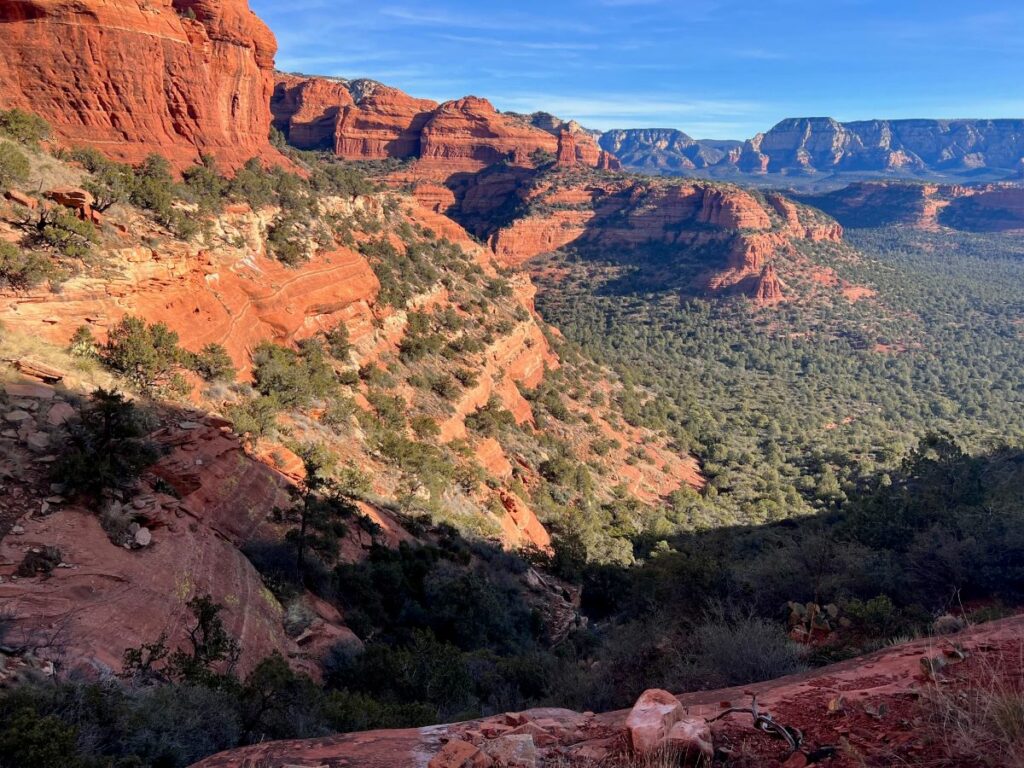
Approach
The roads to the parking area are generally in pretty good shape, though bumpy, and most high clearance vehicles can get there in dry conditions. Near the end, it gets narrow, and you may have some mud puddles to get through. We used 4WD for the mud.
From the parking area, follow the GPS track to the drop-in point. We had a Garmin casualty recently, so we had to depend on phone GPS, which we weren’t used to. As a result, we missed the drop-in point and ended up starting at the head of the canyon. DO NOT do this. The plants here are straight from hell, covered in small thorns ready to tear your flesh. Okay, maybe not as bad as catclaw, but bad.
Sneak Approach
Optionally, there is apparently a sneak approach developing where you can drop in even farther down canyon and avoid the horrible bushwhack. We haven’t tried this approach, but you better believe we will be trying it next time. The coordinates posted on Ropewiki for this approach are 34.98639, -111.77142. If you do the sneak approach, let us know how it went in the comments!
Descent
Important note Rappel numbers listed below are only an estimate. You may encounter more or fewer rappels on your adventure, but hopefully this list will help you keep track of your progress through the canyon.
Once down in the canyon, keep following the drainage down canyon, sticking to the social trails that have developed whenever possible. You’ll eventually come to a cliff edge. We have heard you can downclimb this part RDC, but we rappelled both times we have been here.
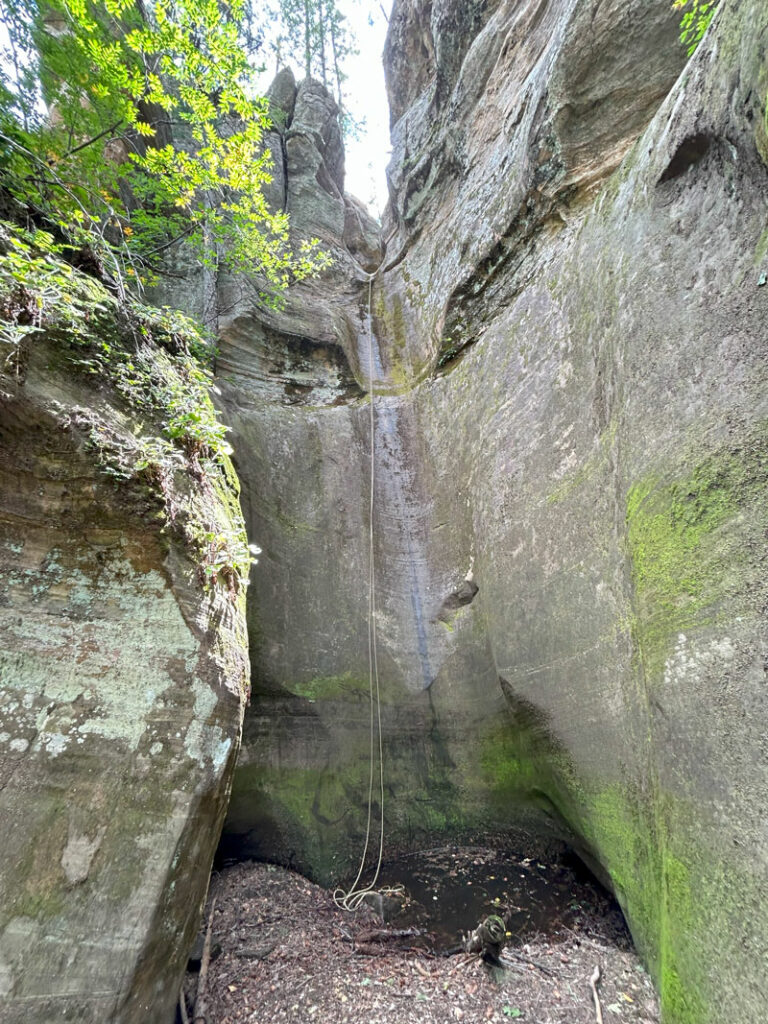
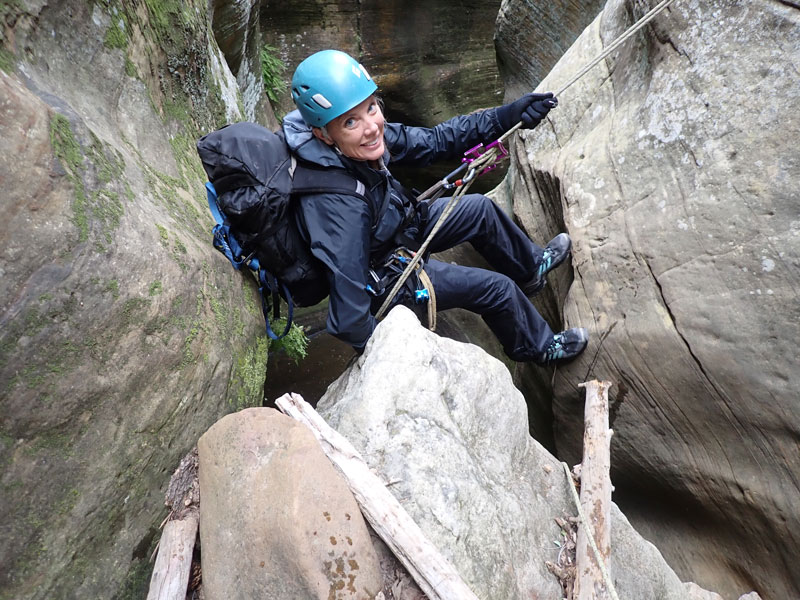
Rappel 1
Three-tier rappel from tree LDC
There is webbing around a tree LDC right at the point of the drop into the first pool. Rappelling from here will force you to go down to the pool, which can be avoided with some fancy footwork. Then there will be another drop into another pool, which can also be avoided with even fancier footwork. Then you’ll go over one more lip down a smooth and slippery chute.
When we did this canyon in 2021, there was an anchor on a tree farther RDC, almost to the cliff edge. There was no anchor on that tree this time, but rappelling from that location will allow you to bypass the pools and go directly to the chute.
Continue down canyon until you reach a sign with a register inside an ammo box. Sign in and read the warning information on the sign.
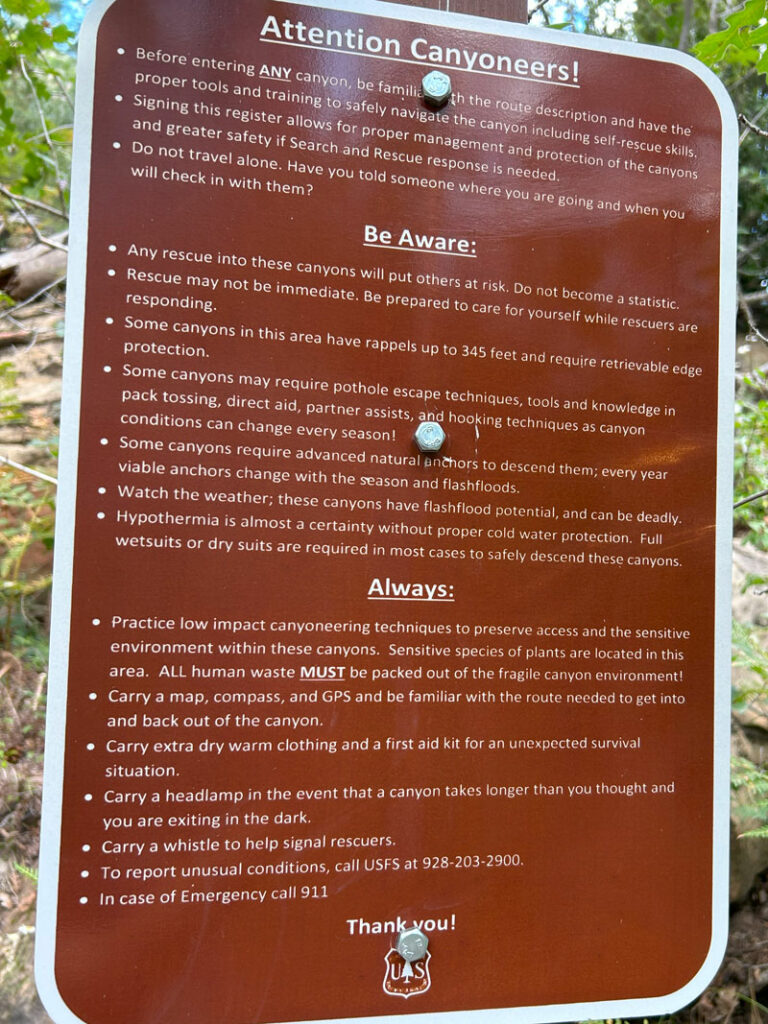
Actually, read it now because by the time you get there, I know you aren’t going back for anything. PS – I hope you remember to go #2 long before you get to this point. The canyon doesn’t need any extra logs.
As the canyon begins to narrow and deepen, you’ll encounter a few downclimbs.
Did I mention not to wear your best pants? Fawn’s pants will never be the same after she slides down this part.

Rappel 2
Tree LDC
This rappel had an anchor when we ran this canyon in 2021, but this time it wasn’t there. We did a meat anchor for everyone except the last person who downclimbed with a partner assist. Be prepared with a plan in case there is no anchor.
After this rappel, the pools become more frequent, and you’ll soon have to commit to getting your feet wet. No, don’t try a sketchy bypass—just get in! You have to do it pretty soon anyway.
Rappel 3
Bolt RDC into a shallow pool
Right before this rappel is where we ate lunch and changed into our wetsuits. The water is pretty constant from this point forward.
Rappel 4
This rappel is immediately after rap 3.
After rap 4, you’ll walk through some marshy areas for a while. If you’re leapfrogging ropes, just know there’s a bit of a walk before rap 5.
Window Arch
Next, you’ll have to go through some slippery chutes, skinny slides, and a cool window arch.
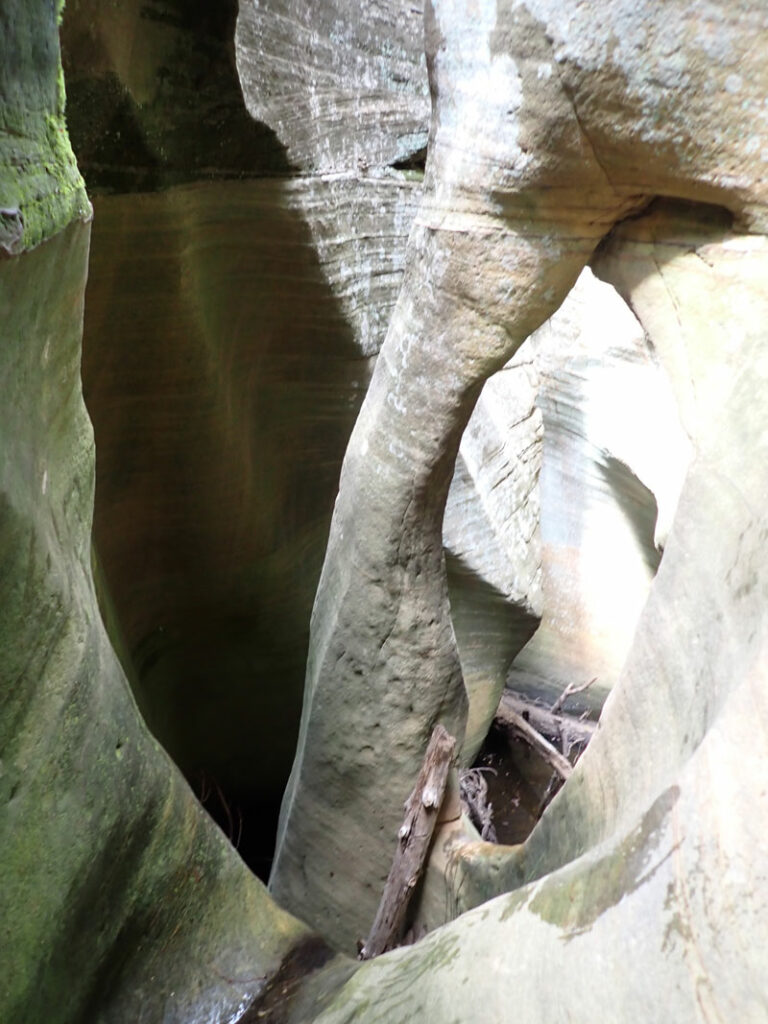
A chasm with a chute heading down left separates you from the window. The strategy with this one is to step over into the window and then downclimb the slope on the other side. It can be tricky for those with short legs.
This is soon followed by a small corkscrew slide.
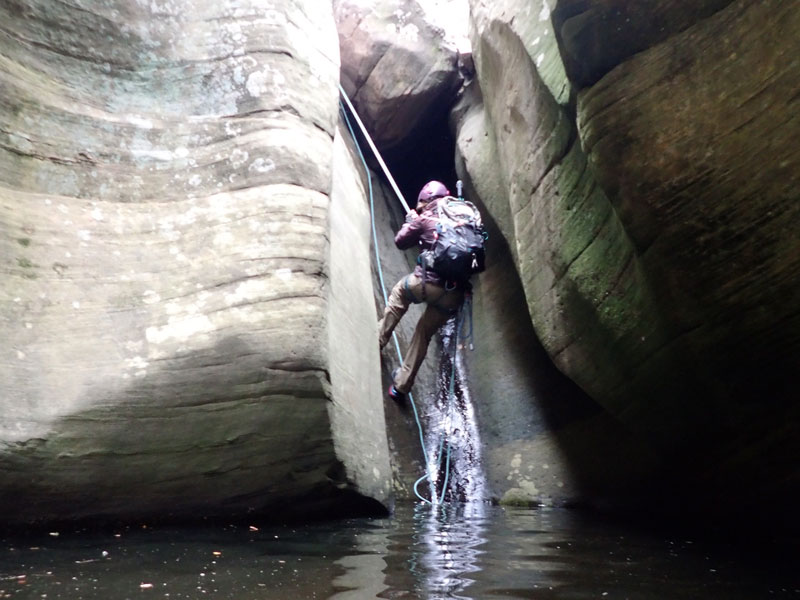
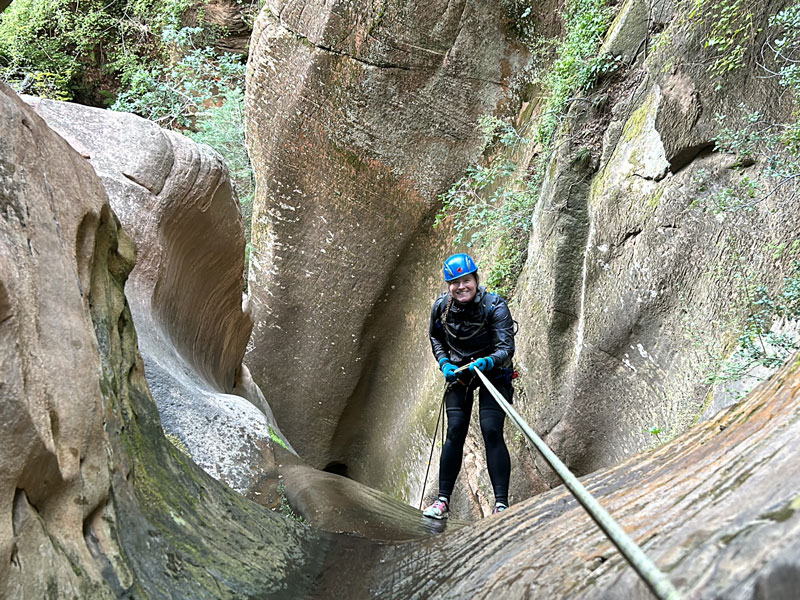
Rappel 5
Bolts LDC
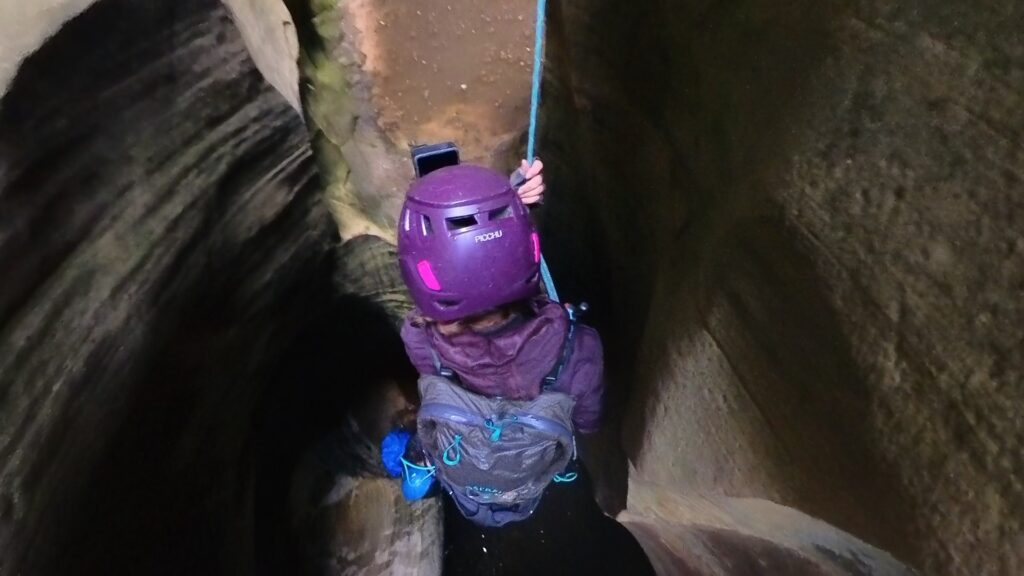
You have the option of going through the “birth canal” on this rappel, which we highly recommend. Then walk through a pool and through the little mouse hole arch.
(Picture is from our previous trip in 2021)
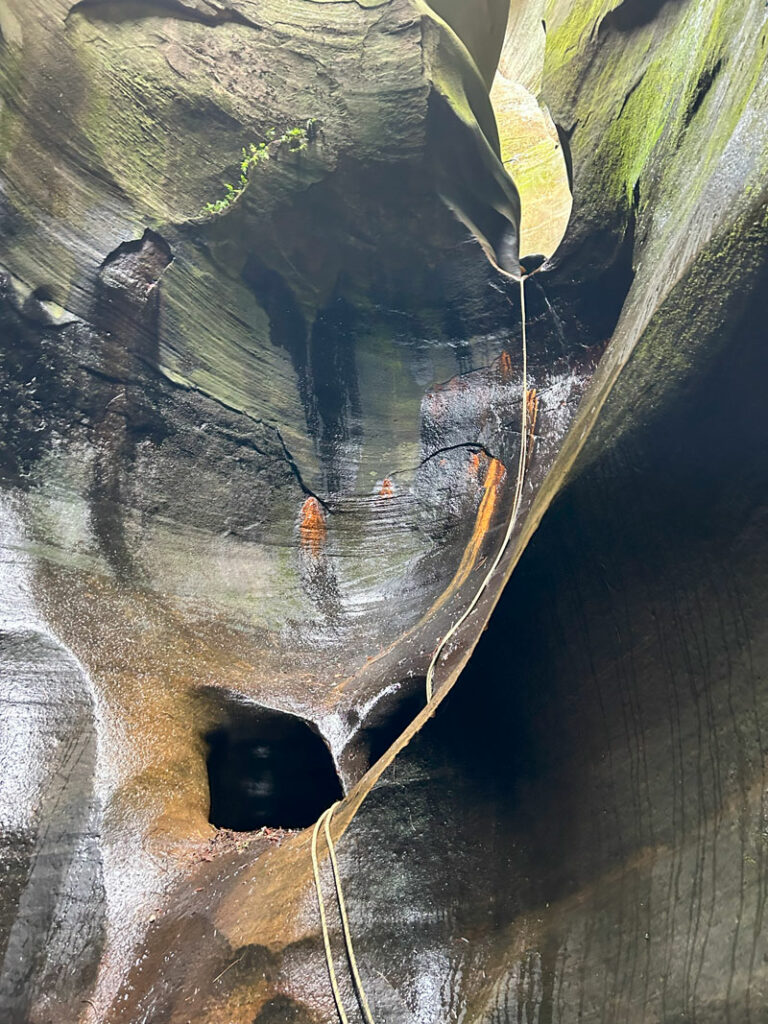
Just before rappel 6, there is a log jam. We downclimbed the log jam this time, but in 2021, there was an anchor there that Hillary turned into an awkward rappel where her foot got stuck at the top. Since logs can move around, be prepared for anything.
There is not much space to stand at rappel 6, so if you have more than two people, have some of them wait at the top of the log jam or on the logs.
Rappel 6
Two bolts LDC
This rappel follows a chute for a short distance, then curves to the right where you’ll go over the right side and rappel down the other side.
Rappel 6, continued
Go through the notch to continue down the second tier. The most memorable part of this rappel was Heather’s foot getting stuck in the notch and ending up above her head (she didn’t want me to show you).
On the way down this rappel, there are a couple potholes on the ledge to get past. Then continue down the slippery chute. Once in the pool, go over a lip into the next shallow pool.
This is one of the most beautiful spots in the canyon, so don’t forget to look up!
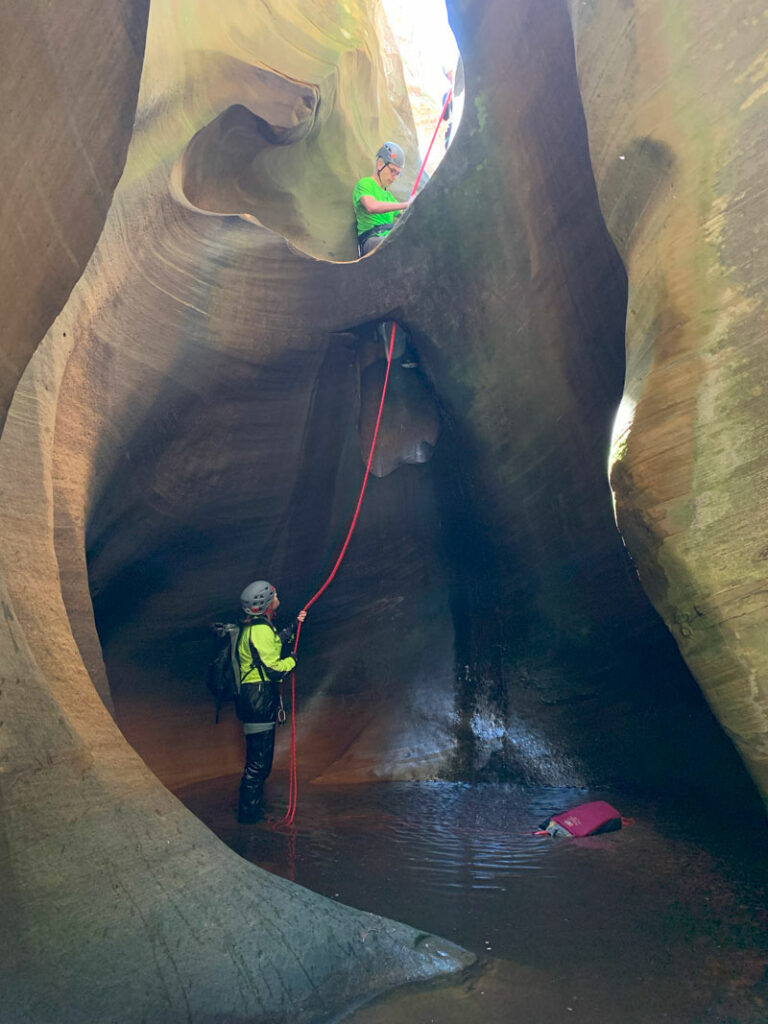
Rappel 7
Log in the watercourse
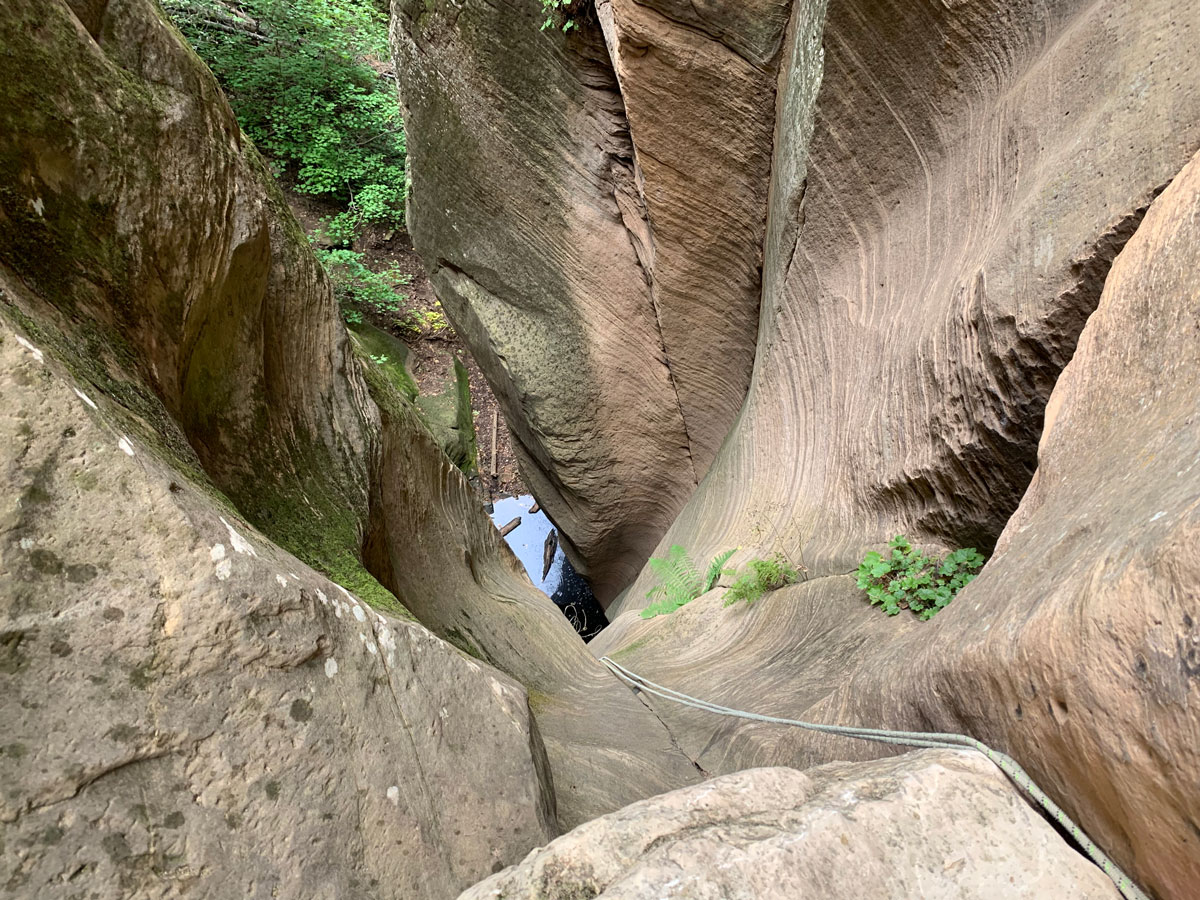
This rappel starts at an awkward log where you’ll have to maneuver around it as you go down. Once in the pool, go to the other side and heave yourself up onto the lip of the next opening. Note that this could be a keeper in low water conditions. Then continue your rappel down into the next pool. After that, there is another opening where you can continue your rappel to a third level. The only problem with this is that it can make the pull difficult since the rope will be going around a couple corners. Our rope pull was going fine for a while and then suddenly got hopelessly stuck. Because of this, we recommend having everyone except the last person rappel down all three levels. Then the last person can rappel down two levels, pull the rope, and get an assisted downclimb for the last drop.
The canyon looks like it will start to open up soon, and depending on water temperatures, you might be excitedly thinking you’re almost done.
Rappel 8
Honestly, I don’t even remember this rappel, but now that I’m reviewing the video, it seems like it must exist. Looks like a very short drop followed by a lip that drops into a pool. If you don’t want to wait in a cold pool for your turn on rappel 9, you might want to wait before dropping in.
Rappel 9
Two bolts and chains LDC
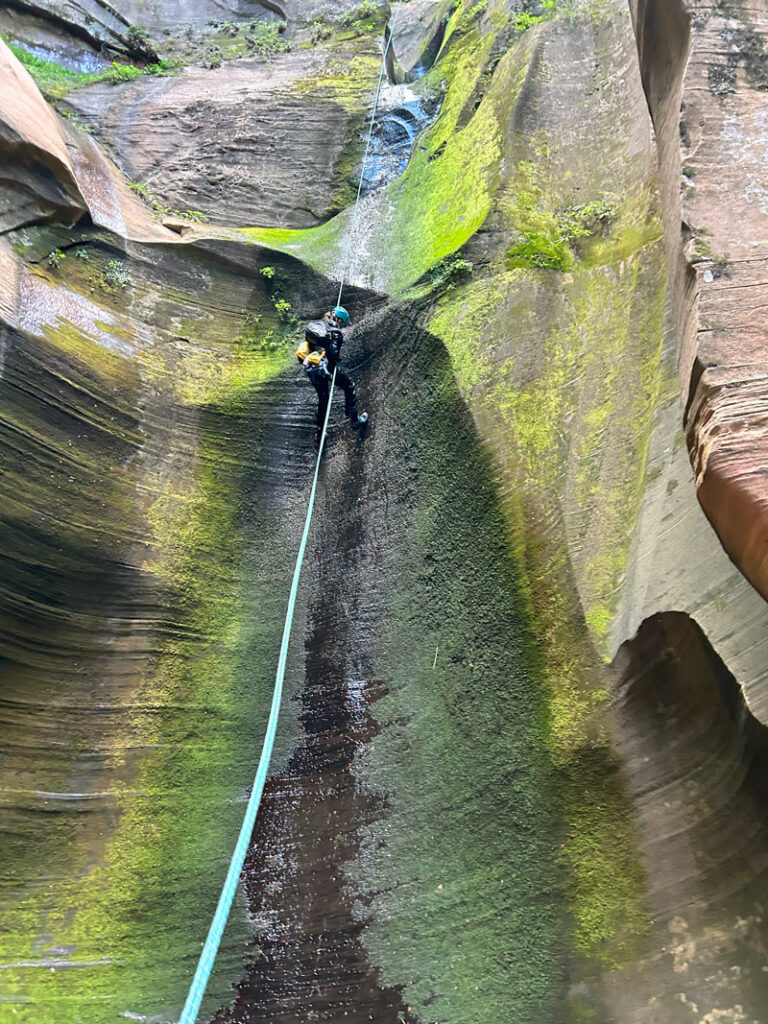
A few of us have made this rappel look really ungraceful (not naming names). The rock is very slippery, and chances are good you could end up on your back or your side or anywhere besides your feet. There is a small ledge where you can stop part way down and get yourself right. You also might enjoy a shower from your friends who are jumping into the pothole above and sending water down the chute. From this ledge, I tossed the rope down the rest of the way and heard it splash in water below, which reassured me it was at the bottom. This rappel is long, but a 200-foot rope on a double strand will get you there.
Now, the end of this rappel feels like it could be the end because you’re out of the narrows and maybe feeling some sunlight if you’re lucky. We made the mistake of celebrating a tad too early. Remember, if you’re not rappelling into a swimmer, you’re not there yet.
A little past rappel 9, you’ll enter more narrows, and you’ll probably be less excited this time because you’ve been cold a while now and you have to slide into a chest deep pool again.
Rappel 10
Boulder in the watercourse
Again, there is limited space to get out of the water before rappel 11, so if you have more than two people, you may want to have some wait at the top of rappel 10 while the last rap is being rigged.
Rappel 11
Two bolts RDC
This is it! The grand finale! You’ll rappel down a short distance before the rappel becomes freehanging for a short time. Then you’ll get back on the slippery watercourse for the remainder of the rappel.
At the bottom of this rappel is a potential keeper. When the canyon is full, the water can be several inches above the lip. The water was about 8 inches above when we were there, so we simply climbed on top of it.

Once you finish this rappel, you can go ahead and gear down. We left our wetsuits on, thinking they would keep us warm. Mistake! Not only did they keep us too warm on that strenuous exit hike, but you know those exercise bands at the gym? Yeah, it was as if we had like 10 of those on our body at once, and we had to work extra hard.
Next time, no.
Do eat a snack because you’ll need a little energy for what’s coming next.
Sneak Exit
Immediately after the last rappel, begin looking for a social trail that heads off to the right. Don’t try to follow the GPS track precisely. You’re better off on a worn down trail than on the exact GPS route, which might not be super accurate.
Also, if you use our track, I’m just saying we did the best we could. One way or another, you need to get up that drainage, so find the path of least resistance. It has a good amount of wear on it at this point, so you should generally be able to follow it.
But dang it, that rim looks so far away and so high up. It is. I’m not going to sugarcoat anything about this exit. After a long day of canyoneering, it kinda sucks. You’ll be using your hands to help climb over boulders and logs. There will be rocks that want to slide out from under you and smash your friend’s fingers (don’t follow too closely). It’s not the worst exit, but it can definitely crush your spirit just a little bit. Hopefully you fooled your canyoneering friends into carrying the rope bag.
At the top of the main climb is a saddle. From there, it gets a little less steep, but you’re not done with the climbing. Near the top, there’s a lot of deadfall, so whatever forest road that used to be there doesn’t seem to exist anymore. Just don’t get too excited for a road too soon. Keep truckin’ until you do finally end up on a road, which you will follow back to your vehicle.
West Fork Exit
For those who hiked up the AB Young Trail or staged a car at the parking lot on Highway 89A, you’ll keep descending the canyon until you hit West Fork. Then turn right and follow the tourist trail back to the parking area. We have not done this route, so we can’t comment on the conditions. If you do, please comment below and let us know how it is!
Map & Directions
Location Coconino National Forest, Sedona, Arizona
From Sedona, take 89A north to FR 535 and turn left. Follow 535 until you get to FR 536 and turn left again. At a junction, keep right to continue on 536, which is also labeled 236A. Turn left on FR 231, and follow it south across Oak Creek Canyon and then east again. At the very last intersection, fork left up to the parking area.
From Flagstaff, take Woody Mountain Road (FR 231) south. Follow southwest until it crosses Oak Creek Canyon and then continue on it as it turns east. At the very last intersection, fork left up to the parking area. The benefit of this route is you can stay on the interstate longer if you’re coming from south of Flagstaff, so it is potentially faster.
In winter and early spring, the roads described above are closed, and you will have to park at the West Fork Trailhead parking lot and hike up the AB Young Trail to the start of the canyon. Then simply hike out West Fork Canyon back to your vehicle.
If you’re doing this in cold weather, you’re an advanced canyoneer, a little crazy, and probably named Eric (also, Eric is awesome, and the owner of Sedona Canyoneering, where you can find tons of information about more canyons near Sedona).
Fees/Passes None
Trailhead Facilities Are you kidding?
Recommendations for you
Crack Addict Canyon | Sedona
Chopper Drop Canyon | Sedona
Dillinger Canyon | Sedona
Leave a Reply