Flatiron and Peak 5024
TRAIL STATS
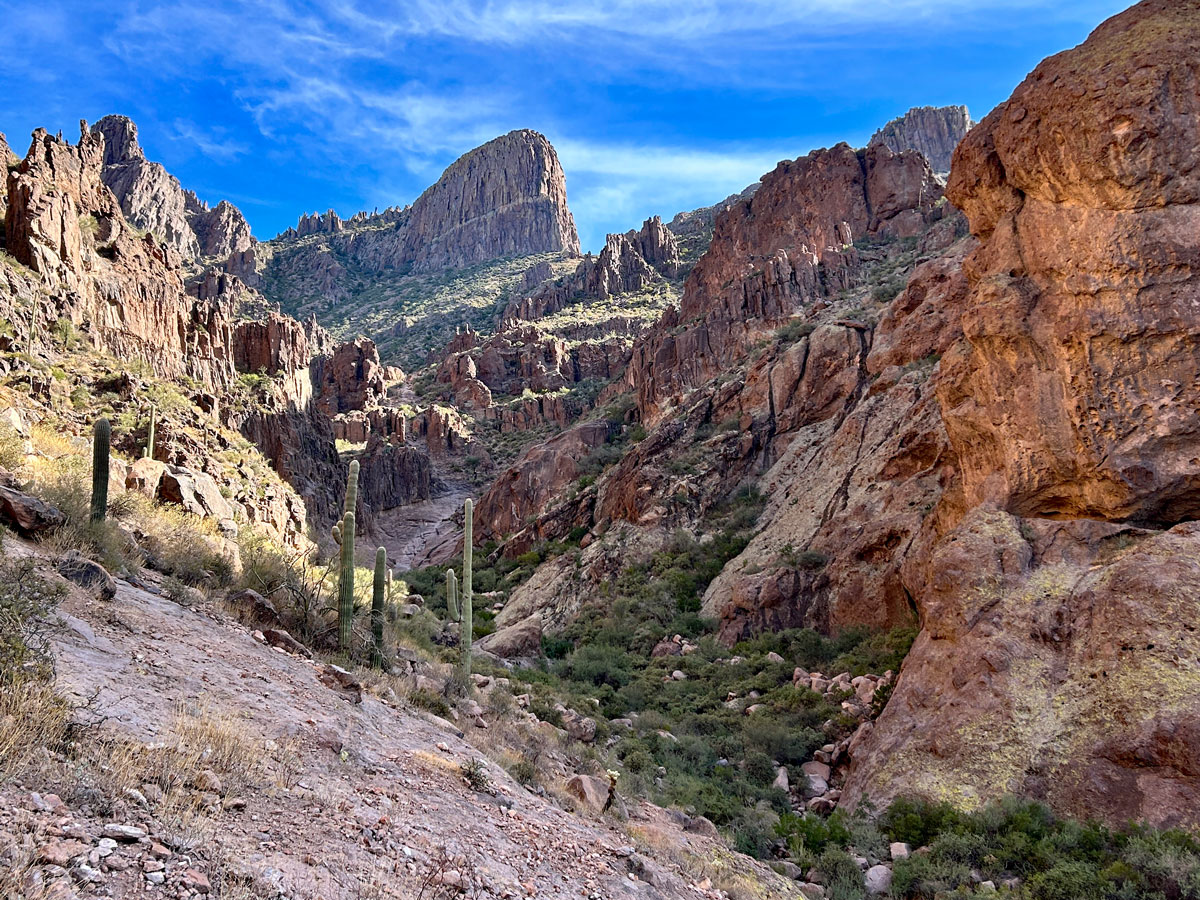
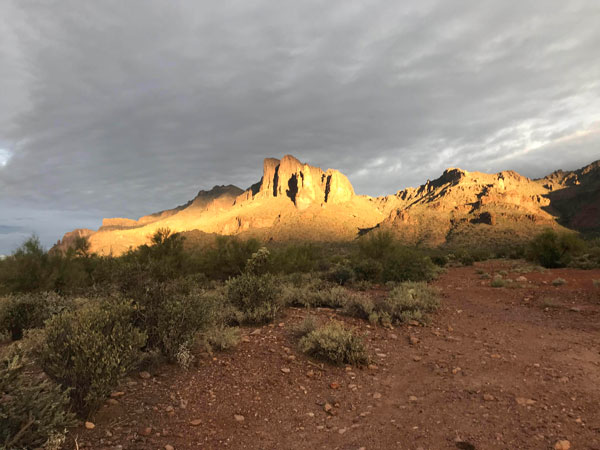
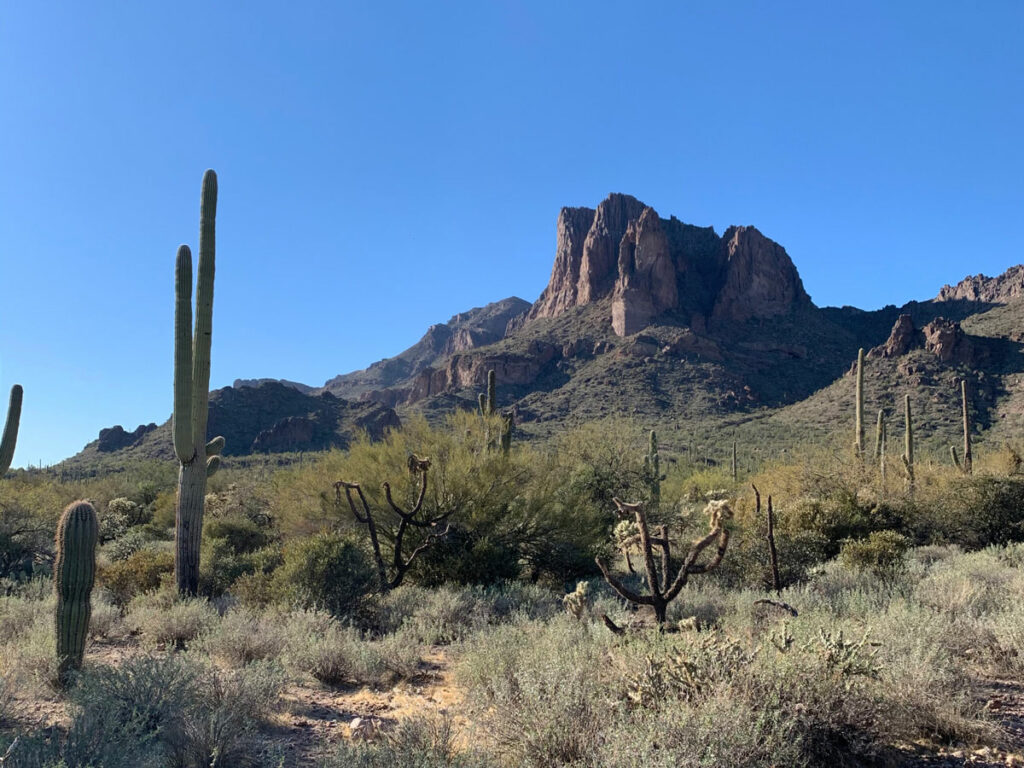
Standing majestically upon its lofty perch, Flatiron is an easily recognizable landmark in the Superstition Mountains and one of the most popular hikes in the Phoenix area. The views from the tip are incomparable, but they come at a price. You’ll face a relentless incline, loose gravel in spots, and obstacles that require use of both your arms and legs as you make your way up the rocky drainage. Once you’ve enjoyed the Flatiron, you have the option to visit Peak 5024 (also known as Ironview Peak) and a memorial dedicated to the victims of a plane crash. This hike is really a 5-star hike, but the crowds, paid parking, and loose, slippery parts take away a bit of the charm for me.
Trail Description
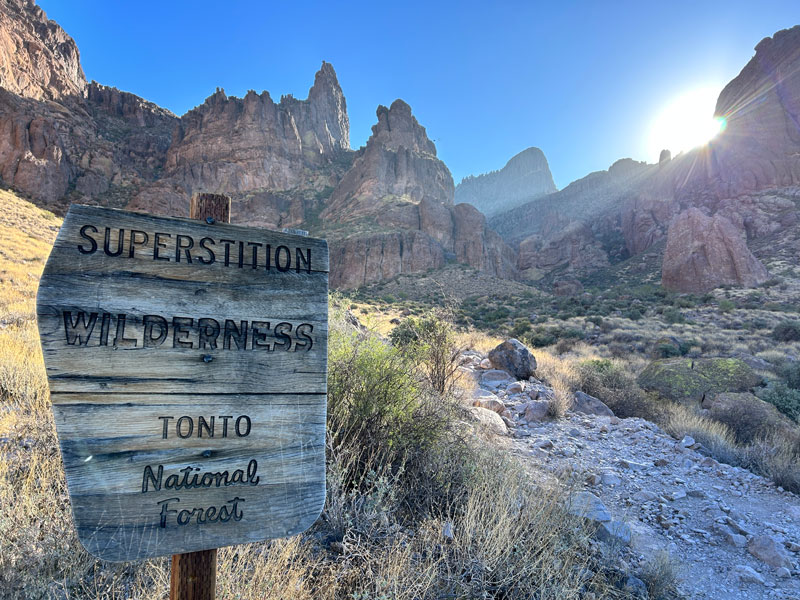
The Flatiron resides in the Superstition Wilderness, so it is a free hike, but the most convenient parking is in Lost Dutchman State Park, and you have to pay a fee if you’re parking there. I avoid paying whenever I can, so when my friend told me she had an annual AZ State Parks Pass, I knew it was time to go.
Discovery Interpretive Trail
From the Siphon Draw Trailhead parking area, set out on the Discovery Interpretive Trail toward the camping area. This trail features a sundial, bird bath, and benches, but you ain’t got time for any of that!
However, when you see the sign for the restrooms, head on over because you DO have time to make use of the facilities (since you paid and everything). It’s a long hike ahead, and there are a lot of folks on the trail, so you won’t have much privacy. Just sayin’.
Follow the signs for the Siphon Draw Trail.
Siphon Draw Trail
Once you turn onto the Siphon Draw Trail, it’s kind of a boring, rocky trail with just enough incline to be annoying. Keep your eyes on the mountain ahead. Good things are coming. Really hard, exhausting things, but still good.
As you enter the canyon, the rock formations around you get more interesting. The trail can be hard to follow at times because it seems like everyone took their own way, but almost all trails will eventually meet up. Stay up on the left side and avoid going down into the drainage. Remember, this is a very popular hike, so if you ever feel like you’re on a faint trail, you probably took a wrong turn.
Siphon Draw Basin
If you keep going toward the Flatiron, you’ll eventually reach Siphon Draw Basin. It’s steep in spots, and it can feel a little sketchy if your shoes don’t have good grip.
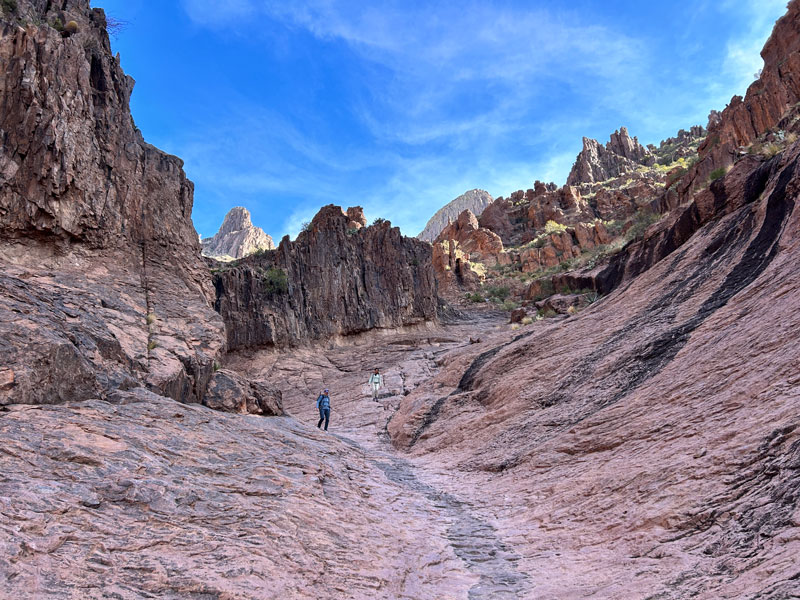
Just after rain, this turns into a water wonderland with a waterfall and a very slippery waterslide. I would try to avoid the basin when it’s wet because it gets quite slick. I mean, it might make the return trip a little faster and easier—or it might land you in the hospital.
Follow the basin up over a small saddle, or look to your right for a path that bypasses some of the loose, gravelly areas of the main trail.
“Creaky Knee Bend”
Once you get over the saddle, you’ll come to what I like to call “Creaky Knee Bend.” It’s a short, steep rocky saddle, and once you get on top of it, the rest of the hike comes into full view. In a moment of dread, you’ll realize just how far you still have to go.
Now’s a good time to do a reality check and decide if you’re really doing this today. From this point on, you’ll be using your hands a lot to get up and over the boulders that fill the drainage. That also means that on the way down, your knees will take a beating.
Is it a go? Come on!
After climbing down Creaky Knee Bend, you’ll get a short rest as you make your way along the right side of the drainage. Again, avoid going down into it at this point.
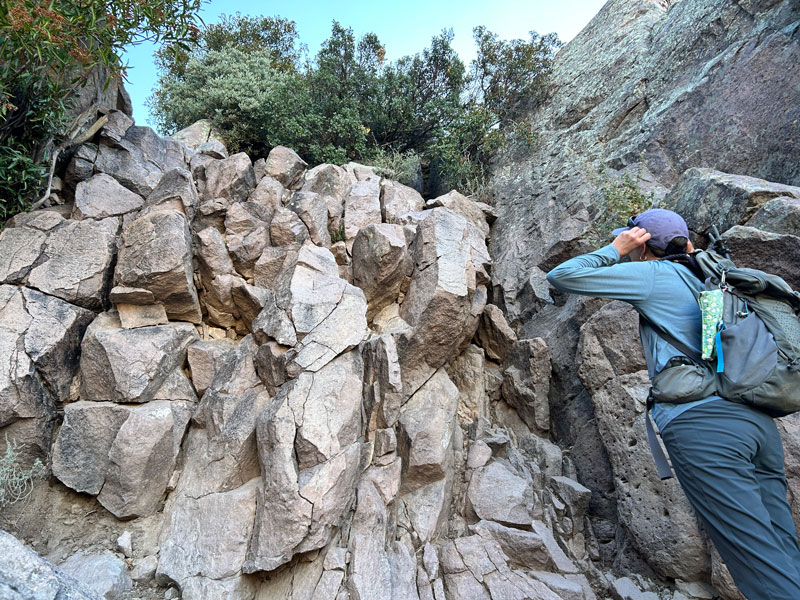
Eventually the trail reconnects with the drainage, and you’ll start using your hands to help you climb up jagged rock walls and over boulders. Nothing scary, just very physical.
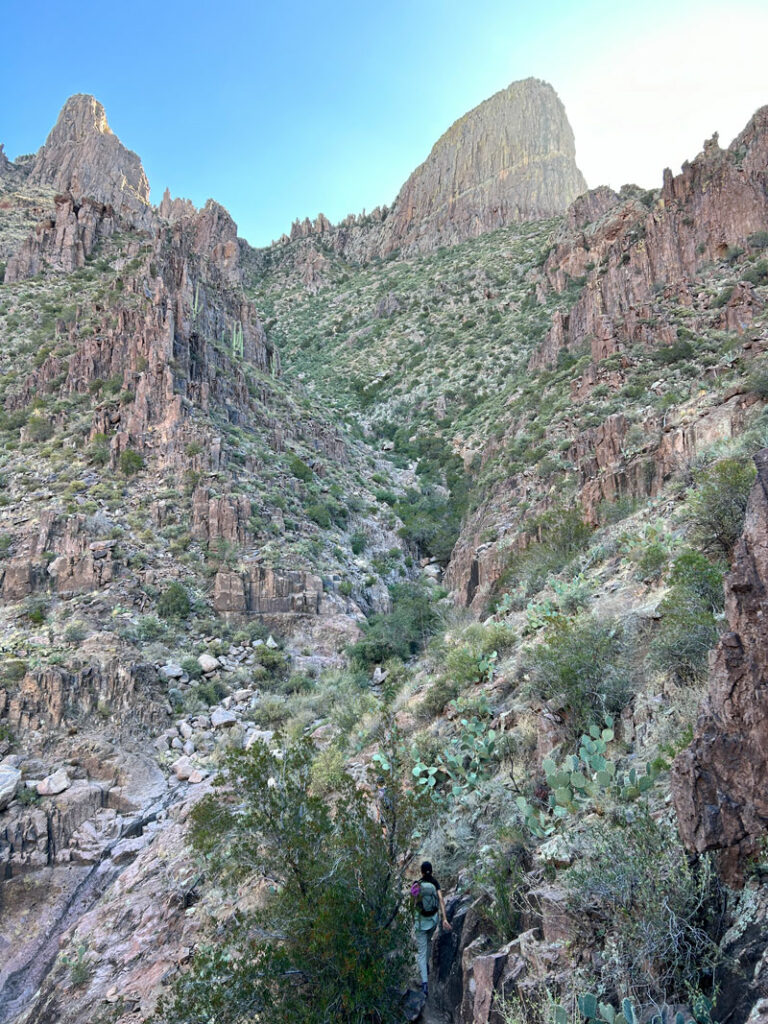
Repeat, repeat for like 45 minutes. The best advice I can think of for this section is that when you’re in doubt, keep left toward the rock wall next to you. This will keep you from wandering onto some steep slopes with loose rocks.
Every now and then, you’ll be tempted to look up to your right at the Flatiron towering above you. It’s kind of a bad idea since it will probably still look so freakin’ far up there! Keep at it, this will not last forever.
12-foot Wall
You’ll know you’re almost there when you hit the famous 12-foot wall. My favorite way to overcome this obstacle is to climb up on the right. You can also climb up on the left, using the tree branch as a handle. Or, you can bypass it completely if you look for a path all the way to the left. Did you really come all this way to take the easy way out, though?
Once you’re above this point, you’ve just got to take a path to the right that will lead you out to the tip of the Flatiron. Woohoo!
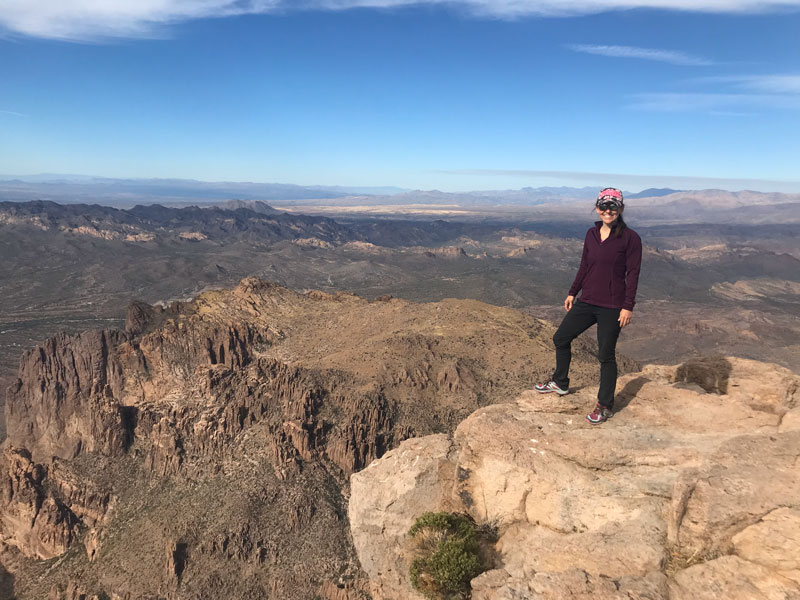
There is a small memorial up there for a young man who tragically fell to his death up there last year. So be sure to use plenty of caution.
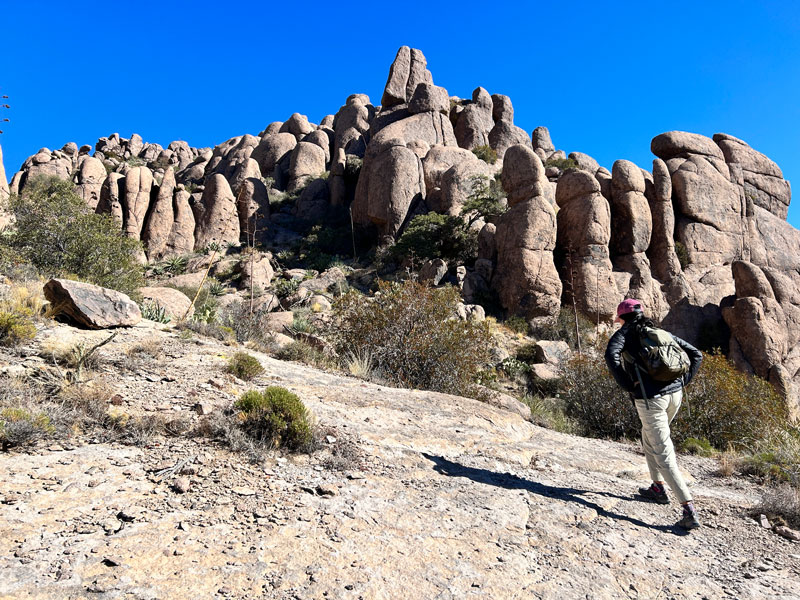
Peak 5024
If you’re not completely wiped out yet, it’s worth it to take a side trip up to Superstition Peak 5024. To do this, head back to the point where you popped out after you climbed up the wall, and find a trail going off to the right toward a saddle. Then make your way up the least steep route to the top of the peak. It’s pretty well traveled by now, so you shouldn’t have a problem staying on trail.
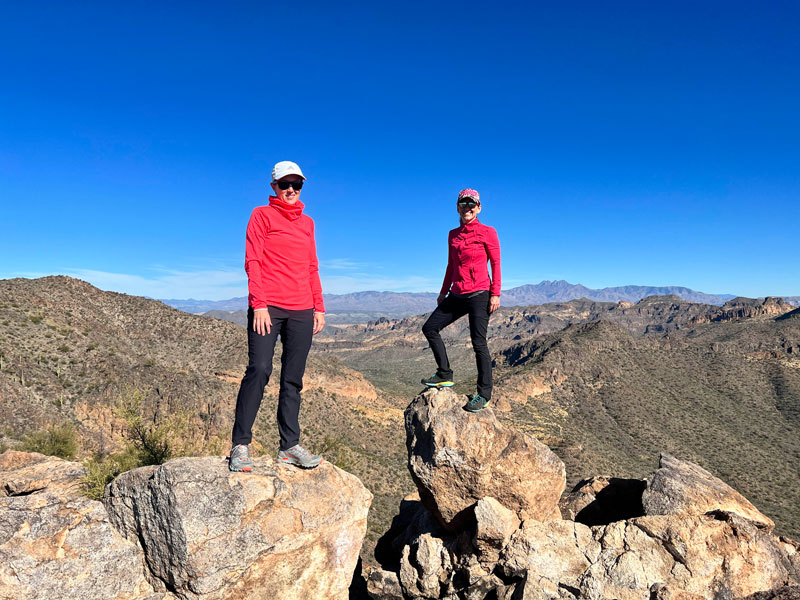
This trail is kind of fun because it goes through some small tunnels formed by the boulders. Once at the summit, you can look down on those inferior folks who only went to the Flatiron.
Plane Crash Memorial
If you’re still not wiped out, return once again to the point where you popped out after climbing the wall and turn the opposite direction from the Flatiron. Hike a very short distance to see a memorial plaque and some mementos dedicated to the memory of the people who died in a plane crash near that site. The children’s toys are particularly heart wrenching.
Now, if you’re still not wiped out, you can do Superstition Ridgeline. Just kidding! Don’t be like Connor (long story of a guy we rescued), and make sure you plan for an undertaking that huge. For now, save your remaining energy for the hike down.
Map & Directions
Location Superstition Wilderness, Apache Junction, Arizona
From the US60, head north on Idaho Road. Turn right onto Highway 88. Follow for a few miles, and then turn right into Lost Dutchman State Park. Pay the stupid fee and then park at the Siphon Draw Trailhead. Or, instead of going into the park, keep going just a little farther and turn right on First Water Road to use the free option.
Fees/Passes Depends. Most people park at Lost Dutchman State Park, and that requires a daily fee or a State Parks Pass. If you hate to pay to park when you’re hiking outside the park in the wilderness area, you can park on First Water Road and use Jacob’s Crosscut Trail to access the trail.
Trailhead Facilities Restrooms and drinking fountains available at Lost Dutchman State Park
Preview this Hike
Recommendations for you
Ten Awesome Arizona Peaks that Aren’t Humphrey’s
Superstition Ridgeline | Superstition Wilderness
Three Sisters | Superstition Wilderness
Leave a Reply