Zion Traverse
TRAIL STATS
If you want to get a glimpse of everything Zion National Park has to offer, there’s no better way than to backpack across the entire park on the Zion Traverse. Also known as the Zion Transect or Trans-Zion Trek, this trail features pleasant creeks, sprawling meadows, varied wildlife, jaw-dropping rock formations, and spectacular views of Zion Canyon. With its plentiful trees, you’ll have shade most places along the way and may even see fall color in early October. As a bonus, you can hike to the thrilling heights of Angels Landing along the way if you get a separate permit.
Trail Description
The Zion Traverse is the ultimate Zion backpacking adventure, which travels across most of Zion National Park along an unforgettable 40-mile route. In the past, the traverse included the East Rim Trail, too, but a rockslide in 2019 has closed that section indefinitely. Not to worry, it’s kind of nice to end your hike at the main park area anyway since you’re closer to food, and it’s easier to arrange a shuttle.
Where to Start?
You can hike this route in either direction, but we were told by a ranger at Zion National Park that most people do it from north to south. This direction has the advantage of having less overall elevation gain, and you’ll end at the main park area where there are plenty of services. The Lee’s Pass Trailhead is an hour drive away and kind of in the middle of nowhere. Our strategy was to park at the Zion Canyon Visitor Center and take a shuttle the first morning of our trip to the Lee’s Pass Trailhead. By the time we were done, we were really glad to be at the car instead of catching a shuttle to retrieve it (more on shuttles at the end of the post).
Alternative Trailheads
If you want to shorten this trek, you can start at the following alternative locations:
- Hop Valley Trailhead 24.3 miles, 3756 ft elevation gain
- West Rim Trailhead 15.6 miles, 2023 ft elevation gain
Regardless of where you start, you will need a backcountry permit for ALL camping within Zion National Park (more on permits at the end of the post).
Lee’s Pass Trailhead
Okay, let’s get to it! Our shuttle driver took us to the Kolob Canyons Visitor Center to check in with the ranger and use a flushing toilet one last time. Then he drove us about 4 more miles (uphill) to the Lee’s Pass Trailhead. So, if you were considering taking an Uber to the visitor center and then walking the rest of the way, banish that thought immediately. Ain’t nobody got time for that.
There are picnic tables at the trailhead, but no trash can (what?!) or bathrooms. It was so annoying to have to pack our picnic trash.
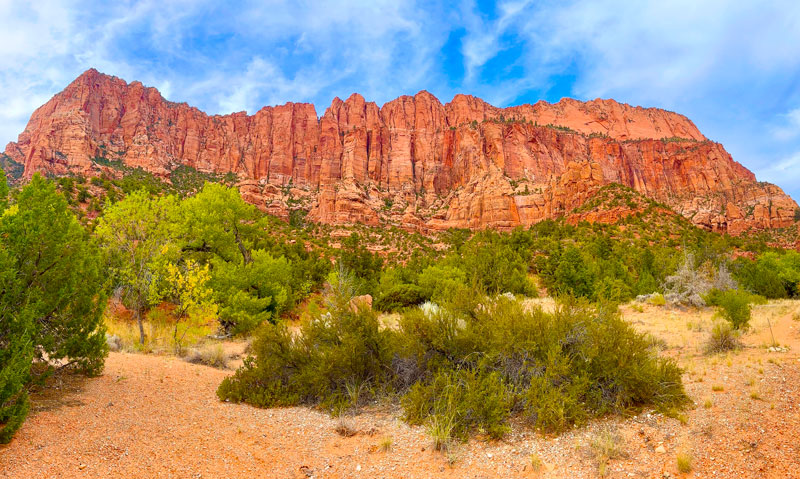
But, of course, the beauty of the area soon mesmerized us and made all our troubles melt away. According to our shuttle driver, Kolob Canyons is a formation of several “fingers,” and we would be hiking between the forefinger and thumb. It was incredible to look at from the ground, but he said by air it’s even more impressive. Wish list!
La Verkin Creek Trail
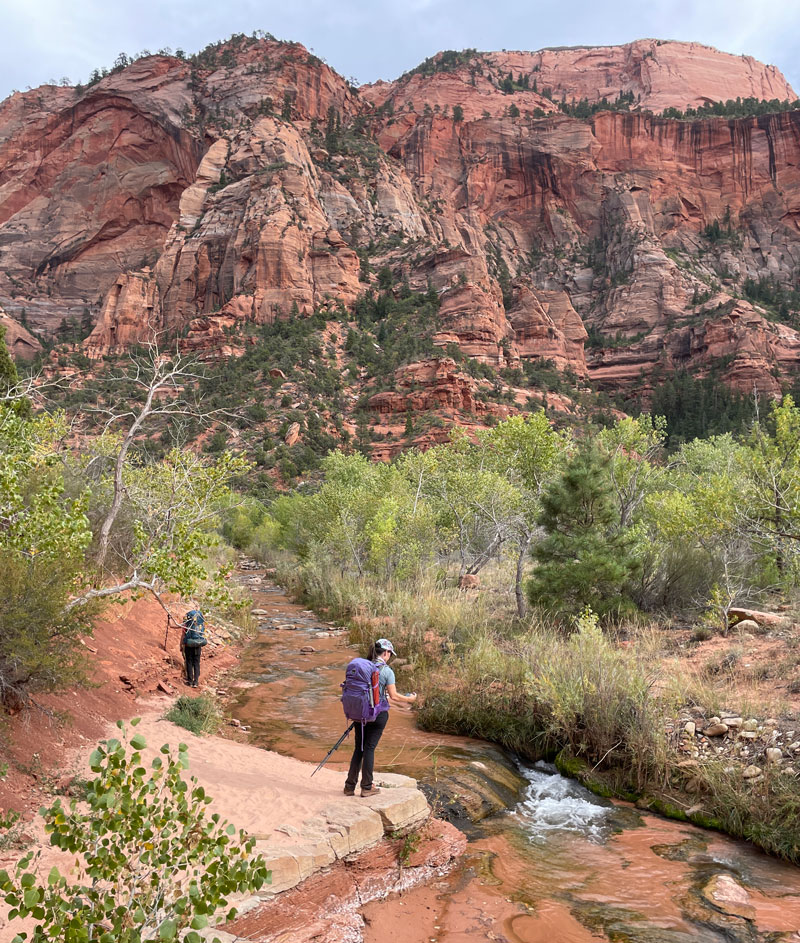
This section of the trail slowly makes its way down to La Verkin Creek. You’ll pass the first three campsites in the first 3.5 miles, so I wouldn’t recommend them if you have a choice. Plus, they are along a tributary that was dry when we went. After you pass campsite 3, you’ll be hiking along La Verkin Creek, which was flowing nicely and so beautiful. The trail doesn’t cross the creek until right before Beatty Spring, so you won’t have to worry about keeping your shoes dry.
Ideally, you’ll be able to snag campsite 7, 8, 9, or 10, which are close to the spring and far enough in to make them worthwhile. Plus, you can easily drop your packs at camp and take a short side trip to Kolob Arch.
Kolob Arch
After passing campsites 8 and 9, you’ll cross a small stream that flows out of the canyon containing Kolob Arch. That’s where you’ll turn left and begin following the path to Kolob Arch. There’s a sign marking the junction.
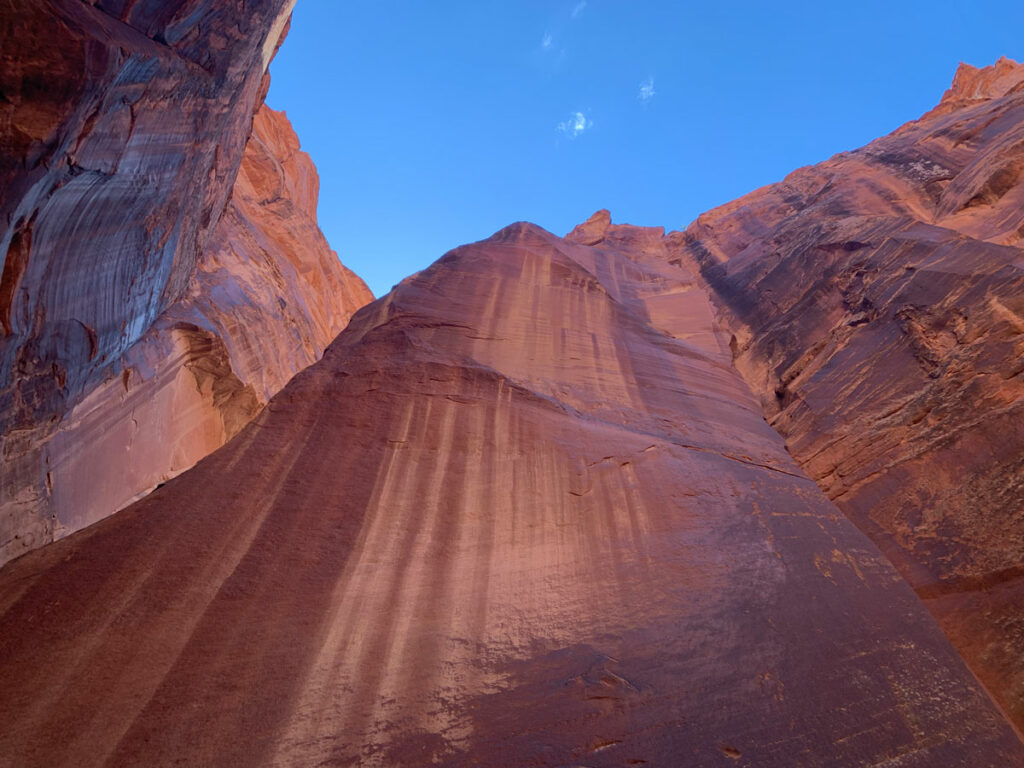
Even if you weren’t going there for the arch, this little side canyon is so pretty and worth a trip. At the end of the trail, you’ll come to a sign marking the end of the path. But where’s the arch? Luckily, a helpful tourist engraved “Look up” right onto the sign. When you do, you’ll see this magnificent arch perched high upon the canyon wall.

Beatty Spring
Just after campsite 10, the trail will cross the creek and continue left on the other side. Beatty Spring is tucked away behind some trees on your right immediately after you cross. Even though it’s right there by the trail, it can be tricky. If you find yourself following La Verkin Creek up a sketchy trail, go back, you fool! Yes, we’re fools, so it feels fair to say that.
Also, it’s right where the GPS says it is, so ignore the other hikers you might run into. Just sayin’.
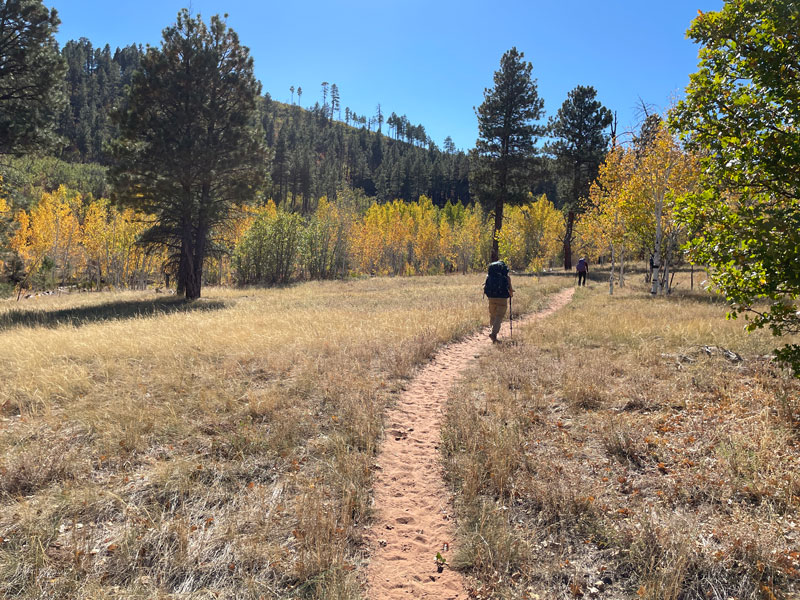
Hop Valley Trail
After the spring, watch for the junction for the Hop Valley Trail. We met some nice college boys from California at the spring who told us they had a similar itinerary to ours. When we parted, we said we’d see them later, but we never saw them again. Of course, we had to worry about them the whole time, and we wondered what could have happened. All I’m saying is, watch those trail junctions!
Once on the Hop Valley Trail, you’ll be huffing and puffing on the most relentless uphill climb of the entire journey. It’s about a 2000-foot climb, but it’s also sandy, which makes every step twice as hard. If you’re not in the lead, you’re probably going to be eating the dust of your hiking compadres. This is where one of us broke out the inhaler. Asthmatics beware.
You’ll get a reprieve from the climb as the trail passes through Hop Valley, where the creek meanders back and forth along the way. I’m wondering if this valley got its name from the number of times you’ll have to “hop” over the creek. Most of the time, there is a nice log or something to help you stay dry while you cross. Other times, you may have to improvise.

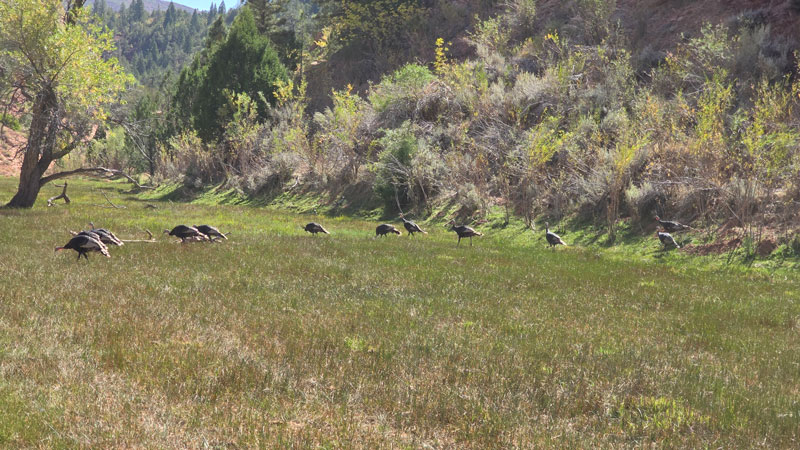
Sand will be your ever constant (and annoying) companion, and the trail becomes faint at times. The basic idea is to follow the creek down the valley until it makes a turn to the left, at which point you will continue straight. We saw a flock of wild turkeys in that area that were obliged to keep running from us as we advanced, but we were happy to be on solid ground for a while and finished with creek crossings.
Don’t get too used to the solid ground. The sand isn’t done with you yet. However, as you leave the valley, you’ll come to an open, flat section where you’ll get a little cell service. Go ahead and text your family back home to tell them how badass you are. Own it!
Hop Valley Trailhead
Soon you’ll begin to hear cars, and that’s when you know you’re closing in on the Hop Valley Trailhead. The junction with the Wildcat Canyon Connector Trail comes just before the trailhead, but you’re gonna pass that baby right on by because there are bathrooms and trash cans ahead. If you have an awesome shuttle driver like we did, there will also be some jugs of water waiting for you. Or, you can stash them there yourself ahead of time. Most importantly, take advantage of the nice, clean bathrooms and trash cans. How spoiled to be able to throw away some trash along the way? Dang!
Go back down the trail a little way to reconnect with the Wildcat Canyon Connector Trail and take a right. It feels a little weird crossing a paved road a little farther down, and all the sand you’ve been dealing with will make you wonder if you might as well just walk on the road for a while. Well, luckily it doesn’t stay very sandy for long, and I’m quite certain the trail is the better bet.
This area will give you a sneak peek of the canyon ahead, so get excited. Things will only get better from here.
Wildcat Canyon Trail
As you begin to head away from the road, the forest becomes a bit thicker, and you’ll reach the junction with Wildcat Canyon Trail. Yes, there are bathrooms at the trailhead, but do you really want to truck an extra mile each way? Nope.
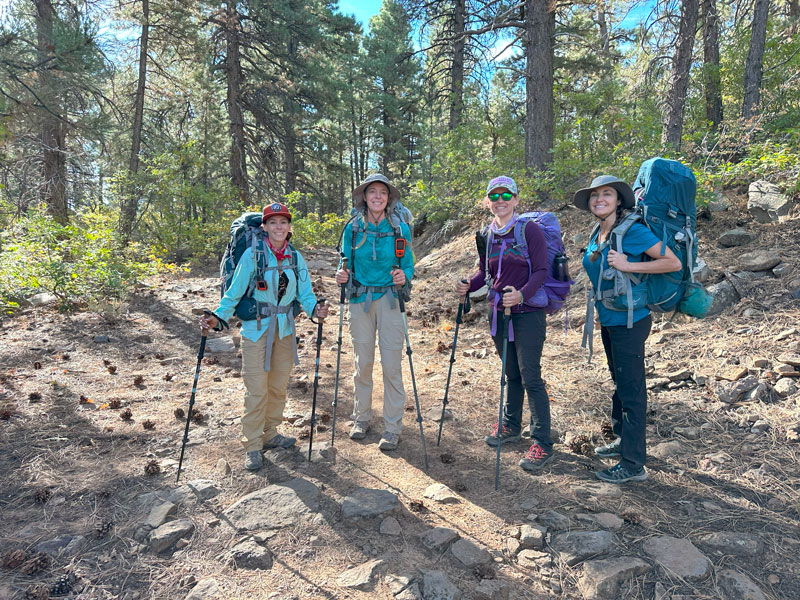
Continue along Wildcat Canyon Trail, and you will start to see more people who are probably hiking between here and West Rim Trailhead. That, of course, means you’ll have opportunities to brag about the mileage you’ve already put in. Also, they can take your picture.
If you’re spending the night in this area, be sure you are within the designated camping zone, indicated in white on the map—or, at least, on the wilderness map (be sure you have it). Not only is it not marked on every map, but there are no signs either. The ranger said, “There’s a meadow, and you’ll see previously established campsites on your right.” Well, kind of? We did eventually find a spot (marked on our map), and we saw some potential spots the next day that were near a meadow, but by no means was it obvious. Generally, your best bet is about a mile to 3/4 of a mile before Wildcat Spring.
The bad news is that if you need water at camp, you’ll have to hike over to the spring to get it. So, it really is nice to have a water drop at Hop Valley. Otherwise, your water has to last you all the way from Beatty Spring to Wildcat Spring.
Wildcat Spring
This is one of the few springs that usually runs year round, but after being spoiled with lively flow at Beatty Spring, this is going to seem pathetic. At least, it did during October when we went. In fact, we almost missed it. There were about a dozen bees and a wasp buzzing around the opening, which you had to stick your head into to reach the flow. It felt a little risky, but nobody got stung.
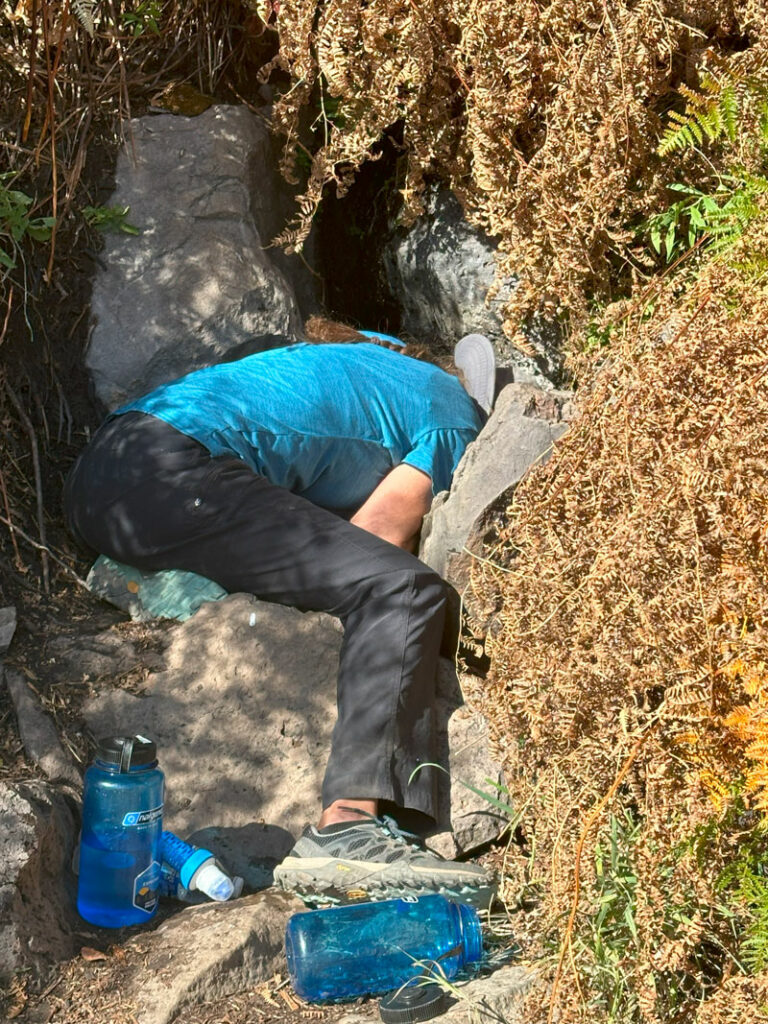
And, it’s wet, so we can’t complain too much.
West Rim Trailhead
Soon after the spring, you’ll pass a junction for Lava Point. It sounds really cool, doesn’t it? No. First of all, the trail only leads you to West Rim Trailhead, which is nothing but a dirt parking lot. Second, no bathrooms, no trash, no water. I guess we started to expect too much. Getting to Lava Point from there requires a mile hike each way, and by then you definitely won’t be in the mood to hike extra, even if there is a nice view and bathrooms.
So, skip it and continue right onto West Rim Trail.
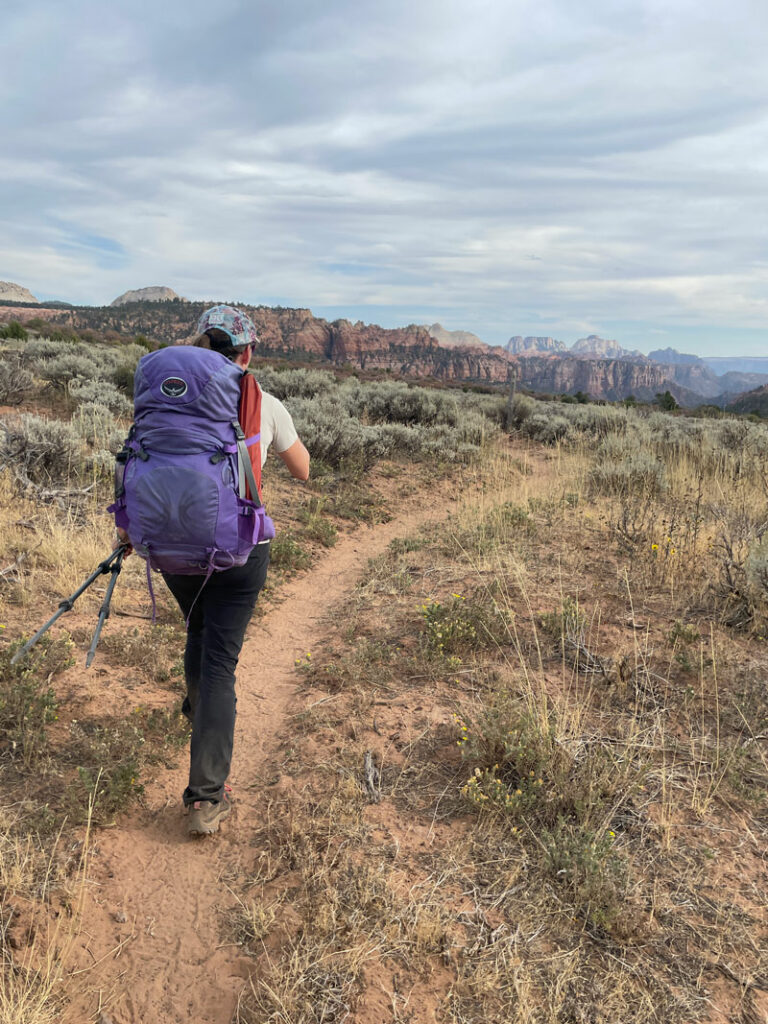
West Rim Trail
Along this trail, you’ll continue to have plenty of company. After about a mile, you’ll come to West Rim camp 9, which is near Sawmill Spring. This spring does not run year round, so verify with a ranger if you plan to camp there. As you continue along, you’ll begin to get more and more views to the canyons on either side of you.
Eventually, the trail drops down a bit into a pretty valley with meadows and groves of aspen. This is where you’ll find camps 8 and 7.
If you got some intel somewhere that the trek from Wildcat Spring to The Grotto is “mostly downhill,” you’re about to have a rude awakening. After camp 7, the trail starts a steep climb up to the West Rim plateau. Oh, it’s worth it, but best to be warned ahead of time.
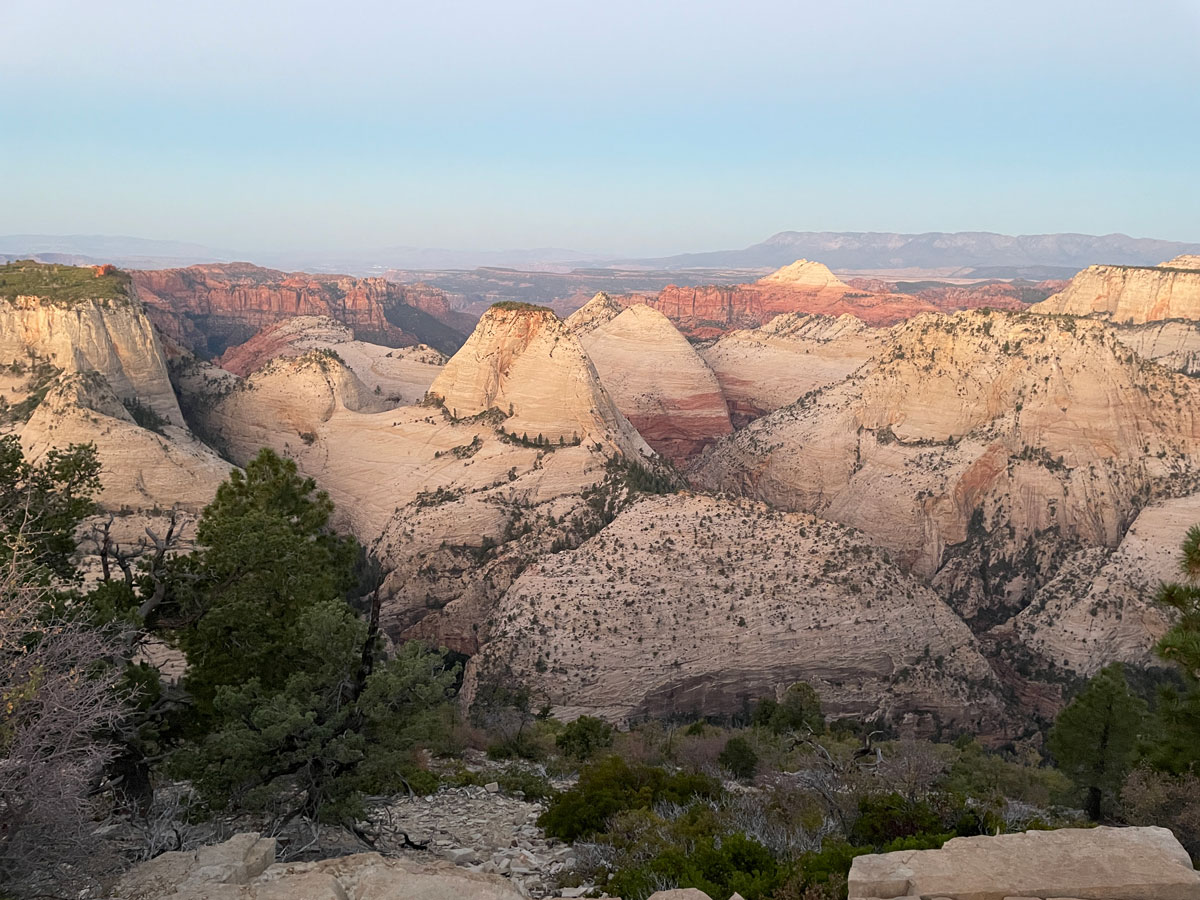
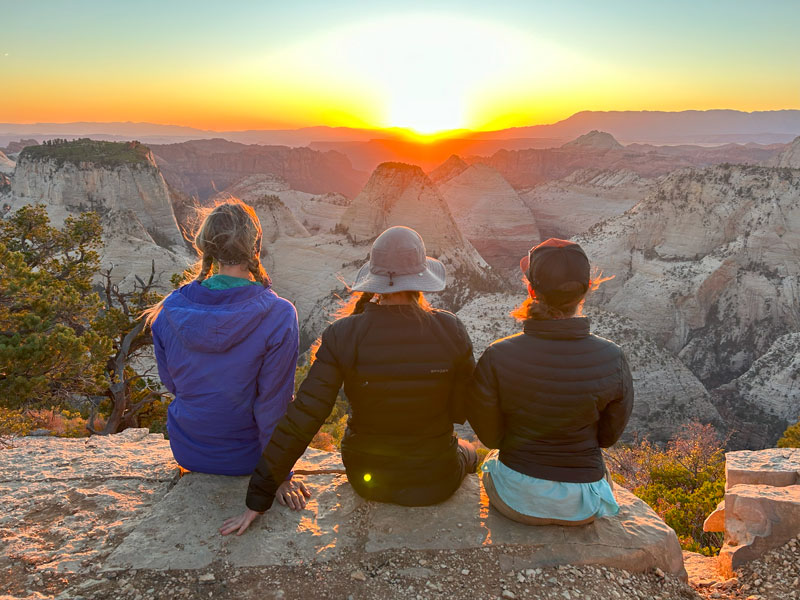
Immediately after gaining the rim, you’ll see campsite 6. This is the first of the primo campsites. We had campsite 5 reserved, so we continued on a mostly flat trail for what seemed like forever (it was just over a mile). After two long days, our feet were hoping 5 and 6 were closer together. It kinda sucked to be honest, but our reward was what we believe to be the most incredible campsite anywhere along the rim. No lie. Snag campsite 5 if you can. It’s set apart from the others, so you’ll have complete solitude, and straight across from camp is a little trail to the edge where there’s a rocky bench perfect for watching the sunset.
I’ll never forget you, camp 5.
Continuing on, the trail remains relatively flat as you take in massive views of Zion Canyon on your right. Leave time to stop and take about a billion pictures here. You’ll continue along the rim past camps 3 and 4 before turning away to the left down to camps 1 and 2. Yes, these camps are close to the spring. No, they are not so awesome.
Cabin Spring
The turn off toward camps 1 and 2 is NOT the same as the turn for the spring, so just hang on for a few more steps until you come to a sign marking the path to the spring.
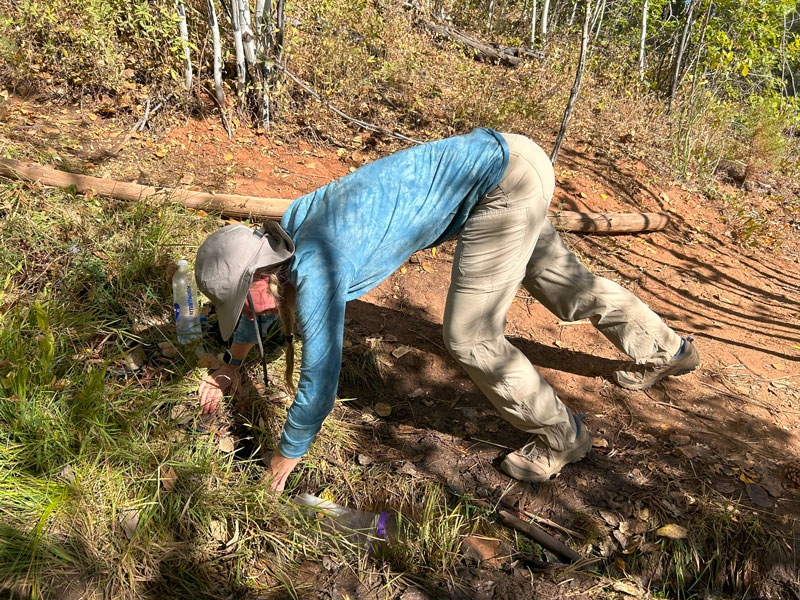
And also, don’t get your hopes up. Cabin Spring usually runs year round, but we were there in October when it looked pretty pathetic. You’ll either have to dunk your reservoir into a mud puddle or do some kind of fancy twist, reach, or plank just to access a tiny trickle. Even then, expect to be dealing with some silt.
Weirdly, lots of day hikers took the short diversion to visit the spring and then felt very sorry for us that we actually had to use it. Their faces said, “Sucks to be you.” I was offended until I realized they missed all the magic of the traverse and especially camp 5. Oh, camp 5.
Beyond the spring, the trail begins to zigzag down a cliff face, which is pretty rad. There was a lot of fall color to enchant us at the bottom of the canyon, although it was obviously past its prime. Late September or early October is probably a better bet. Still beautiful!
Then the trail then passes through a section of solid rock with few trees. You’ll hit yet another uphill section on the approach to Scout Lookout, but the upshot is you’ll soon be treated to your first views of Angels Landing.
Scout Lookout
After enjoying a good deal of solitude along this trek, Scout Lookout is a jolt back to reality. It’s kind of like arriving at Costco on a Saturday. However, there are bathrooms with a weird “flushing” system (waterless) that are available. If you’ve been trying to avoid using your wag bag, now’s your chance. The swarms of flies will tell you you’re not the first.
No water or trash service is available. Come on, you can’t have it all.
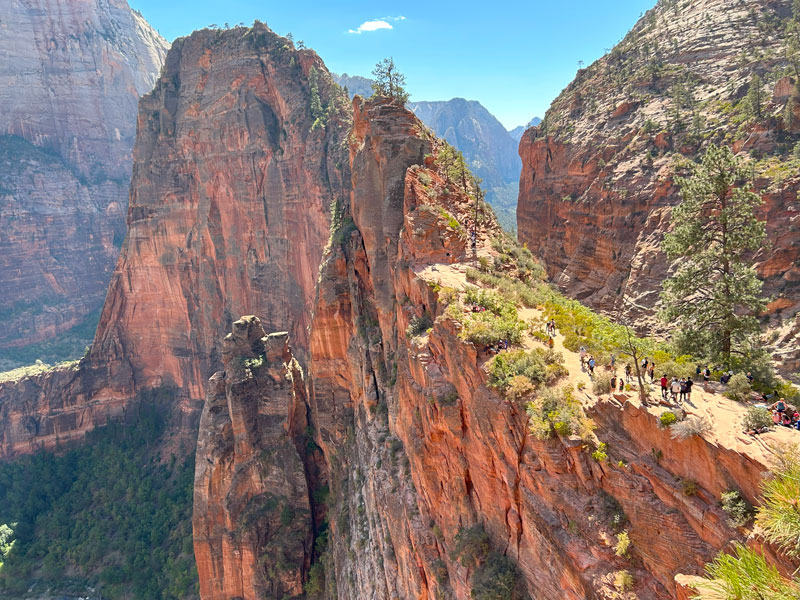
Angels Landing
Plenty of people hike up to Scout Lookout, but only those with permits are allowed to do the chained portion of Angels Landing (more on permits at the end of the post).
Just the sight of Angels Landing can strike fear into your heart. From far away, it looks ridiculously skinny with sheer drop-offs to either side. If you were lucky enough to obtain a permit, you’re probably wondering at this point if you’re crazy. Before you set off, set your pack somewhere safe, making sure to secure your food items away from the many little critters that are hoping to find a treat.
As you approach, you’ll see that the trail is pretty level overall, and there is a decent amount of distance to the edge. I would say those who are afraid of heights will definitely struggle psychologically with this one. However, for most people, it should be doable at a slow and careful pace.
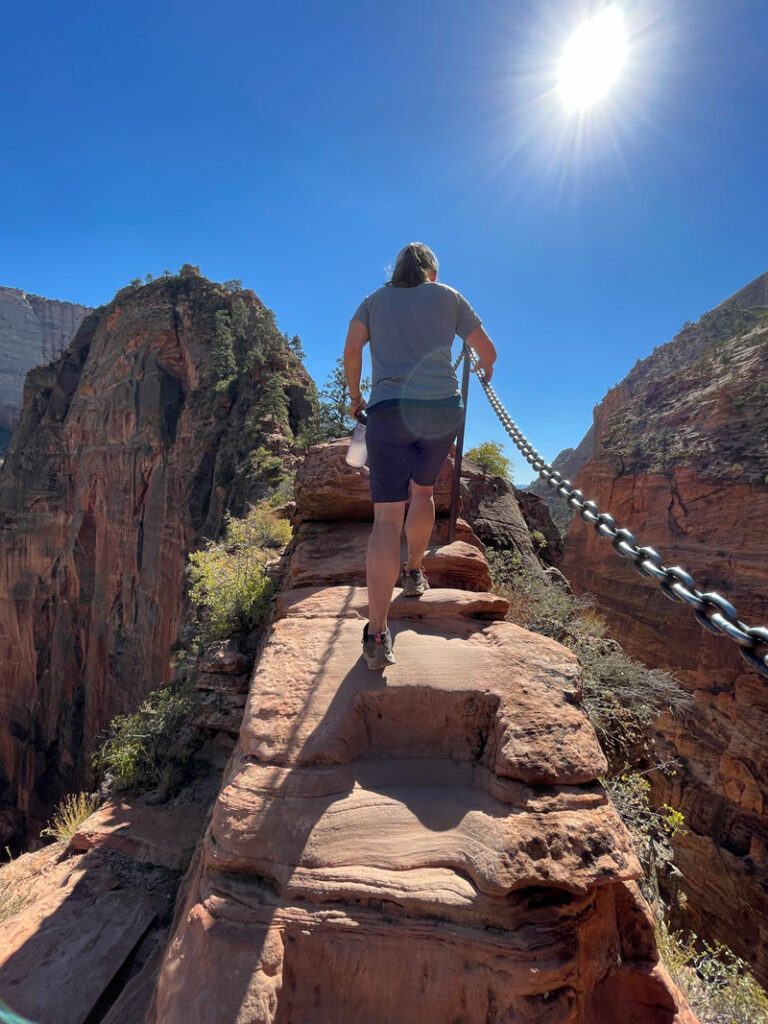
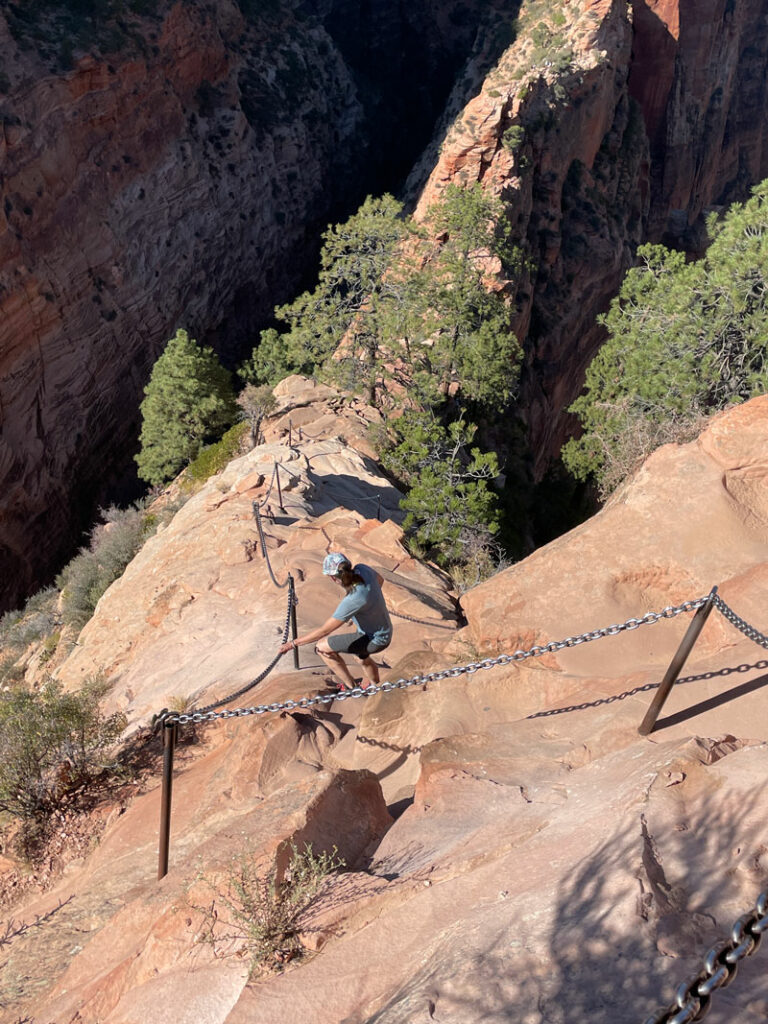
Some areas of the trail are too narrow for two-way traffic, so be sure to be patient and communicate with hikers coming the other way. If you find a good spot to step aside, do so to let others pass you.
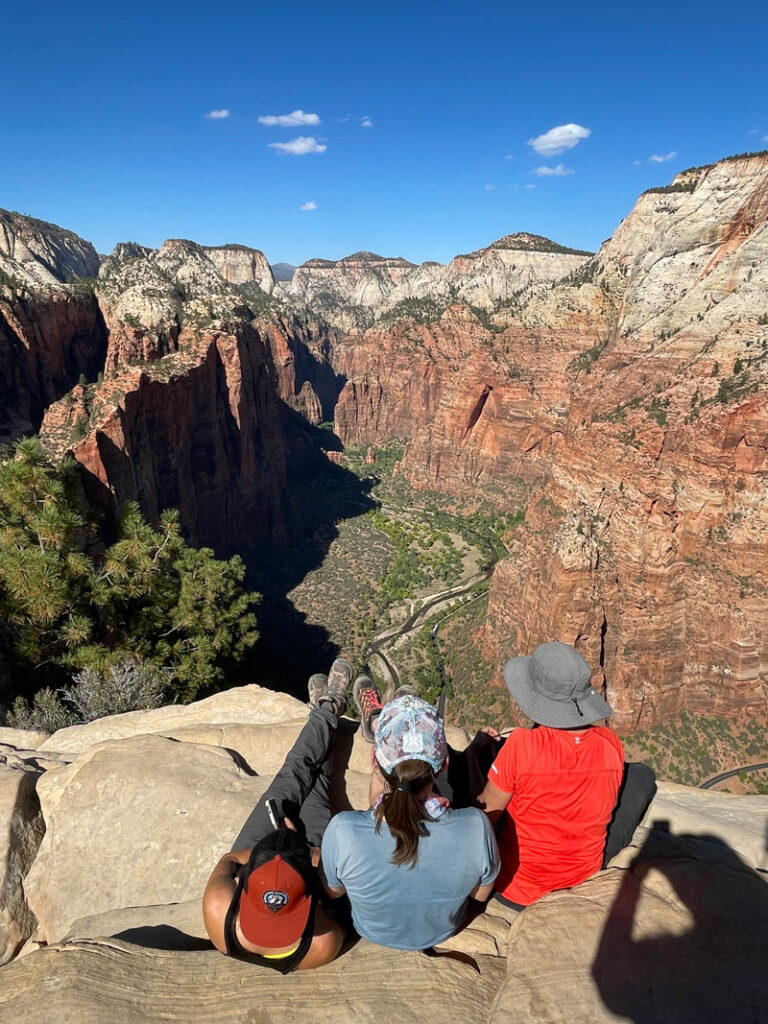
There are not chains the entire way, just at the sections that are a little more sketchy. Once atop the main climb, you will continue along a slanted ridge to the very end for the most magnificent views up and down Zion Canyon. It’s truly a sight to behold.
On the way down, your perspective changes, and it might even surprise you to see what you accomplished. Yeah, baby!
Once back at Scout Lookout, grab your pack and keep heading down the trail.
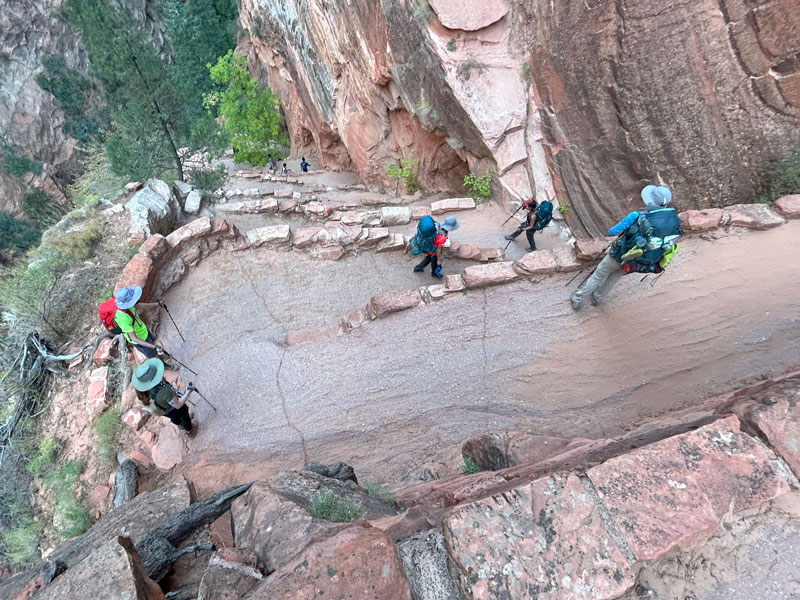
Walter’s Wiggles
One of the most famous parts of the trail is Walter’s Wiggles, a paved section of trail that zigzags steeply back and forth down the side of the cliff.
This part of the trail will have plenty of shade in the afternoon, making it a nice reprieve from the heat earlier in the day. As you descend the many switchbacks, watch for a California condor that apparently lives in the cliffs near Angels Landing.
Near the bottom, you’ll begin to parallel the Virgin River, and you’ll have opportunities to access the beach if you’d like. But I know what you really want right now is a juicy burger, so continue until you get to the shuttle bus stop for The Grotto. There are bathrooms, water, and trash receptacles here. If it’s near the end of the day, chances are good that the shuttle buses will be full of people who just left The Narrows. You’ve got a big pack on, so you might have to use some elbows to clear enough space on the bus for you and your compadres. Ain’t nobody coming between you and your burger!
The Grotto is shuttle stop 6, so you have 5 to go before you get to your car. Spend your time wisely, bragging about the amazing adventure you just had. You earned it.
Logistics
Food
Besides all the normal backpacking gear, you’ll need a way to keep critters (particularly rodents) from getting to your food. We used a ratsack. No campfires allowed within the park, so do not plan to use fire to cook your food.
Water
You’ll need to carry a water filter with you and filter all water you collect, even that which you obtain from a spring. The Park Service warns not to drink water from streams or rivers anywhere in Zion National Park due to cyanobacteria, which cannot be filtered out. Only collect water from springs.
This route has three springs that usually flow year round:
- Beatty Spring along La Verkin Creek Large spring with good flow
- Wildcat Spring along Wildcat Canyon Trail Small spring with one good stream of flow
- Cabin Spring along West Rim Trail Just a trickle when we were there
There are other springs that usually dry up sometime during the summer. Be sure to ask rangers about water availability when you pick up your permit.
Human Waste
Wag bags are required for solid human waste throughout the park. However, you will have a bathroom at Hop Valley Trailhead and Scout Lookout along the way. If you’re desperate, it’s a mile diversion each way to Wildcat Trailhead or Lava Point, which also have bathrooms. Wag bags can be purchased at the gift shop in the Zion Canyon Visitor Center.
Shuttle
There are several shuttle companies available, but we chose Red Rock Shuttle. Not only did they show up a little earlier than expected, but they also left water and peanut M&M’s at the Hop Valley Trailhead, which we passed on day 2. It was nice to use the clean pit toilets, throw away our trash, and carry a little less water, knowing some was waiting for us. Really glad they came through on that!
If you can, make your shuttle reservations in advance. We had to call around to find an available shuttle, and Uber was a complete fail. The Park Service employees are reluctant to give you any shuttle company names and will most likely tell you to “Google it.” But it all worked out even without a reservation. It just took a little longer.
Obtaining a Permit
Permits are required year round for all backcountry camping in Zion National Park. You must stay in the locations and on the dates indicated on your permit. You will need to stop by the Zion Canyon Visitor Center Wilderness Desk before your trip to pick up your permit.
Advance Permits
Half of the available permits can be reserved online at Recreation.gov in advance. See the link for release dates.
Walk-up Permits
The other half of the permits can be obtained in person at the Zion Canyon Visitor Center Wilderness Desk no more than one day before your start date. We were able to reserve La Verkin site 8, Wildcat Canyon dispersed, and West Rim site 5 by showing up at 9AM on a Thursday morning in October. They had around 5 sites available in each area, so our experience indicates you have a pretty good chance of being able to piece together an itinerary even if you don’t have an advance permit. Since we were reserving three consecutive nights, we were able to secure the highly coveted West Rim permit three days before we would get there, so I’m thinking that probably helped our chances.
Angels Landing
Even though Angels Landing is along your way, you will need a separate permit if you want to go to the top. I confirmed this with a Park Service ranger, so do not attempt this hike without it. The penalty is a fine up to $5,000 and/or 6-months in jail. No thank you!
Advance Lottery
Permits can be obtained in advance through a lottery on Recreation.gov. The weird thing is that Recreation.gov has a separate page for each season.
- Winter hikes December 1 – February 28 (apply October 1-20)
- Spring hikes March 1 – May 31 (apply January 1-20)
- Summer hikes June 1 – August 31 (apply April 1-20)
- Fall hikes September 1 – November 30 (apply July 1-20)
See the links for more information.
Daily Lottery
If you are unable to obtain a permit in advance, you can still try for one of the daily permits. The day before your trip, use the link above that corresponds with the date you want to hike. There you’ll see the day before lottery option. Applications must be entered between 12:01AM and 3:00PM on the day before your desired hike date. This can pose a problem for those of us in the middle of a backpacking trip, since we’re on the trail. However, we had pretty good cell reception on top of West Rim. Give it a try!
Map & Directions
Location Zion National Park, Springdale, Utah
Google Map Zion Canyon Visitor Center
Fees/Passes Zion National Park entrance fee or America the Beautiful pass. In addition, you need to obtain a wilderness permit from the Zion Canyon Visitor Center Wilderness Desk. Half of the permits can be reserved online at Recreation.gov before your trip, and the other half are available as walk-up permits on a first come, first served basis the day before or the day of your trip.
Trailhead Facilities None at Lee’s Pass. Pit toilets and trash receptacles at Hop Valley Trailhead. There are toilets at Scout Lookout. Water refill, flushing toilets, and trash receptacles at The Grotto Trailhead and Zion Canyon Visitor Center. Don’t bother taking the short spur trail to the West Rim Trailhead because there aren’t any facilities there.
Preview this Hike
Recommendations for you

The Narrows (top down) | Zion National Park
Paria Canyon | Vermilion Cliffs National Monument

Grand Canyon Rim to Rim | Grand Canyon National Park
Leave a Reply