Leave It to Beaver Canyon
TRAIL STATS
Leave It to Beaver Canyon has a few interesting spots and a really nice rappel sequence into Wet Beaver Creek, but the approach hike sucks and you’ll have some bushes to whack along the way. The canyon is a typical desert drainage that never really slots up, and it may be mostly dry unless it’s been raining recently. The number of swimmers and your ability to avoid the water will depend on how much water is in the canyon. We have heard of canyoneers packrafting the creek back to the start, but we opted to combine this with “the Crack” for a full day of adventure.
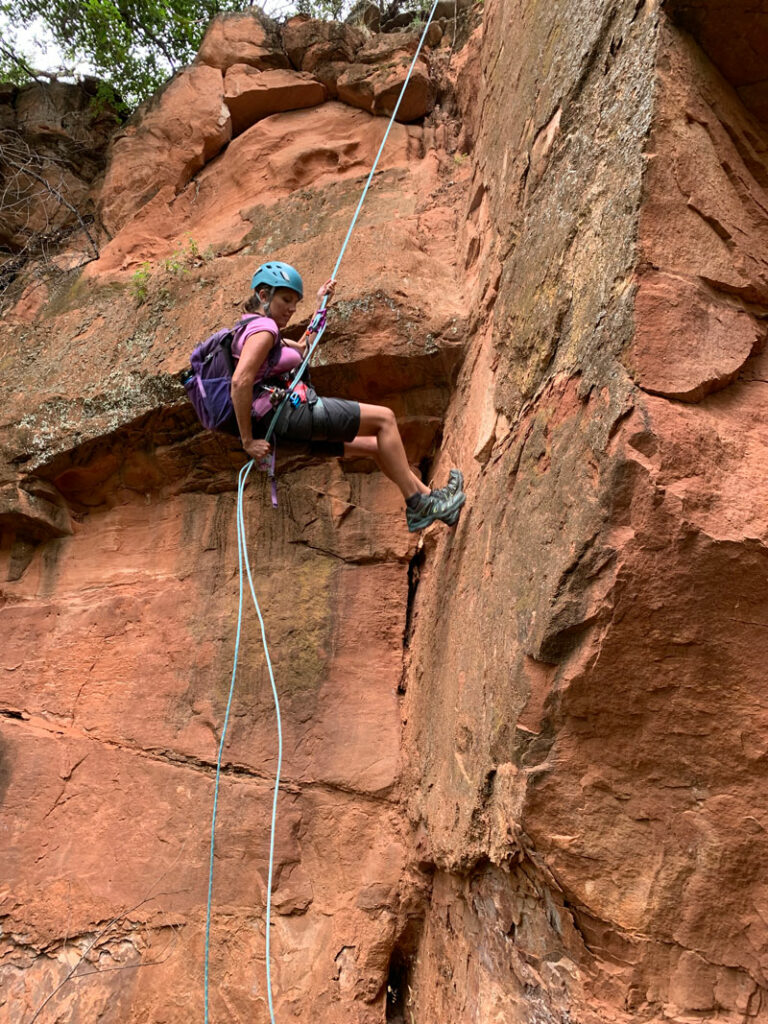
🪢 This is a technical canyon with eight rappels up to 100 feet. You will need one 200-foot rope, plus all the required safety equipment for rappelling and knowledge how to use it. This guide is not intended to provide instruction on how to descend a technical canyon safely.
Trail Description
Long Canyon Trail no. 63
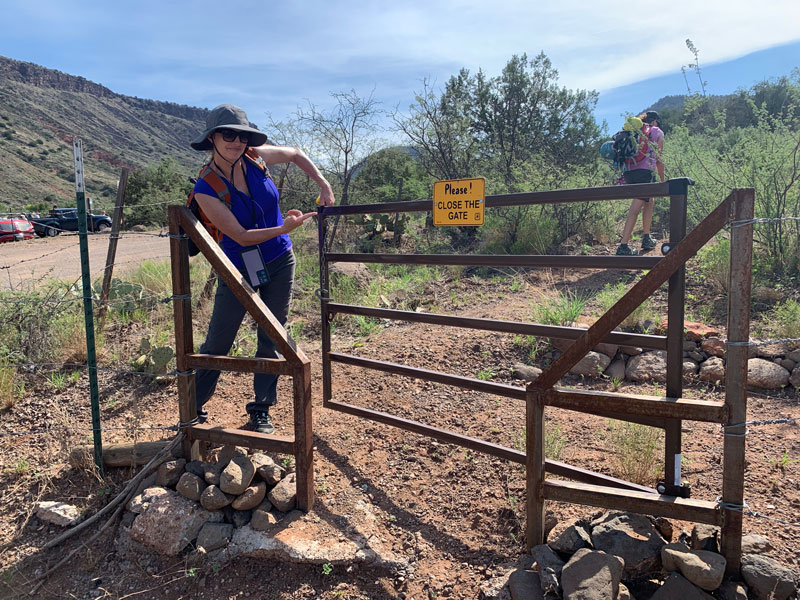
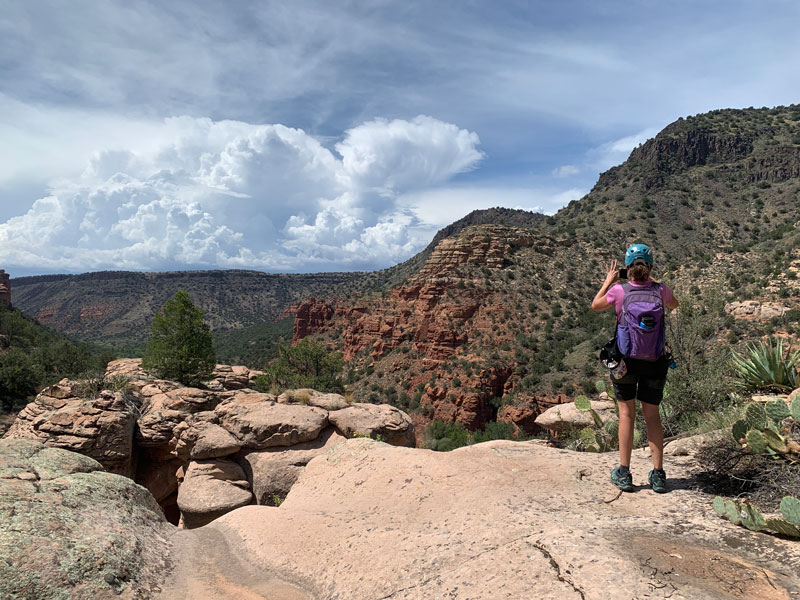
From the parking area, you’ll head across the dirt road and to the right a little bit to pick up Long Canyon Trail, heading in a southeasterly direction. The GPX file we were using was a little confusing to us, so look for this gate to know you’re in the right place.
If you’re doing this in summer like we did, prepare for some suffering. It was hot and humid this August 3 morning, and that made the journey up to the top a little brutal. There were a few shady spots to catch our breath.
But the scenery is. . . bleh. If I wasn’t headed for some canyoneering, I don’t have any idea why I would ever hike this trail. Some reviews said this trail is true to its name (“long”), but the time passed quickly enough for me, and soon we were at Long Tank and turning left (northwest) to drop into the canyon.
Leave It to Beaver Canyon Drop In
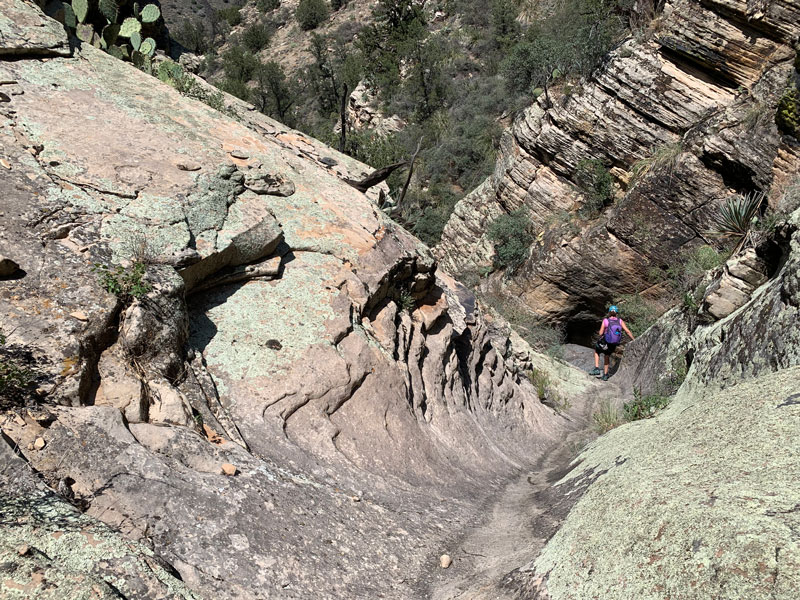
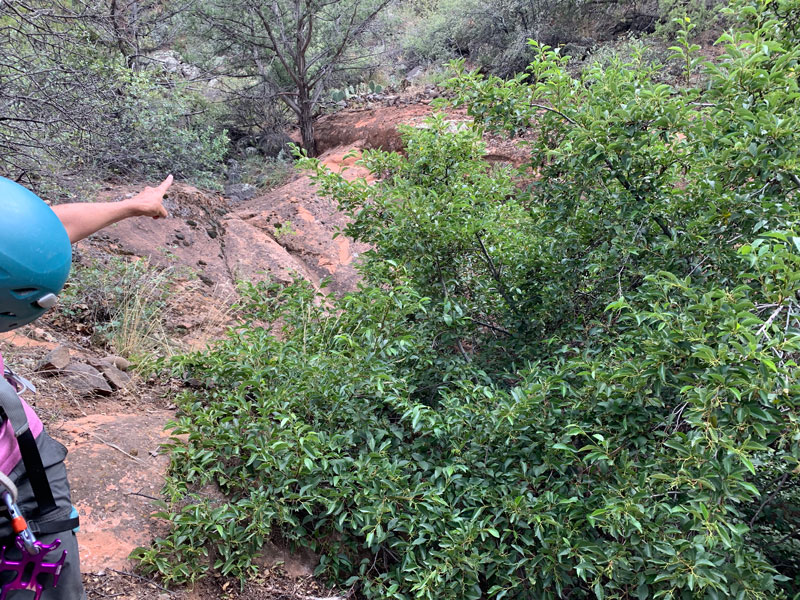
Once in the canyon, you’ll have some rocks, fallen logs, and bushes to negotiate, but the going isn’t too difficult. By this I mean I’ve had worse (see Rhyodacite Canyon). You’ll be hiking for quite a while before you see any rappels.
Technical Section
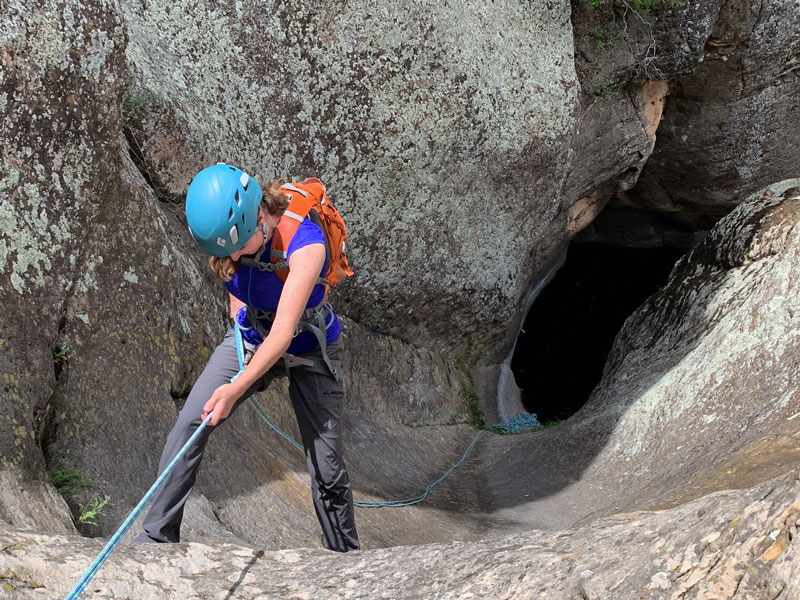
Rappel 1
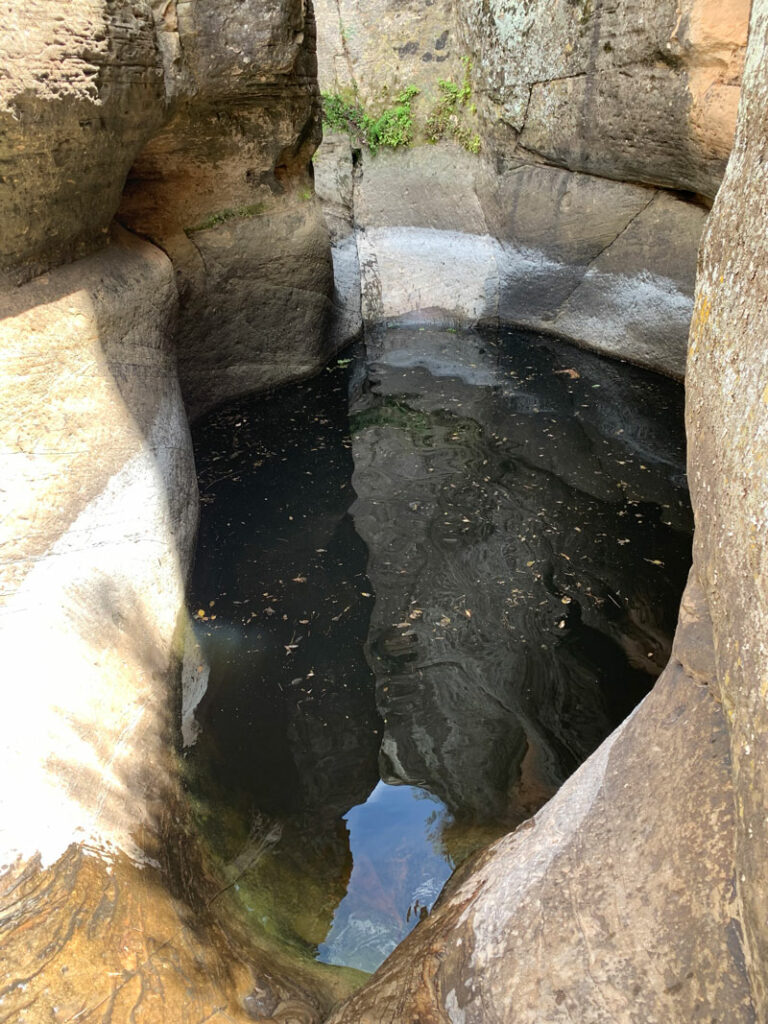
This is about 30 feet off a rock pinch down a chute into a dirt-filled pothole. Because Rappel 2 is right after and only about 40 feet more, I thought we could stay on rope and go all the way down. However, there is a swimmer at the bottom of rappel 2, so you’d have to go around the corner to stand, and that could make for a difficult pull.
Rappel 2
That tree you see on the left side of the above picture is the anchor for rappel 2, which is 40 feet down another chute into a swimmer.
One of us needed help climbing out of the pothole, but it’s not too difficult if you give it a strong kick.
After those two rappels, you’ll travel down the drainage for a while, doing some easy downclimbs here and there. Or if you’re like Heather, you’ll opt for the brushiest, most cactusy way around them.
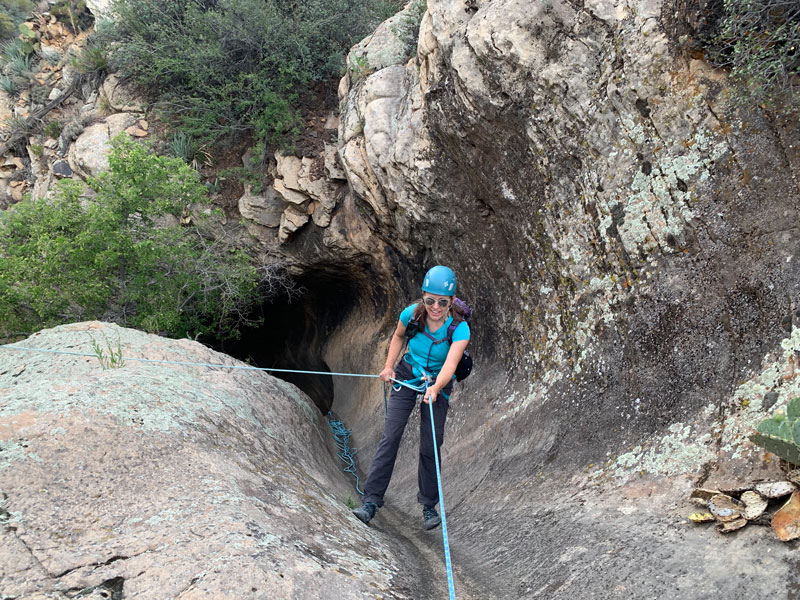
Rappel 3
This is a 30-foot rappel off a rock pinch, and the water at the bottom can generally be avoided if you have skillz and the canyon isn’t too full of water.
Rappel 4
Immediately following rappel 3, rappel 4 is about 25 feet off a small tree.
After rappel 4, you’ll again be walking through the drainage for a while, which is mostly blah but has a couple semi-interesting spots.
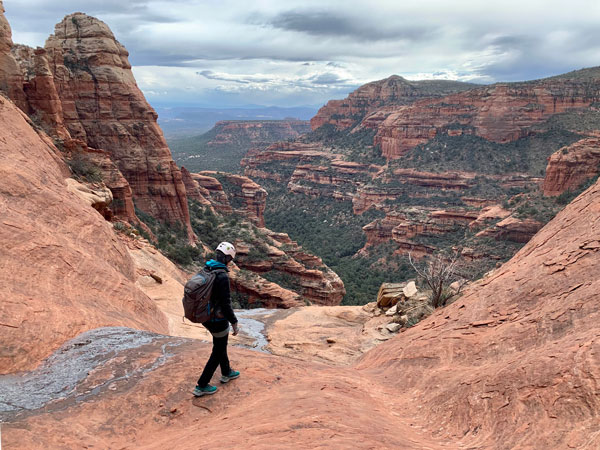
You’ll know you’re at rappel 5 when you find yourself on this cool precipice with views of Wet Beaver Creek below. You might even see hikers on Bell Trail across the canyon from you.
Rappel 5
This one is 40-50 feet off a tree. You might be tempted to get off rope when you first touch down, but I think it’s best to stay on until you get down to the pothole. A careful maneuver will allow you to avoid the water.
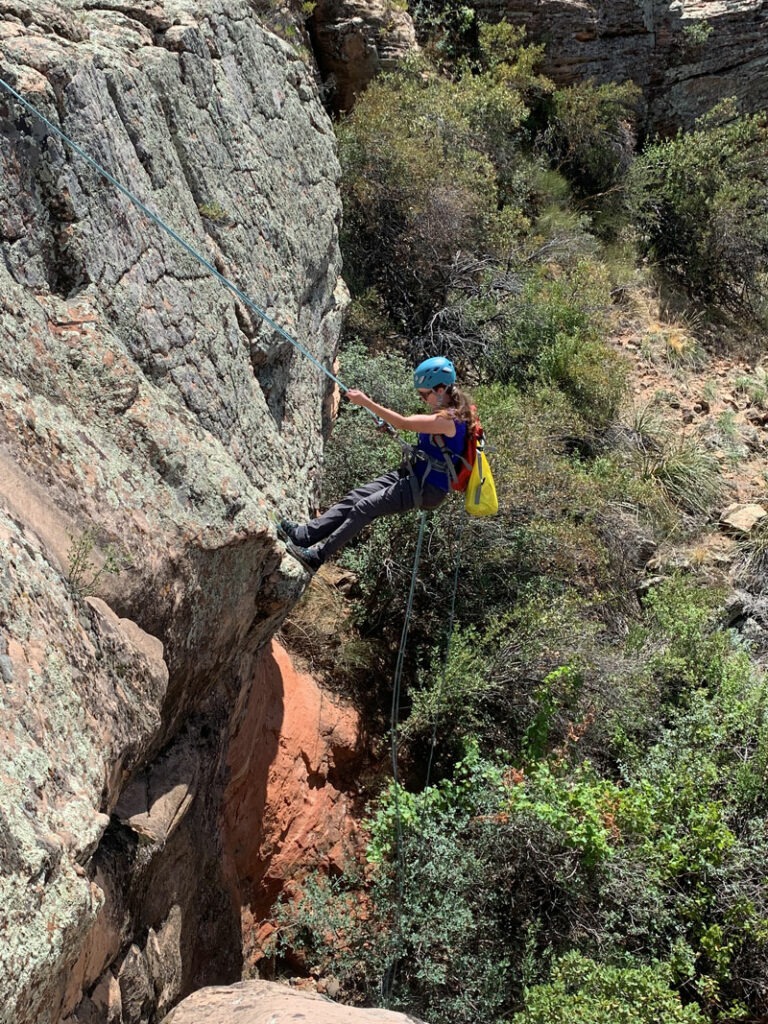
Rappel 6
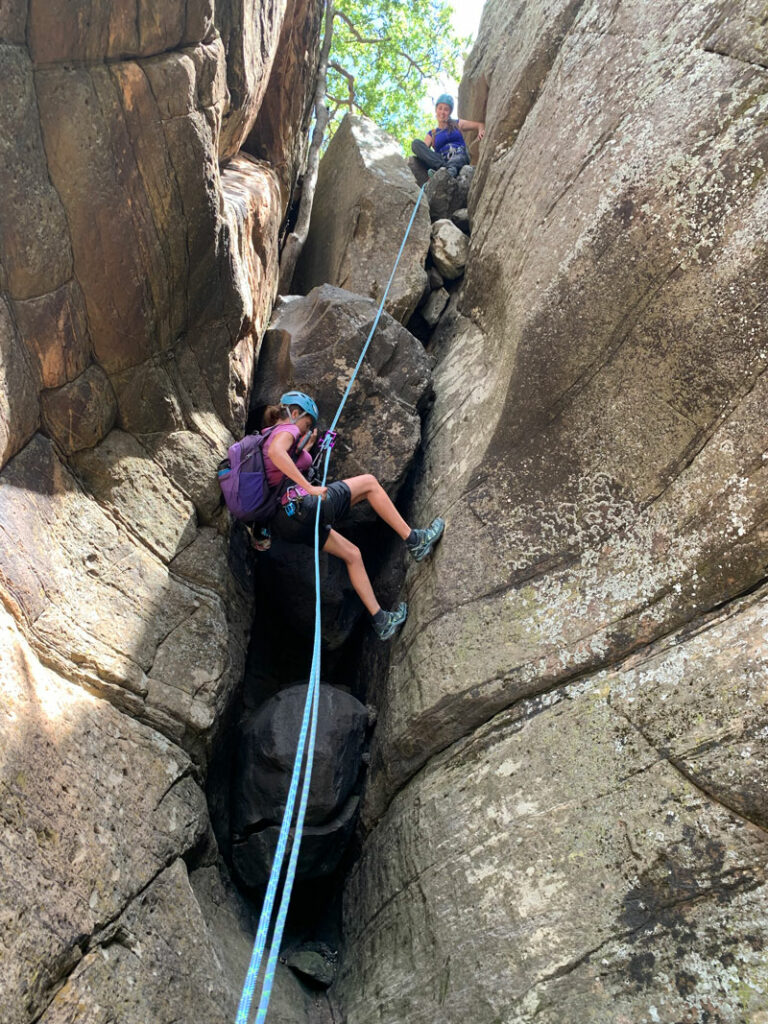
Look to the right at the bottom of rappel 5 to find the anchor for rappel 6 on a small tree. The drop is almost 100 feet, and it’s not straight down, so take care to keep the rope from sticking on anything. Avoid getting wet by making your way around the right side of the pothole.
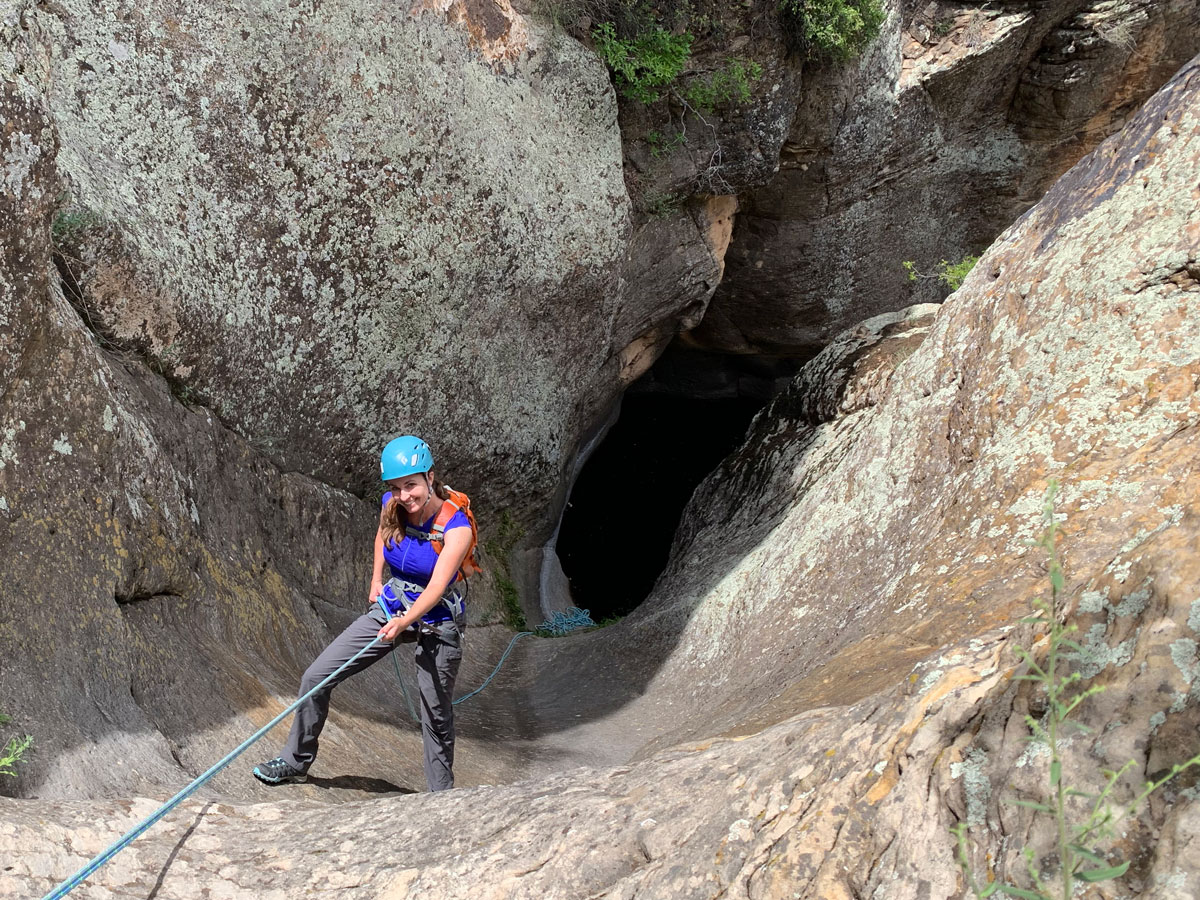
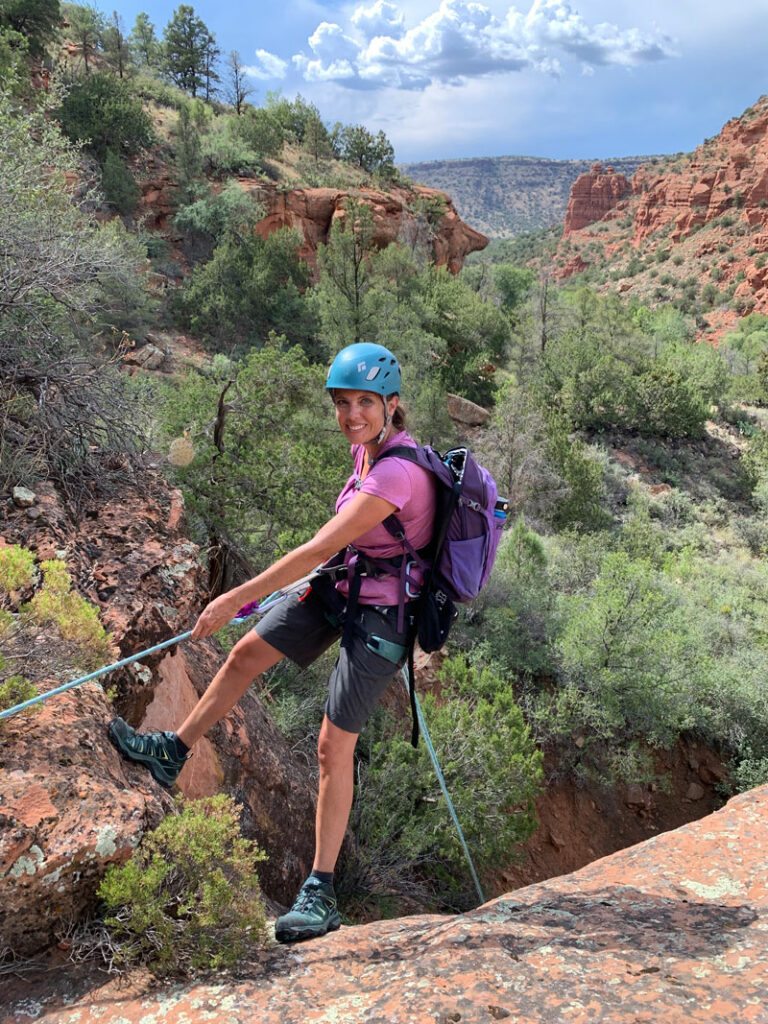
Rappel 7
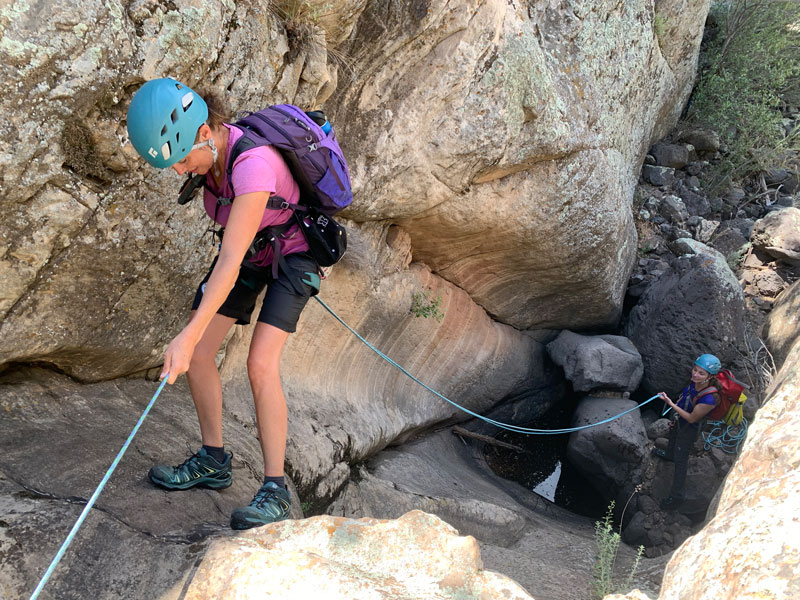
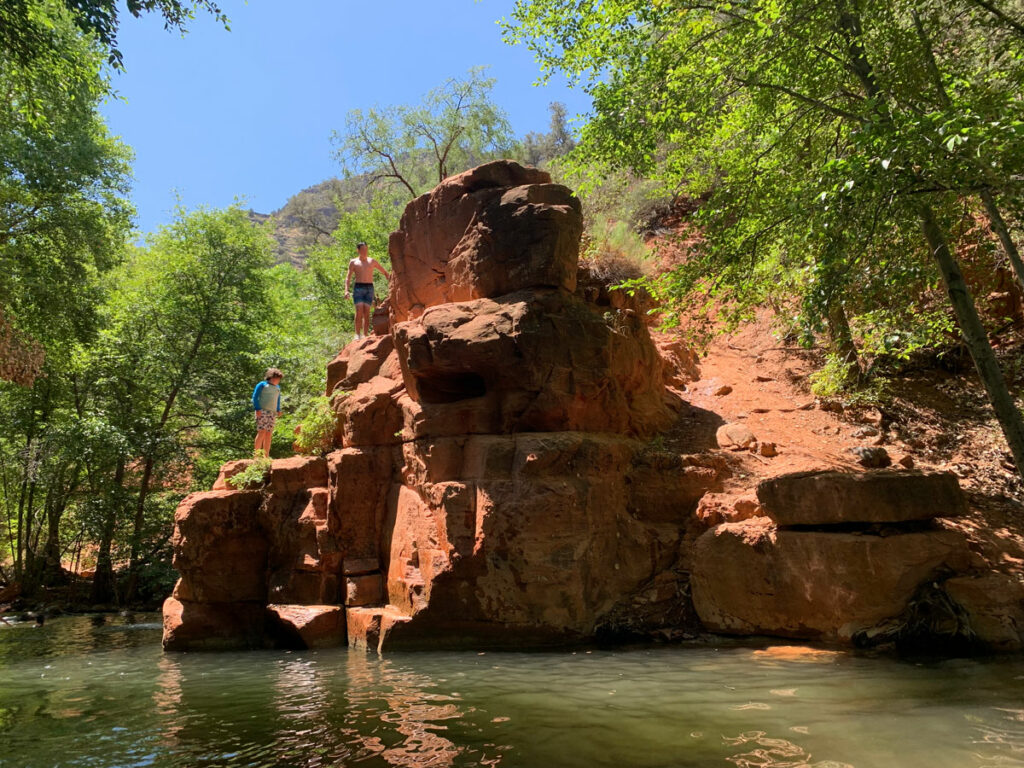
Another 30 foot rappel from a boulder. It’s not a very interesting rappel, but it’s the best photo op of the canyon!
Once you’re down to the bottom of this sequence, it feels like you’re just moments away from a refreshing swim in the creek.
How can there be another rappel?
The Deceptive Tree
Well, Heather learned the answer to this question the hard way. She was making her way down a slope toward a tree when she suddenly realized there was a huge drop-off below that was concealed by the leaves. By then, she was in a precarious position that we had to help her out of.
Heather: 1, Reaper: 0
PSA When you see this tree, head to the right to the anchor for the next rappel, which is just out of sight over the small ridge.
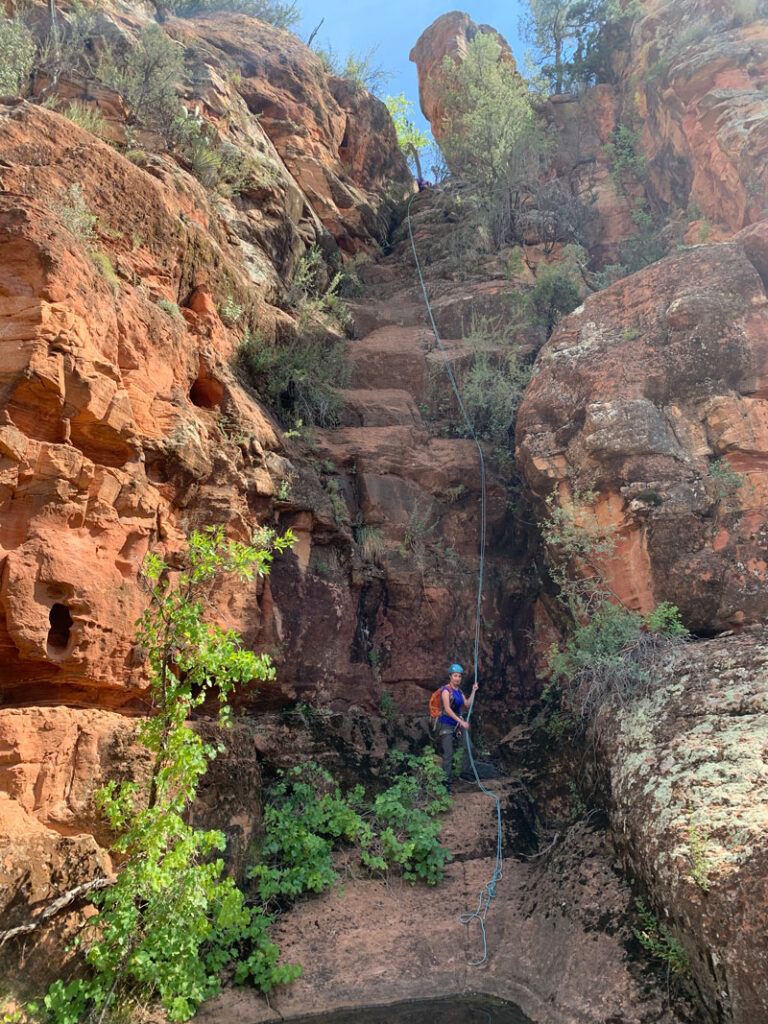
Rappel 8
This rappel is about 35 feet off a tree. It’s really cool looking, but also really dangerous for a fireman belay due to loose rock. Everyone should be prepared to self-belay.
Once at the bottom, you’ve finished the technical section of Leave It to Beaver Canyon and are just steps away from a refreshing dunk in Wet Beaver Creek. You have to cross here to get to the trail back, so I hope you’re ready to get wet.
It was August, so we were more than ready.
Weir Trail
The GPX track we were following shows you how to get to Weir Trail, but I think it was off a little because it showed the trail 80 feet ahead, but we were blocked by a sandstone wall. My suspicion is if you turn left and start walking, you’ll pick up the trail, which eventually merges with Bell Trail.
Getting to the Crack
But I wasn’t ready to go back. The Crack is just half a mile up the creek from Leave It to Beaver Canyon, and I had my sweaty little heart set on it. So we turned right and eventually met up with a lightly used trail. Perhaps it was Weir Trail, but I don’t know because it wasn’t marked on my topographical map.
We looked for any way to get up to Bell Trail along the way, but it was impossibly far above us, and the topography was not in our favor.
Eventually, we got to a drainage where the trail was washed out, which forced us to downclimb toward the creek. We thought we would have to swim to make more progress, but Heather found a way to avoid it. It was self-preservation since she thought she’d drown if she had to swim with the pack on.
Heather: 2, Reaper: 0
Once past that spot, the trail was easy to follow for another 0.2 miles to intersect with Bell Trail. Woohoo! Can you feel it?
Ryan, Red Hair, Born on St. Patrick’s Day
And there he was, an ordinary guy with a big hat and umbrella heading back from “the Crack.” But he looked like an angel to Heather because he also had A COOLER! She had used more water than she expected, and he graciously shared what he had.
Heather: 3, Reaper: 0
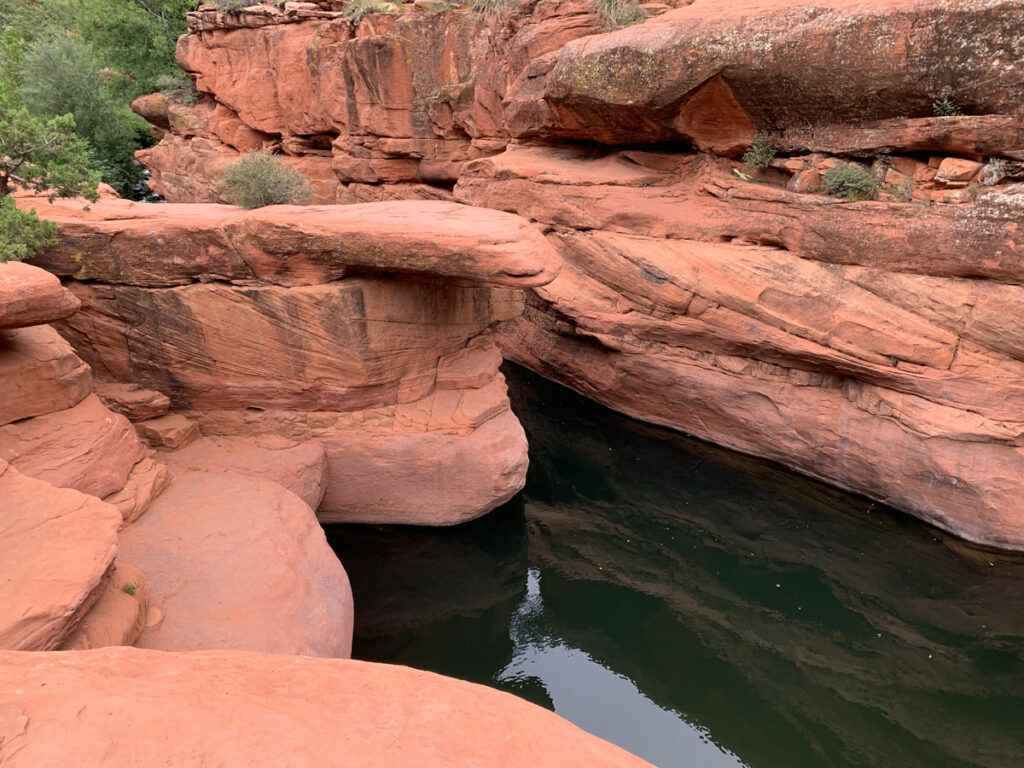
The Crack
By the time you hit Bell Trail, you’re just moments away from the Crack. If you happen to arrive at 5pm like we did, you just might have it all to yourself.
And that would be absolutely AWESOME.

Bell Trail no. 13
Once you’ve had your fill of cliff jumping, head back on Bell Trail. It’s well-used, so you won’t have any trouble navigating here. And it’s got some cool spots of its own.
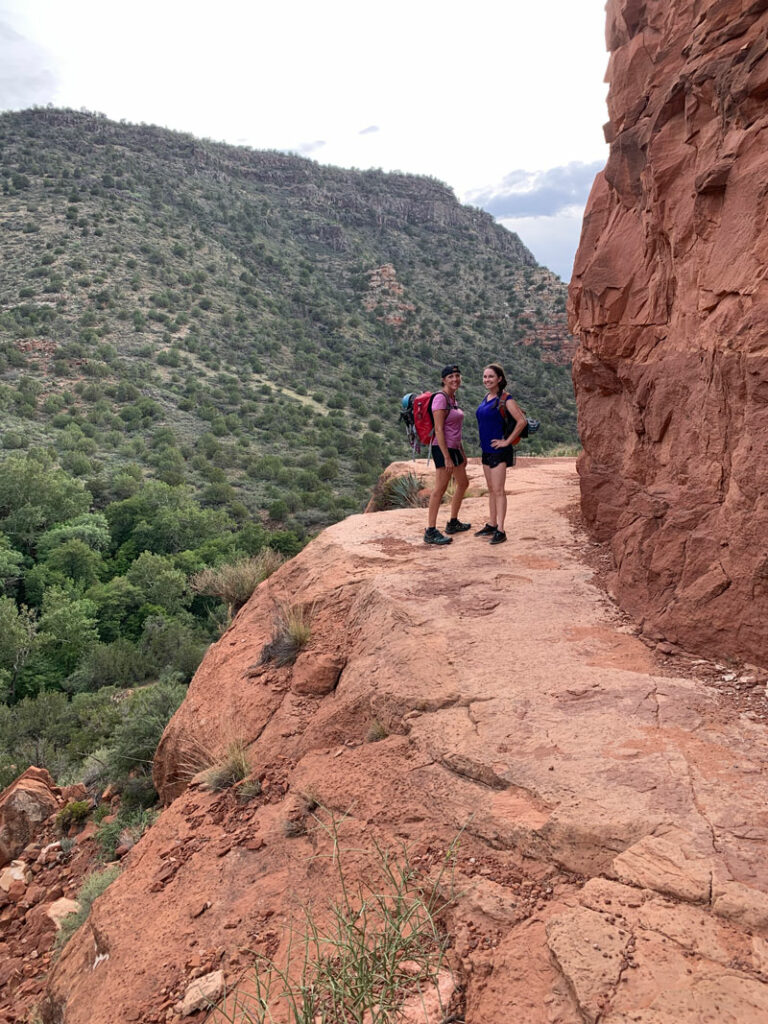
Be sure to look to your left to see Leave It to Beaver Canyon from the other side!
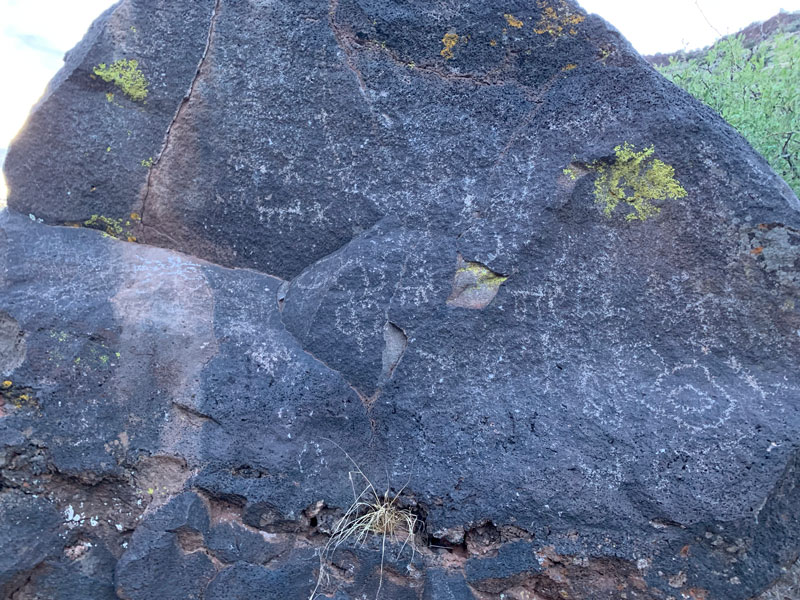
Sinagua Petroglyphs
This area is known for having many sites with petroglyphs left by the Sinagua people. Almost a mile after the intersection with White Mesa Trail, you’ll see this large, obvious boulder covered in petroglyphs on the right side of the trail. You can find other petroglyphs in the area by exploring the Sinagua Circle.
Just after passing the intersection with Bruce Brocket Trail that leads to the Crack overflow parking, start looking for a trail that heads down toward the creek. I’m not saying our choice was the right choice, but it worked well enough. We passed through thick ivy, crossed the creek, and then picked up a trail on the other side back to the parking.
Under the moonlight.
Map & Directions
Location Wet Beaver Wilderness, Coconino National Forest, Camp Verde, Arizona
Head north on I-17 past Camp Verde. When you see the sign for Highway 179 to Village of Oak Creek, exit and turn right onto Forest Road 618, which is paved. Shortly after crossing Wet Beaver Creek, turn left onto Forest Road 618H, which is dirt. There should be a sign there pointing toward the academy. The parking will be on the left just before the gate that blocks the road into private property.
Fees/Passes None
Trailhead Facilities Restrooms are available at the Bell Trailhead, which is just before the turn for the Long Canyon Trailhead. Google it, baby!
Preview this Hike
Recommendations for you
Bull Pen Swimming Hole | West Clear Creek
Grizzly Canyon | Sedona
The Crack | Wet Beaver Wilderness
Leave a Reply